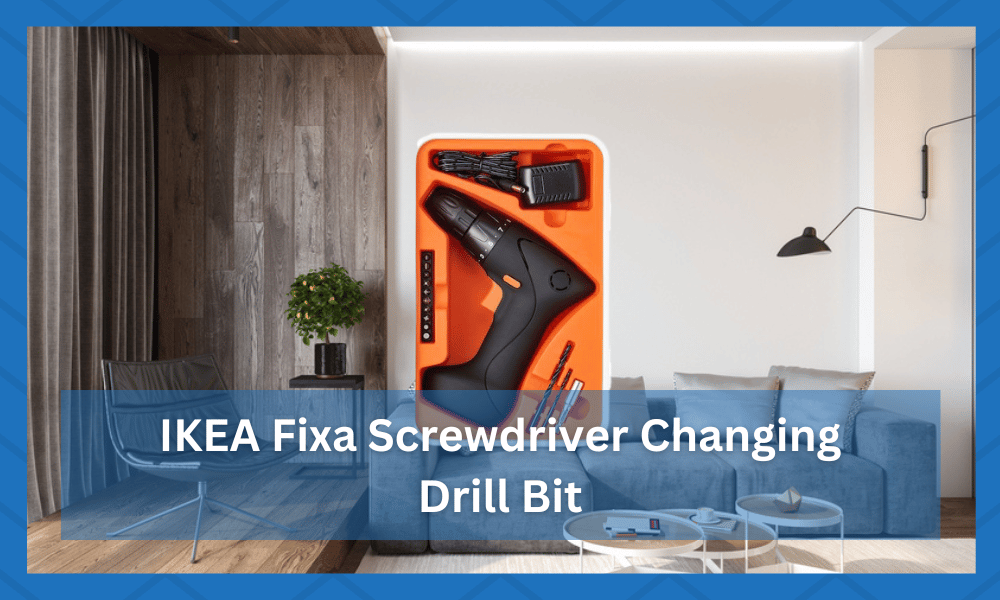
The Ikea Fixa Screwdriver drill is an affordable and handy piece of equipment that not only complements the other essential tools at your home but also helps you build a starter kit for your next grand project.
With this screwdriver drill, you can drill into the wall to hand wall photos around and also use it to assemble your DIY furniture.
Fixa Screwdriver drill is cordless, battery-powered, rechargeable, comes with a charger, and has various attachments. Everything comes in a box to keep all the things together and secure.
The small drill bit is a complete package that one can have at home and do all the DIY projects without significant help.
The Fixa screwdriver drill kit comes with a 1-bit holder, 10 screwdriver bits, and ⅛” and 13/64″ drill bits.
You can change them according to your requirements and the project you are using, the fix a screwdriver kit. Depending on each size, you can decide how wide and deep holes you need and select the drill bit accordingly.
However, some people may find changing the drill bit hard. It usually happens when you use the fix screwdriver drill for the first time or have yet to read the user manual in detail.
Are you also someone who is having trouble changing the drill bit on your IKEA FIXA screwdriver?
This can be frustrating, but it doesn’t have to be. We will help simplify the process of changing the drill bit on your screwdriver step-by-step.
IKEA FIXA Screwdriver Changing Drill Bit
Changing the drill bit on the IKEA FIXA screwdriver bit is relatively easy compared to the traditional style drills that require a separate tool that comes with it to loosen the attached drill bit and replace it with another.
The contemporary FIXA drill comprises the latest battery-powered cordless design that doesn’t require special tools for changing the drill bits.
It can be done quickly and conveniently by hand if you have the drill bit you want to attach.
Follow the steps to change your IKEA FIXA screwdriver drill bit to suit your purpose!
- Check the Motor
Before you change the drill bit according to your work, be that drilling in the desk, bed, or wall, you should know if your drill motor is functioning correctly. Changing the drill bit will only benefit you if the motor is functional.
Begin with checking the motor. Is it functioning? If not, then you will need to replace the brushless motor.
You can replace it with any reliable hardware shop near your residence or claim the warranty from Ikea if your equipment is still within the warranty window and its motor has stopped working.
Nevertheless, if your FIXA screwdriver drill motor is defective, there is precisely no use in changing the bit and moving any further with the steps.
If your motor is functional, continue with the next step.
- Remove the Battery
If the motor is running, then proceed to remove the battery. This step is taken for safety measures as the torque and speed of the FIXA screwdriver drill are efficient and exorbitant.
Accidently if you turn on the power while changing the drill bit, you can cause harm and severe injuries to yourself.
The FIXA screwdriver drill’s battery is on the back of the drill. The lid over the battery pack is screwed to secure the battery in the drill.
To remove the battery, use a screwdriver to unscrew the 7 screws on the FIXA drill casing. Once you have done it, open the two sides and remove the battery carefully.
Keep the battery aside, as you’d have to insert it back after changing the drill bit.
You can also change the drill bit without removing the battery if you are short of time. However, if you’re doing so, be careful not to accidentally turn on the power button.
Although this is not recommended but can be done with caution to avoid any serious injuries, unscrew the chuck from the front of the drill.
- Locate the Chuck Screw
The next step following the battery removal is locating the chuck screw. This is a small screw that is on the side of the chuck.
A chuck is a clamp specialized to hold a drill or screwdriver bit (a cylindrical object with radial symmetry).
Especially in a drill, a chuck is a part that firmly holds the rotating screw or drill bit in its said place. Now that you know the chuck of your screwdriver drill, you can move to the next step to change the drill bit successfully.
- Loosen or Remove the Chuck Screw
You can use a full grip by the palm of your hand to rotate the chuck anticlockwise to loosen it up. If doing it with hand seems hard, use a small Allen wrench to loosen this chuck.
Once it is loose, you should be able to remove the old drill bit and insert the new one with ease.
The chuck may be too hard to loosen if you haven’t used the screwdriver drill for quite a long time and you are trying to change the drill bit after quite a while.
It may also be due to the debris or the wood shaving stuck in the chuck that may cause the loosening difficult for you.
If the chuck screw is too tight or you cannot loosen it, you’ll have to remove it altogether. To remove the chuck screw, use a pair of needle-nose pliers. Once you have removed the chuck screw, change the drill bit.
- Open the Chuck Jaws
Open the chuck jaws if you still have trouble changing the drill bit. Begin with loosening the chuck screw with the Allen wrench. Once the chuck jaws are open, you should easily insert the new drill bit in its place.
It’s recommended not to try hard as it may damage the chuck of the FIXA screwdriver drill, and you won’t be able to finish the task you are at.
- Remove The Old Drill Bit
Once you have loosened and opened the jaws of the chuck screw, you can then remove the older drill bit. Keep the drill bit back into its case to keep it safe, as you may need it later for the other project.
Once you have removed the drill bit, you can attach the one you want to work with.
However, if you damaged the chuck while loosening or opening its jaws, you’d need to replace it before you change the drill bit.

- Insert the New Drill Bit
Now that the chuck jaws are open, the chuck is loosened, and the old drill bit is removed, you can insert the new drill bit. Be sure to insert it into the jaws so it is secure.
Once the drill bit is in place, you can close the chuck jaws and tighten the chuck screw.
Use the needle-nose pliers to screw it back in place. Be sure not to overtighten it, as this can cause damage to the drill.
- Change the Drill Bit
Now change the drill bit. If you’re struggling with removing the old drill bit, try using a pair of needle-nose pliers. When the old drill bit is out, insert the new one and screw it in tightly until you feel it’s locked in place.
- Close the Chuck Jaws and Tighten the Chuck Screw
Once the new drill bit is in place, close the chuck jaws and tighten the chuck back to its original position.
Similarly to how you unscrewed and loosened it, you can use your palm or your hand to rotate it clockwise until it is locked in its initial position. Don’t overtighten the chuck, as this can damage the drill.
- Reassemble the Screwdriver
Now you can reassemble the screwdriver. First, insert the battery you had removed back into its place. Attach the battery to its connections and cover it up with its casing.
Keep the two sides of the FIXA screwdriver drill together and screw them up. Now that you have changed the drill bit, tightened the chuck back into its lace, and inserted the battery or replaced it, you should be good to go!
You should now have a new drill bit in place and be able to use your IKEA FIXA screwdriver easily.
What Not To Do While Changing The Drill Bit
- Don’t overtighten the chuck screw, as this can damage the drill.
- Don’t use a power drill to remove or insert the new drill bit, as this can also damage the drill.
- If you are having trouble removing the old drill bit, don’t use excessive force
- Change the drill bit precisely and carefully
The Bottom Line
If you follow those mentioned above quick and easy steps for changing the IKEA FIXA Screwdriver Drill Bit, you can attach the new drill bit to your screwdriver instantly and resume your DIY project!
