How To Tuft an IKEA Sofa
IKEA is known for its inexpensive, put it together yourself furniture. When it comes to making it a little more stylish, sometimes a little IKEA hack is needed. Tufting, which means adding cloth-covered buttons to a sofa cushion, is one of the hacks.
There are a couple of ways to go about doing this project. One is sort of “seat of the pant,” in which you buy each part of the materials separately. That’s great if you thoroughly educate yourself first or already know how to do it.
The second option works better for beginners. There are companies that sell kits specifically designed to tuft IKEA furniture. You can upgrade the cover material at the same time if that is desired. The kits come with everything you need to do the project.
The items needed for this project are pins or chalk, upholstery needles, upholstery twine, tape measure, and buttons. Some people prefer to use quilting pins to mark where the buttons are going to go and others prefer to use chalk.
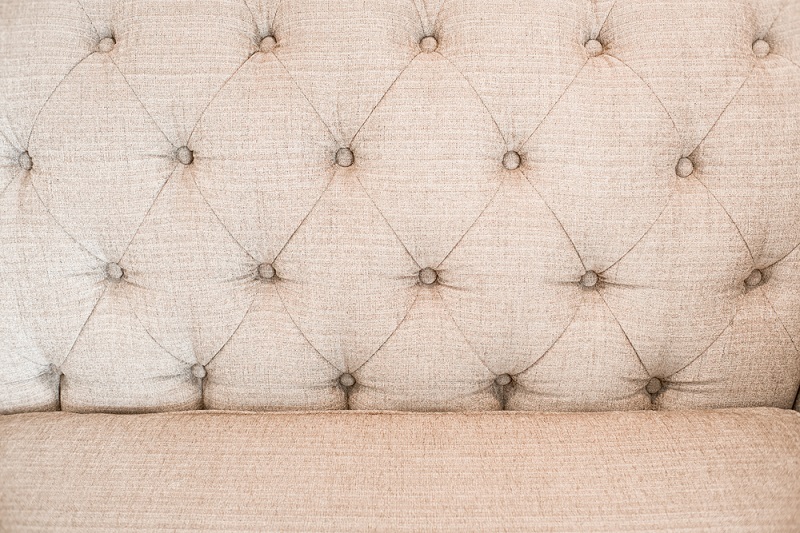
The next step is to decide the design you want for your tufts. Most of the folks who posted about doing this project chose two parallel lines across the cushions. The starting point was approximately four inches down from the top and four inches from the sides. The second row was four inches from the bottom.
It may be a good idea to use a regular ruler to make sure the lines are straight. It can be a little off-putting to have one button just slightly above the row. Once everything is marked, it’s time to get started.
Tufting requires two buttons, one on each side, for every button marked. You’ll want twenty inches of twine for each pair of buttons. Cutting them in advance is a big help; it will make the project go faster. Once that is done, thread a button onto the twine and slide it halfway down.
After that, you’ll need the upholstery needle. Thread both ends of the twine through the eye and you’re ready to start sewing it to the cushion. Run the needle through the marked place on the front of the cushion. Use your free hand to feel where the point is on the backside, otherwise, there will be unnecessary holes in the fabric or leather.
Once the needle is through, pull it taut and it’s time to add the second button. For this, only put one piece of the thread through the button. Make a slip knot to pull the button tight. Once this is done, run the twine around the button twice to make sure it stays put.
Thread the twine through the slip knot and adjust how tight you want the tuft to be. Don’t cut the threads just yet. You’ll want to do the whole cushion so that adjustments can be made if needed. When it is done, you can snip the twine to about a quarter of an inch in length. Tuck the cut ends under the buttons.
Related Video:
