Workshop Outlet Quantity Calculator
Estimate outlet locations from wall runs, bench zones, tool counts, dedicated 120V and 240V machines, dust collector or compressor loads, and ceiling drops.
Choose a starting layout, then adjust the measurements and tool counts to match the room.
Planning breakdown
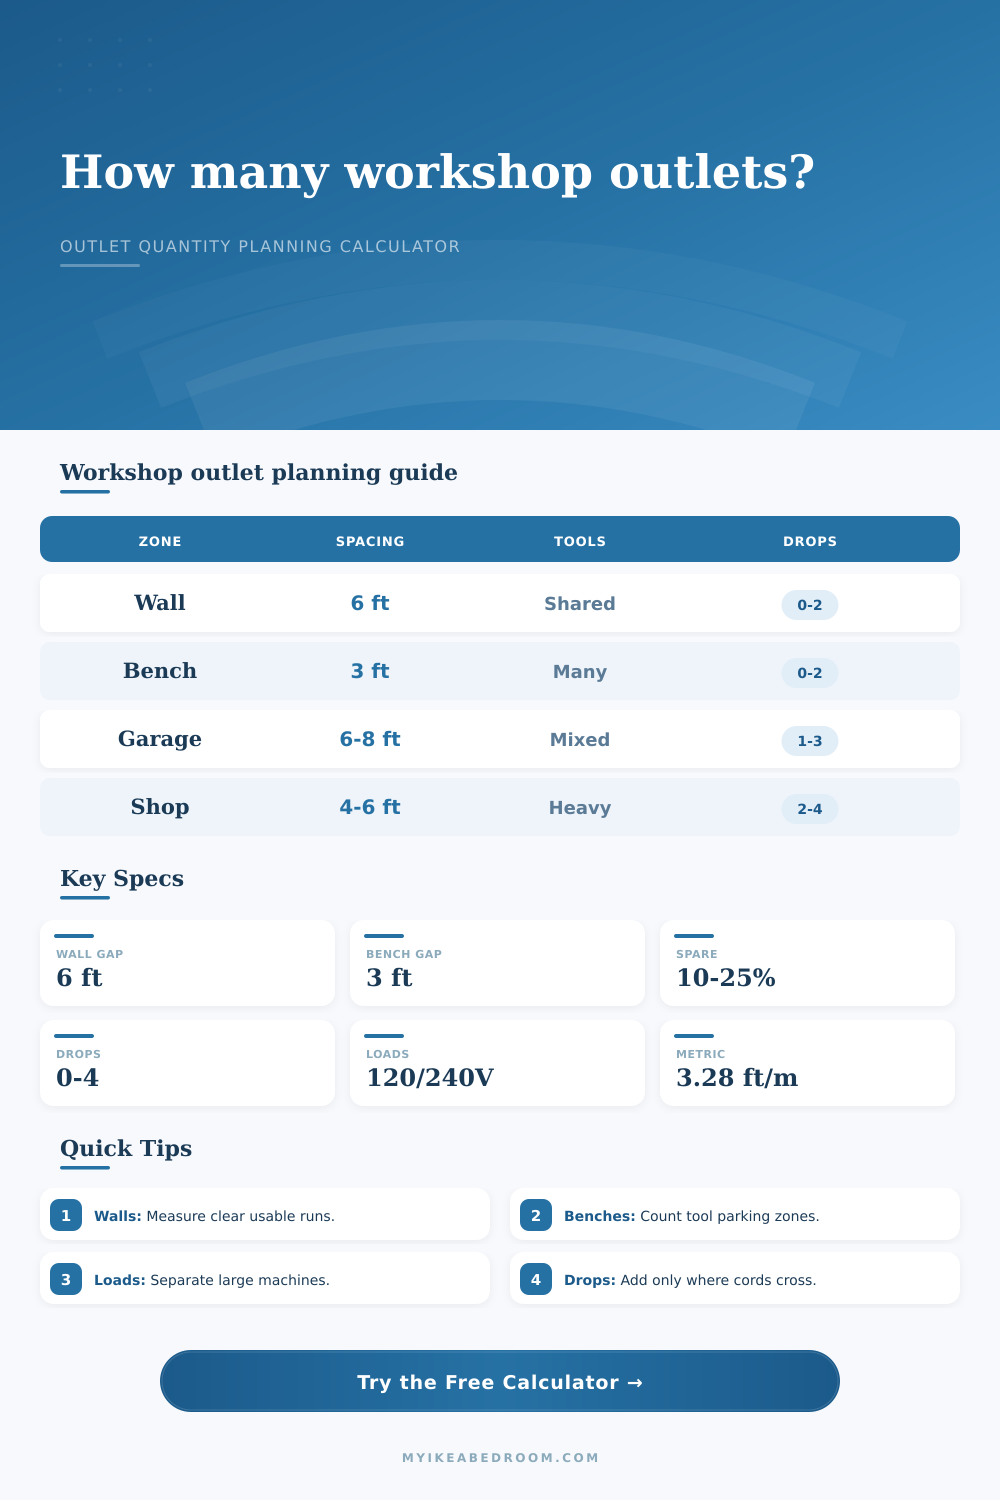
| Planning zone | Typical interval | Quantity method | Best use |
|---|---|---|---|
| Clear wall run | 6 ft to 8 ft | Usable wall length divided by spacing | General access along open walls |
| Workbench face | 2 ft to 4 ft | Bench length divided by bench spacing | Chargers, task lights, sanders, small tools |
| Machine wall | Per machine | One planned point per stationary tool | Table saw, jointer, welder, lathe, collector |
| Ceiling access | Per bay | Count drops where floor cords would cross paths | Assembly table, vehicle bay, center island |
| Tool group | Voltage plan | Calculator treatment | Logistics note |
|---|---|---|---|
| Portable hand tools | 120V shared | Converted by shared-use factor | Not every tool needs a permanent outlet at once |
| Stationary benchtop tools | 120V dedicated spot | Added one-for-one as planned locations | Keep parked tools from occupying all bench outlets |
| Large machines | 240V if selected | Added as separate 240V locations | Good for layout quantity only, not circuit design |
| Collector or compressor | 120V or 240V | Added when voltage is selected and amps are entered | Place near the machine zone it serves |
| Scenario | Typical size | Outlet emphasis | Ceiling drops |
|---|---|---|---|
| Compact craft bench | 10 ft x 12 ft | Bench outlets and chargers | 0 to 1 |
| Single-car hobby shop | 12 ft x 20 ft | Balanced walls and bench | 1 to 2 |
| Two-car garage shop | 20 ft x 22 ft | Walls, bench, and machine spots | 2 to 3 |
| Cabinet shop layout | 24 ft x 30 ft | Dense bench plus dedicated machines | 3 to 4 |
| Item | Count trigger | Calculator input | Planning purpose |
|---|---|---|---|
| Center assembly table | One island or mobile table | 1 ceiling drop | Reduces cord crossing in the center zone |
| Vehicle or repair bay | One open bay | 1 to 2 ceiling drops | Keeps chargers and task lighting reachable |
| Future bench extension | Likely layout growth | 10% to 25% spare | Allows new tools without recounting the whole room |
| Storage-heavy wall | Cabinets block access | Blocked wall run | Prevents hidden outlets from inflating the useful count |
Poor electrical planning is frustrating for workshop owners. You’re working on your project: welding a frame or sanding a table. Then you hit a wall. The next plug is too far away. The outlet is behind the tool, or the cord is simply too short. Now you have to run an extension cord around shop floor and trip all over it.
That’s what happens when we make electrical plans in the abstract. Yeah, you think that you’ll need a couple outlets for the machine and maybe another one for bench. Then you purchase a welder, or a dust collector. Next thing you know, the circuit are overloaded and now the floor is dangerous.
How to Plan Your Workshop Electricity
If you plan out how many outlets before you start running conduit or cut holes in drywall, then you never get into this situation. It turns your guessing game into a good layout strategy. After entering the number of tools you plan to mount and length of the walls, the calculator do all the math. No need to stand in an empty garage trying to mentally divide room perimeters.
The initial task is to determine actual length of your usable wall run. Typically this would be the perimeter of the entire room. However most workshops arent a nice clean rectangle. There are tool chests, storage cabinets, doors, and maybe a water heater or furnace. Take away what’s blocked off. An outlet within the garage door opening is bad news and one obscured by a tall tool cabinet wont do much good either. Give it the blocked lengths so it knows to exclude those. That will result in a count of locations that are actualy reachable.
Why does that matter? You are paying for labor, the box, and the wire. Don’t want to pay for an outlet where there’s just a stack of lumber.
One area where most hobby shops drop the ball is in bench spacing. For a living room, it makes sense to have general wall outlets spaced every six feet. But for a workbench? Not so much. Because you’ll be mounting task lights, chargers, and multiple small tools, you need power every three to four feet. Having outlets at that frequency prevents a web of cords. And the calculator lets you specify a tighter interval just for your bench zone, which shows how you actualy get things done.
It also factors in portable tools. I’m guessing you own a saw, a grinder, a drill, a sander. But you don’t use all of those at once. So you don’t need one dedicated outlet for each tool. But you do want enough shared capacity so that stranding one tool wont strand the next. That’s what the shared-use factor helps figure out. It adds an extra location or two, but doesn’t overbuild, so you’ve got some flex without spending any more then you need on unused boxes.
That all changes when it comes to heavy machinery. Large dust collectors, jointers, and table saws may be 240-volt machines that needs their own circuits. They can’t ride along with your space heater and phone charger. That’s where the dedicated spots come into play. The tool distinguishes them from your general 120-volt areas. Not only is this safe but also code compliant. You won’t mistake your heavy machine load for simply another plug on a shared circuit.
If you have a bigger space, you may also need ceiling drops. Running cord up to the wall works fine unless you’re working dead-center in the shop. Tripping hazards abound. With a cord reel or ceiling drop, the floor stay clear. Again, no hard-and-fast rules here; use the calculator to add places based off how you move around the shop.
A plan for future growth. You will buy tools that change. Your project grows. Planning some extra capacity today is less expensive than cutting holes in walls in the future. This allows you to move from reacting when you need something to planning how your shop will work. When you eventually purchase that new compressor or lathe, you’ll have somewhere sensible to put it.
The point isn’t to be able to plug-in anywhere, but to be able to plug-in anywhere that makes sense. You can do it without having to fuss with a cord. With this kind of planning you’ll end up spending less time wrangling extension cords and more time creating stuff. And THAT’s what having a well thought out layout gives you.
One outlet at a time, it transforms your messy garage into an actual workshop.