IKEA-style home workshop planner
Wood Tabletop Plank Quantity Calculator
Estimate board rows, board count, cut length, waste allowance, glue seams, clamp spacing, and final panel width before you start a desktop, dining top, counter, or shelf-style tabletop.
Tabletop Plank Estimate
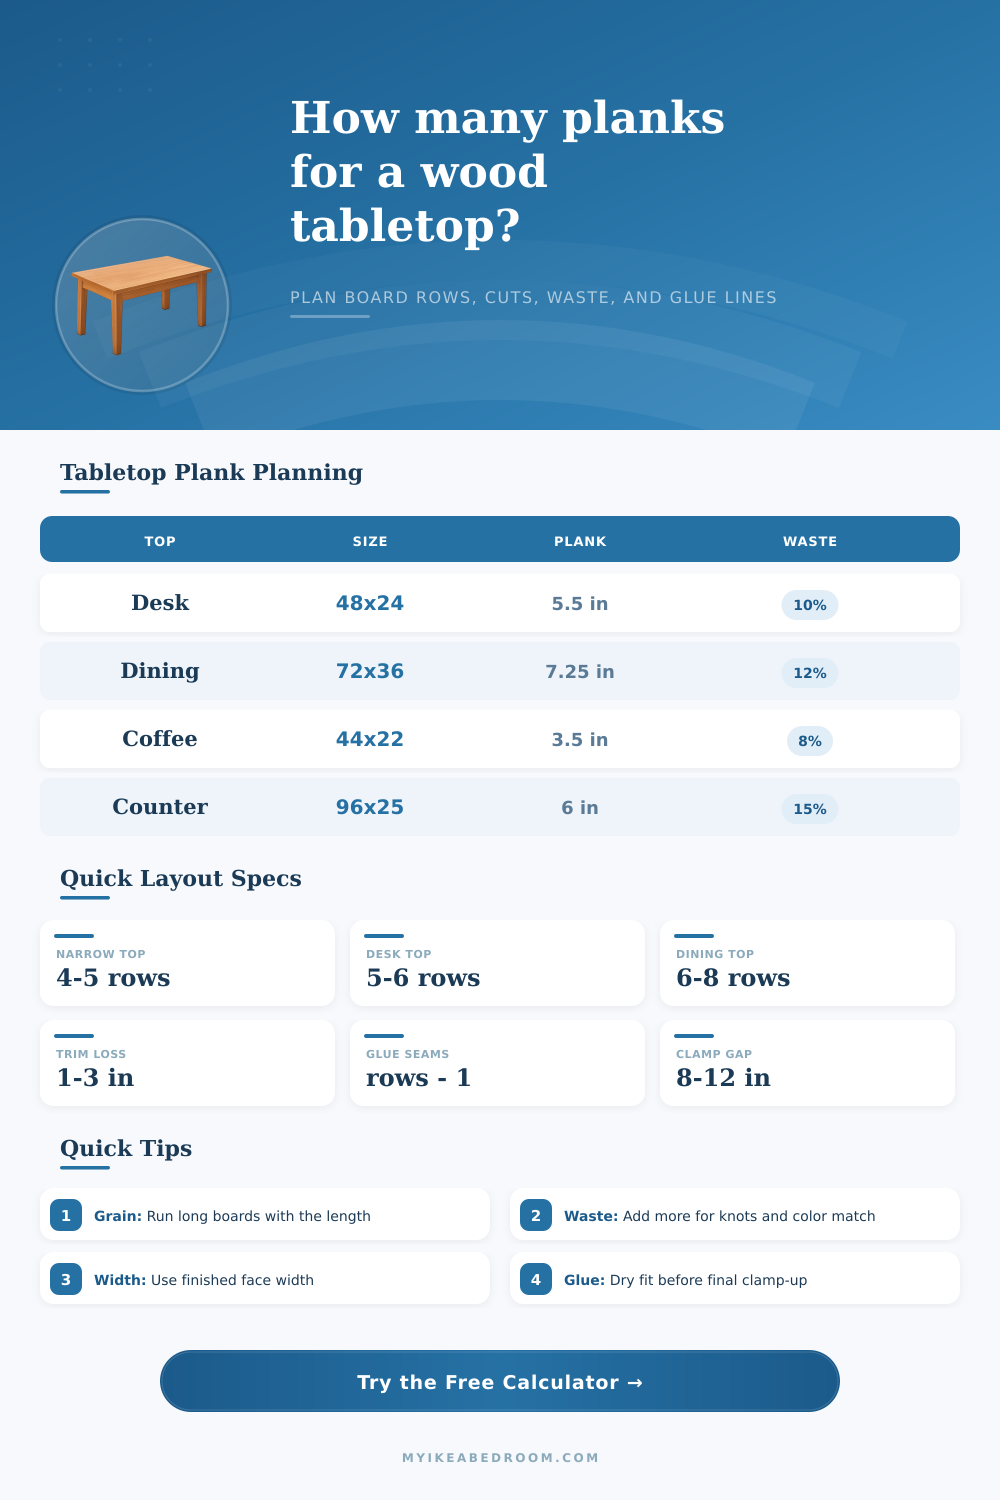
| Actual plank face | Rows for 24 in | Rows for 30 in | Rows for 36 in |
|---|---|---|---|
| 3.5 in narrow strip | 7 rows | 9 rows | 11 rows |
| 5.5 in common board | 5 rows | 6 rows | 7 rows |
| 6.0 in panel plank | 4 rows | 5 rows | 6 rows |
| 7.25 in wide plank | 4 rows | 5 rows | 5 rows |
| Tabletop type | Finished size | Typical boards | Buffer |
|---|---|---|---|
| Writing desk | 48 x 24 in | 5 to 6 | 10% |
| Work desk | 72 x 30 in | 6 to 8 | 12% |
| Coffee table | 44 x 22 in | 5 to 7 | 8% |
| Dining table | 78 x 38 in | 7 to 10 | 12% |
| Board length | Best tabletop length | Trim each end | Layout note |
|---|---|---|---|
| 48 in | Up to 44 in | 1 to 2 in | Small tops |
| 72 in | Up to 68 in | 1 to 2 in | Desks |
| 96 in | Up to 92 in | 1 to 2 in | Long tops |
| 120 in | Up to 116 in | 1 to 2 in | Counters |
| Waste level | Use when | Effect | Best for |
|---|---|---|---|
| 5% | Clear stock | Small extra | Painted tops |
| 10% | Normal boards | One spare often | Desks |
| 15% | Knot sorting | More choice | Rustic tops |
| 20% | Color match | Many options | Dining tops |
Long grain layout
Boards run with the longest edge. This usually gives fewer end joints, simpler glue-ups, and a calmer furniture look for desks, dining tables, and benches.
Cross grain layout
Boards run across the short edge. It can use shorter stock but creates more rows on long tops and may need careful movement planning.
Segmented rows
When the tabletop length exceeds board length after trim allowance, each row needs two or more pieces and the visible end-joint pattern should be staggered.
No more buying lumber by sight; it’s all about calculations. Think of the perfect wide plank dining table, you envision a seamless surface. Then, it dawns on you too late: you have exactly enough face material for three-quarters of tabletop! This calculator eliminates guesswork and makes you actualy measure your wood before cutting anything up.
The second most frequent mistake: assuming nominal size of anything means something. A 2×12 board isn’t 12 inches across once it’s been surfaced and planed down. Maybe it’s 11 and five eighths, maybe less if you then joint one edge for straightness in order to glue up. Only the usable width of the plank on your face matter here. Inputting a nominal value here will result in an incorrect row count and therefore a narrower than expected final panel. Most folks never do this till it’s too late. Measure what’s left after milling.
Why Using a Calculator Helps Your Project
The whole thing is based off grain direction. To make your table top look best, such as with most dining tables and desks, run the boards parallel to the longest side of the table. This means there are fewer end joints to hide. It also makes the piece look like it flows. So what if your stock is 96 inches and your table top is only seventy-two? That means trimming. And you can’t simply trim down to exact finished length; saw blades take kerf and ends will sometimes split or check. The calculator includes a trim allowance on each board so they aren’t three-eighths of an inch too short when they reach workbench.
Waste is another variable that seems like one thing until it isn’t. “Ten percent more should of be enough,” you reason, “ten percent of every board.” Except maybe when you’re milling pine and rustic walnut with lots of knots, in which case that cushion goes out the window quickly. Soon you’ll be rejecting warped boards that appear during dry-out, large defects, or just mismatched colors. With the waste selector, you can turn this up to as high as fifteen or twenty percent on finicky woods, since three extra boards in your garage beats making another run back to the yard halfway through your project.
You get a total number of boards out as an output, which is fine but the row and seam breakdown are really where it’s at. How many rows? Do you want wide planks (which can make a nice big bold statement but move around seasonally too) or narrower (that hold up better, but add more glue lines to your construction)? Six rows of boards say something. Knowing that helps you understand how much the piece moves and what its overall rhythm will be. And again the table on the page help you visualize the effect of changing plank width on row numbers for typical table-top sizes. For example, if I’m doing a 24 inch wide desk top, it could be seven rows of narrow three-and-a-half inch strips, or maybe only four rows of wide six-inch planks. This is quite a disparity in terms of material cost and labor.
Another thing people tend to forget about is weight. Pine is lighter and a little more flexible then oak (which has a lot less “give” in it over time). It’s a bit harder on the back, but better for every day wear and tear. The estimator takes into account how heavy the finished wood will be based off the density data. If you intend to move the table around frequently, that makes a difference when designing with real life in mind. A beautiful solid walnut top may not be ideal, although it would be luxurius.
The spacing of the clamps make sense. This is one practical thing that matters when it comes to holding the glue joint. If there is too much space between the clamps, the glue won’t make an effective bond because it will just squeeze out. It’s all designed into the logic so you can plan accordingly for buying hardware. When you put the wood glue on your hands, you’ll have enough bar clamps ready to rent/buy before it starts drying off.
“Tabletop building isn’t inspired; it’s prepared. You lay out your boards, dry fit them, and arrange the grain for balance only after the math is finished. And once the math is done, you just follow through by applying the glue, laying down the board, and doing the thing. You use the calculator to do the math, which means you get to do the craft. You go in with a plan rather than hope it works out. It becomes a controlled process rather than a potential disaster. That’s what makes it last.”