Wine Fridge Clearance Calculator
Check the real gaps around a wine cooler before sliding it into a cabinet, bar niche, island end, pantry wall, or dining room built-in.
Pick the closest layout, then replace the dimensions with your actual appliance cut sheet and inside cabinet measurements.
Clearance fit summary
The calculator compares your measured gaps with the minimum ventilation, service, hinge, and front projection allowances for the selected installation type.
Important: appliance manuals overrule general guidance. Use the calculator to find the likely problem zones before you cut fillers or order panels.
| Style | Side gap | Top gap | Rear gap |
|---|---|---|---|
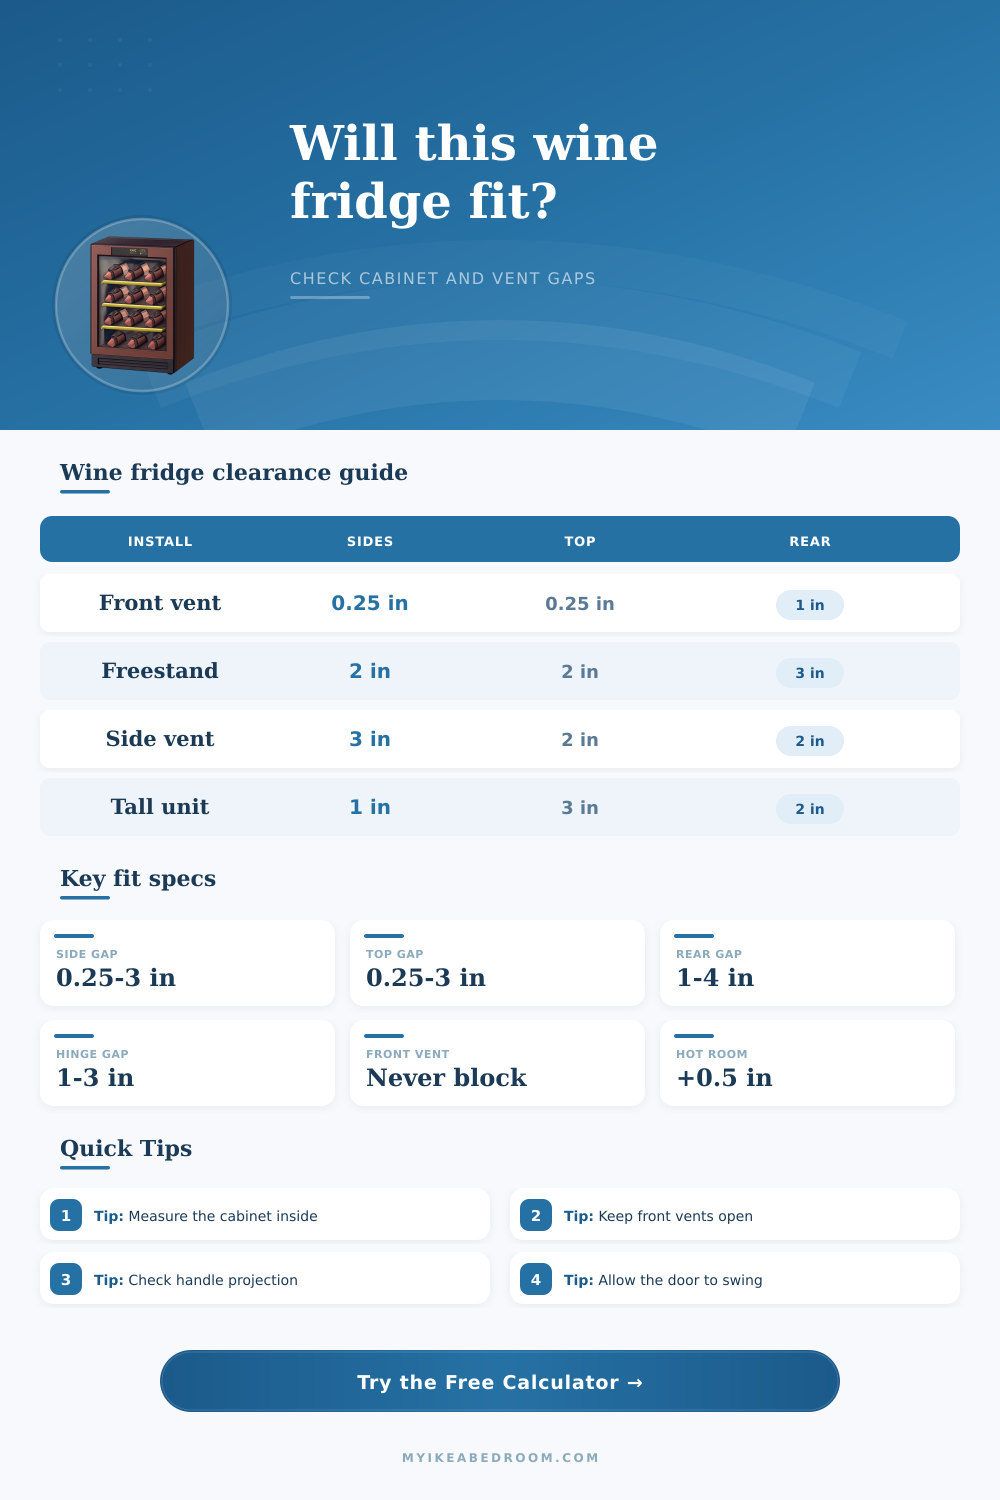
| Front-vent undercounter | 0.25 to 0.5 in each side | 0.25 to 0.5 in | 1 in for cord and leveling |
| Panel-ready front vent | 0.25 to 0.75 in each side | 0.5 in plus panel reveal | 1 to 1.5 in behind case |
| Freestanding rear vent | 2 in each side | 2 in above case | 3 in behind case |
| Side-vent compact cooler | 3 in on vent side | 2 in above case | 2 in behind case |
| Tall wine column | 1 in each side | 3 in above case | 2 in behind case |
| Unknown vent layout | 3 in each side | 3 in above case | 4 in behind case |
| Check | Formula | Why it matters | Common fix |
|---|---|---|---|
| Side gap | (Opening width - fridge width - trim loss) / 2 | Air path, panel reveal, and leveling wiggle room | Wider filler cut or smaller unit |
| Top gap | Opening height - fridge height - platform loss | Heat escape and height adjustment room | Lower feet or raise cabinet rail |
| Rear gap | Opening depth - case depth - outlet loss | Cord bend and condenser breathing room | Recess outlet or move rear stop |
| Front projection | Case depth + handle - cabinet depth | Shows how far handle or door stands proud | Use flush handle or deeper cabinet |
| Hinge swing | Hinge-side wall gap - swing allowance | Door must open far enough to access shelves | Reverse hinge or add filler strip |
| Condition | Added side | Added top | Added rear |
|---|---|---|---|
| Cool room, open front grille | 0 in | 0 in | 0 in |
| Normal room, daily service margin | 0.1 in | 0.1 in | 0.1 in |
| Warm room or toe-kick slot | 0.25 in | 0.35 in | 0.25 in |
| Hot room or decor panel near grille | 0.5 in | 0.75 in | 0.5 in |
| Blocked or unknown vent path | 1 in | 1 in | 1 in |
| Scenario | Typical unit | Opening target | Main risk |
|---|---|---|---|
| Undercounter bar | 23.75 x 34 x 23.5 in | 24.25 x 34.5 x 25 in | Toe grille blocked by plinth |
| Dining room buffet | 11.8 x 33 x 18.5 in | 16 x 36 x 23 in | Freestanding unit trapped too tightly |
| Tall pantry column | 29.5 x 69 x 24 in | 31.5 x 72 x 27 in | Top heat pocket with no escape |
| Island end panel | 23.5 x 34.2 x 23.6 in | 24.5 x 35 x 25 in | Door handle hits walkway or drawer |
| Panel-ready cooler | 23.9 x 34.1 x 23.3 in | 24.5 x 35 x 25.5 in | Overlay panel hides lower vent |
Measure the finished opening. Cabinet boxes, face frames, filler strips, baseboard, flooring changes, and countertop overhangs can reduce the clear opening after the plan looks correct on paper.
Do not bury a freestanding cooler. A unit with rear or side ventilation may fit physically but still run hot, cycle loudly, or shorten compressor life if cabinet panels trap the exhaust air.
Check the door at the angle you need. Some wine shelves need a wider door opening than normal beverage cans, so hinge-side fillers and handle projection deserve their own measurement.
Plan the outlet before depth feels final. A standard plug and cord bend can steal enough rear clearance to push the handle proud of the cabinet face.
For example, you purchase a wine cooler with the right size on paper, but it doesn’t fit in real life. Sure, the box is the right size on paper, but there are always other things that come into play to make it not fit. Maybe it’s the width and height… You measured those, right? But what about air gap needed behind the cabinet, or the fact the door handle stick out beyond the cabinet? Things like this is never listed on a spec sheet since they’re invisible, they only become necessary when you try to install them. With this calculator, those variables will be calculated for you.
Before you start building, everything becomes a simple yes or no question: can I do it or can’t I? Why? Because active cooling appliances (as opposed to passive, like a box) produce heat, which has to go somewhere. But if they’re packed up against flooring and walls, where does it go? Wherever it can get out, which means they has to work even harder to stay cool. This results in more electricity usage, louder cycling compressors, and an early death.
Why Your Wine Cooler Might Not Fit
That’s why the tool asks your ambient temperature, and where the vent will be located. Depending on whether it is front or rear vented, the appliance may need a few inches of space at either side or the back to exhaust hot air around the condenser coils. Get it wrong here, and you’ll assume all coolers requires the same amount of breathing room, but they don’t.
The most obvious ones are width and height. But depth and projection is where it gets tricky. A lot of folks take measurement of their cabinet opening, figure the width of the fridge will match and think they’re good. They don’t realize that adding about two inches of depth for a door handle can become a problem if the handle hit another drawer or a wall return when the door is open. In that case, you have an actual obstacle between you and the bottle you want.
That’s why the calculator has a field for both hinge side clearance and handle projection to help you visualize how much space is being taken up. And since a bar nook or tight alcove can be as small as a fraction of an inch, making sure the door opens far enough to easily pull out the shelf is especially critical.
Secondly, don’t forget about the rear wall. In most houses, this area contains plumbing lines, baseboards, or electrical outlets. Make sure there’s some space for the power cord to flex naturaly so it doesn’t get pinched behind the cabinet. Plugging into an outlet can overheat and damage the refrigerator if it’s jammed up against the wall so tight that nothing can breathe. Enter your rear losses for such impediments. That way, you’re accounting for your house’s real-world trim and wiring.
Also remember: the warmer the room, the larger the gap should of been. The larger the temperature difference between your pantry and your kitchen, the more air circulation you need. One quieter snag is panel ready units that immitate custom cabinets. They appear seamless but need to have certain gaps so that ventilation slots can be seen and overlay doors hangs properly. You may wind up building the cabinet opening too snugly, which causes the lower vent grille to hide under a toe-kick board, or the panels to bind. The tool’s reference tables detail what are usually minimums for those situations.
That way you can visualize how much additional space should be set aside for service access and future maintenance. We’re not just fitting the box now. We’re thinking about cleaning behind it or fixing it tomorrow. Why take your time? Well, measuring correctly now prevents stress (and money) down the road. Get out your tape measure and note how big the inside of your cabinets is, including any trim or face frame. Then, read the appliance manual for ventilation needs.
With all that information, the calculator then analyzes what physical restrictions you have compared to what the industry say is safe. It’ll even give you a number (fit score) along with a breakdown showing how much clearance you have on the sides/top/rear. So you know exactly where you’re cutting it close…and where you’re leaving yourself a lot of margin.
It’s more about installing a product in a way that respects cooling physics than it is shoving a thing into a hole. Don’t forget the power cord; don’t block airflow with your cabinet doors; leave space for air to move around the unit. Do it right and the compressor will be silent, the wine will remain chilled and the rest of your kitchen look just like you imagined when you measured twice (and installed once). That early work prevents an appliance from being too big or small, ensuring your design plan remains intact, while keeping your collection safe.