Window Sill Depth Calculator
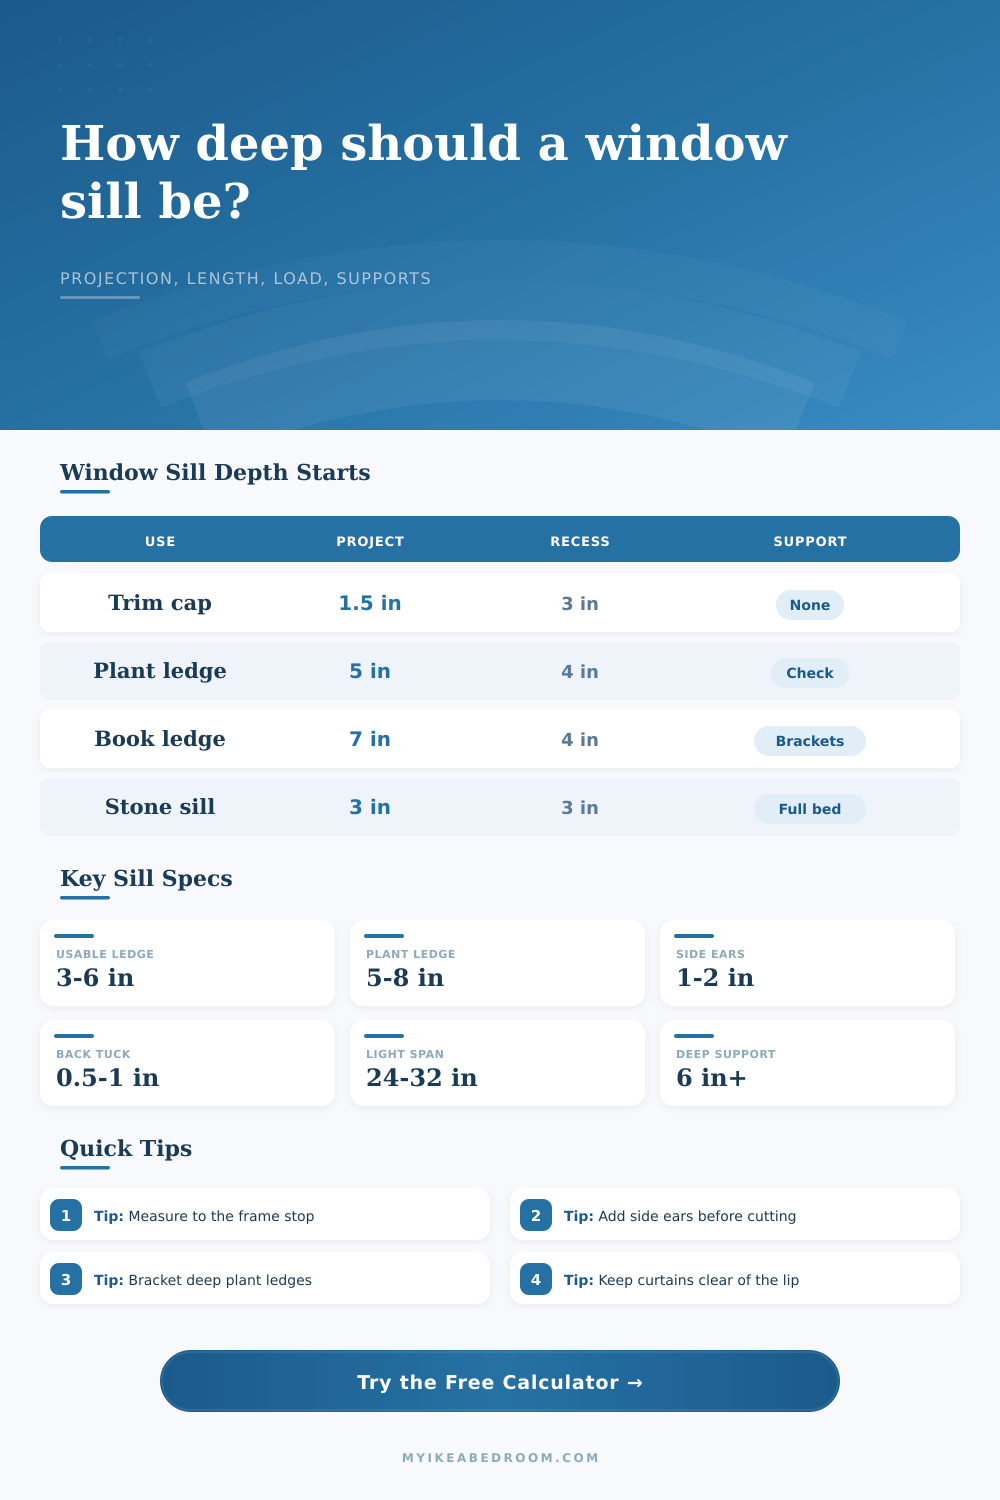
Plan a sill board from the frame tuck to the front lip, including side ears, material weight, expected ledge load, and bracket spacing for deeper projections.
Choose a real starting point, then fine-tune the dimensions for the actual window opening and wall recess.
Window sill sizing results
Under 3 in projection
Best near: curtains, blinds, narrow beds, and tight walkways.
Materials: pine, PVC, tile cap, stone with full bedding.
Acts mostly as trim, not storage.
3 to 5 in projection
Best near: nightstands, low bookcases, and small lamps.
Materials: pine, oak, plywood, or MDF with secure fastening.
Useful ledge without much room intrusion.
5 to 8 in projection
Best near: plant stands, desks, and reading corners.
Materials: oak or plywood with brackets; stone needs continuous support.
Check curtain swing and wall clearance.
Over 8 in projection
Best near: bay windows and built-in bench backs.
Materials: framed plywood, hardwood, or slab on a support bed.
Treat it like a shelf, not simple trim.
| Use case | Front projection | Typical total depth | Planning note |
|---|---|---|---|
| Trim cap or tile return | 1 to 2 in | Recess plus 1.5 to 3 in | Usually supported by the wall and frame bedding. |
| Decor and small objects | 3 to 4 in | Recess plus 3.5 to 5 in | Good balance for bedrooms with curtains or blinds. |
| Plant ledge | 5 to 7 in | Recess plus 5.5 to 8 in | Support the lip if pots are clustered near the edge. |
| Book or catchall ledge | 6 to 8 in | Recess plus 6.5 to 9 in | Use brackets or a framed apron under the front edge. |
| Bay-style deep sill | 8 to 12 in | Recess plus 8.5 to 13 in | Plan as a shelf with support across the full length. |
| Material | Typical thickness | Clean projection before check | Support note |
|---|---|---|---|
| Finger-joint pine | 3/4 in | Up to about 4 in | Paints well; add brackets for planters or long runs. |
| Red oak | 3/4 in | Up to about 5 in | Stiffer wood; still check screw hold and wall backing. |
| Birch plywood | 3/4 in | Up to about 4.5 in | Stable if the front edge is banded or nosed. |
| MDF or particleboard | 3/4 in | Up to about 3 in | Needs dry use and close support for projections. |
| Solid surface, stone, quartz | 1/2 to 3/4 in | 2 to 3 in without full bed | Heavy slabs need continuous bearing, not just end support. |
| Projected depth | Decorative load | Plant or book load | Practical action |
|---|---|---|---|
| 0 to 3 in | Often no bracket | Check fasteners | Use adhesive bedding or screws into framing where suitable. |
| 3 to 5 in | 24 to 32 in spacing | 20 to 24 in spacing | Use low-profile angle brackets or a front apron. |
| 5 to 8 in | 18 to 24 in spacing | 14 to 20 in spacing | Place supports near load zones and close to side returns. |
| 8 to 12 in | 12 to 18 in spacing | Full support preferred | Treat as shelving; verify wall blocking and fastener rating. |
| Window type | Opening width | Board depth formula | Typical result |
|---|---|---|---|
| Single bedroom window | 30 to 42 in | 3.5 in recess + 3 in projection + 0.5 in tuck | About 7 in deep by 33 to 45 in long. |
| Double living room window | 48 to 72 in | 4 in recess + 4 in projection + 0.75 in tuck | About 8.75 in deep; support depends on load. |
| Kitchen plant window | 36 to 60 in | 3.5 in recess + 6 in projection + 0.5 in tuck | About 10 in deep with brackets for pots. |
| Bay center panel | 54 to 96 in | 5 in recess + 8 in projection + 0.75 in tuck | About 13.75 in deep; use shelf-style support. |
Depth tip: Total cut depth is the sum of the wall-to-frame recess, the room-side projection, and any back tuck. Measure from the finished wall face after drywall, tile, or trim layers are in place.
Support tip: A sill deeper than about 6 in behaves more like a shelf. Put support under the load path, especially when plants, books, or stone slabs place weight near the front lip.
What About Weight? Since a window sill is used as a shelf, a piece of wood needs to be treated different than decorative trim because its purpose is to hold something up. Window sills is used as shelves, if you put anything on one, it’s no longer a plain border. It’s now a shelf with loads on it, which totally changes the physics of the structure.
Turn the measurements into a support plan using this calculator. It will make sure what you design doesn’t fall off the wall and can be installed safely. Because the frame will sit behind the finished wall, use the recess as your measurement, not the opening. How far does that extend in the room? Know what length board you need to ensure there is no gap on the inside.
How to Choose the Right Window Sill Size and Support
Then increase by how much you want it to project, three to five inches seems about right for most homeowners; there’s enough room for small pieces of décor without blocking any curtains or walkways. For holding bigger things (like stacks of books, or large planter), go with six inches or more. Adding that thickness transform the window into a piece of furniture.
The structural reality comes down to material choice. A painted quarter-inch PVC sheet might look identical to a three-quarter-inch red oak slab. But it act differently under load. Wood is rigid enough to cantilever out further before sagging, and holds screws well. Plastic and composite board are lighter and easier to work with but lack rigidity to hold deep overhangs. By accounting for the difference in densities, the tool adjusts weight estimate and flags where you will require some mechanical support.
If you use solid surface or stone materials, then requirements once more shift to these being brittle and heavy so requiring a continuous bed of support from end-to-end to avoid cracking. They seldom relies on just end-bearing, but rather a continuous bed of support along their entire length.
Most DIYers drop the ball in support spacing. You think you’re safe with just a few screws driven into side jambs. But the force of gravity doesn’t act horizontally. If the load is positioned at the very front of a deep sill, the back end are being pulled outwards by the sheer action of that lever arm. The general rule of thumb in houses (the way we do things around here) is to check fasteners for shallow projections… but if there’s more than a 5 inch stick-out, beware.
The leverage effect (as illustrated in the reference information on the page) is why closer spacing are used when the load is concentrated toward the far lip. Until then it seems like overkill. Until you witness a wet pot pulling a bowed out pine sill. Also keep in mind the back tuck: The board sits flush with window stool or slips under it, behind the frame stop. Unless you account for this fractional inch, there’s going to be a shadow line showing through, which is bad because you’re aiming for a neat appearance.
Mounting points needs side ears. They provide structure to prevent the board from splitting where mounted and add visual interest for a decorative effect. All of these elements may sound like small things but they make all the difference between a sloppy installation and a pro job. A window sill is a lesson in structural honesty versus visual desire: You want some depth (for use), but only enough depth that can be supported and earned by appropriate means, namely enough support combined with proper material selection.
Run your own scenario about loads, projections, and any desired recess through the calculator, and the guess work goes out the window. The end product is a board that fits exactly, maintains its shape, and holds up to what you’d like to rest on it without drama. And thus it becomes not just a hunk of lumber but something dependable as part of your home’s structure, there to hold plants, books, and even heavy ceramic vase.