Window Head Height Calculator
Plan finished window head height, rough opening head, header top mark, ceiling reveal, top trim clearance, and alignment before framing or ordering a window.
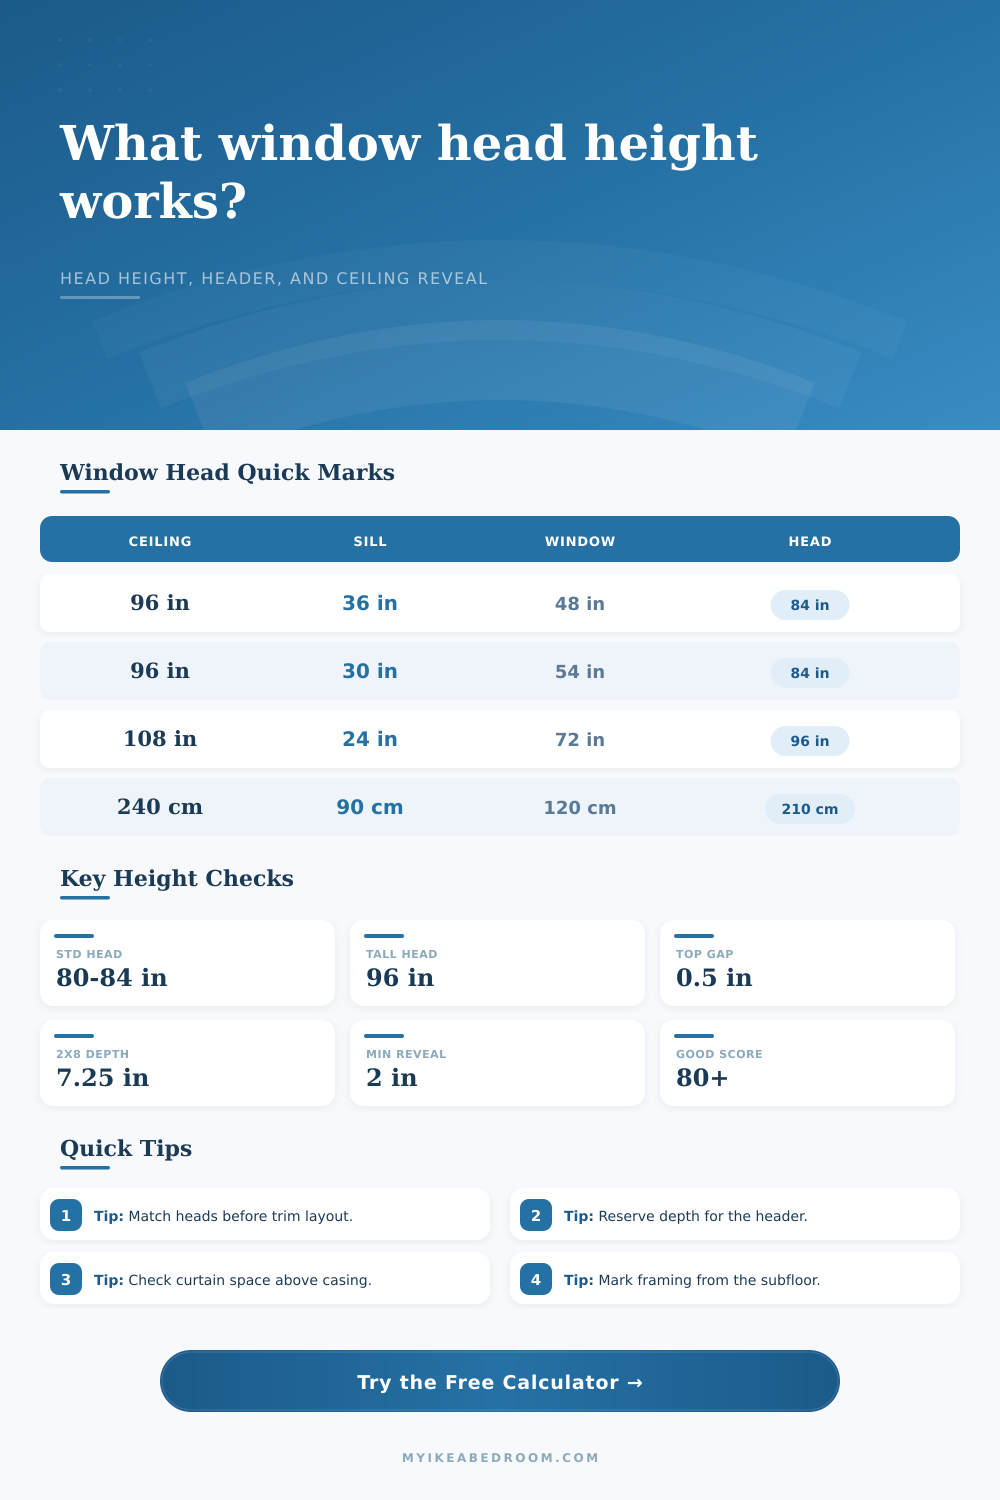
Each preset loads a real head-height planning situation with sill height, window unit height, ceiling height, rough opening gap, finish stack, and header depth.
Dimensional lumber
Typical depths: 5.5 to 11.25 in.
Common for framed openings where the span table permits it. Depth directly raises the header top mark.
LVL header
Typical depths: 9.5 to 11.875 in.
Engineered depth is consistent, useful when a tall opening must still align cleanly with other heads.
Nonbearing partition
Typical depth: 3.5 in.
Used for interior borrowed-light openings or nonbearing walls, leaving more room for ceiling reveal.
Top casing and shades
Planning stack: 2 to 8 in.
Roman shades, curtains, and thick casing can be the real ceiling conflict even when framing fits.
| Finished head | Metric equivalent | Typical use | Example sill and unit |
|---|---|---|---|
| 80 in | 203.2 cm | Aligns with many interior doors | 32 in sill + 48 in window |
| 84 in | 213.4 cm | Common head in 8 ft rooms | 36 in sill + 48 in window |
| 88 in | 223.5 cm | Useful above counters or furniture | 42 in sill + 46 in window |
| 96 in | 243.8 cm | Tall rooms and larger picture windows | 24 in sill + 72 in window |
| 108 in | 274.3 cm | High ceilings and transom stacks | 30 in sill + 78 in stack |
| Assembly | Depth used | Header top formula | Planning note |
|---|---|---|---|
| 2x6 header | 5.5 in | Rough head + 5.5 in | Best when span tables allow a shallow header |
| 2x8 header | 7.25 in | Rough head + 7.25 in | Common residential planning depth |
| 2x10 header | 9.25 in | Rough head + 9.25 in | Consumes 2 in more vertical space than 2x8 |
| 2x12 header | 11.25 in | Rough head + 11.25 in | Check carefully under 8 ft ceilings |
| LVL 9.5 | 9.5 in | Rough head + 9.5 in | Engineered member with consistent depth |
| LVL 11.875 | 11.875 in | Rough head + 11.875 in | Often needs a lower head in tight ceilings |
| Ceiling height | Head height | Reveal above head | Finish interpretation |
|---|---|---|---|
| 84 in | 80 in | 4 in | Tight but possible with small casing |
| 90 in | 84 in | 6 in | Works for compact trim and inside shades |
| 96 in | 84 in | 12 in | Comfortable for casing and curtain hardware |
| 108 in | 96 in | 12 in | Balanced tall-room proportion |
| 120 in | 108 in | 12 in | Good for transoms and high drapery |
| Scenario | Sill height | Window height | Planning reason |
|---|---|---|---|
| Bedroom with low dresser | 30 to 36 in | 48 to 54 in | Keeps furniture usable while landing near 84 in head |
| Egress bedroom window | 20 to 30 in | 54 to 60 in | Lower sill improves egress while preserving head alignment |
| Kitchen counter window | 40 to 44 in | 36 to 48 in | Clears counter backsplash and upper trim conflicts |
| Bathroom privacy window | 48 to 60 in | 24 to 36 in | Raises sill for privacy and still checks casing clearance |
| Picture window behind seating | 18 to 30 in | 60 to 72 in | Creates a tall view with a high head in taller rooms |
Keep one elevation logic. For a room with several windows, compare finished head height first, then check whether each rough opening and header can fit below the ceiling line.
Separate finish and framing marks. Finished head is measured from the finished floor, while subfloor layout marks add the floor buildup so framing does not drift after flooring is installed.
Homeowners do get size of the window hole right most of the time; what they don’t account for is the effect of wall framing on the end result. When you’re ordering your glass and fitting it into place, you may not realize that where the top of opening falls determines whether your curtains look crowded or balanced. After the ceiling, the top edge of opening creates one of major visual lines in the room, called the head height. If it match adjacent windows and doors, the space feel like it was planned. Drifting up or down a few inches can make entire elevation feel off kilter. Guessing doesn’t work here; planning does.
After that you input your own set of constraints into calculator at the top of page, and it do the math for you. It separates world of framing from world of finished. Input your ceiling height and desired sill height (that sets how much vertical space window unit will take). But what about everything between the top of glass and the drywall? What’s the shim gap on the rough opening (about a half inch)? What if there’s a stack of curtain rods or casing you’re accounting for?
Why Window Height Matters for Your Home
After that, where do you fit structural header above it all? People lose inches in headers without realizing it. That’s right: It’s not just a basic double two-by-six for standard residential door; wider spans need deeper lumber such as two-by-eights or even engineered LVL beam. Before the result is shown, the calculator makes you select your header depth. Why does this matter? A deeper header push the rough opening lower, which can eat into the clean band of wall space above window trim. Every fraction counts if you’re working with an eight-foot ceiling. A heavy beam could of force you to shorten glass or lower sill to preserve that visual reveal above casing. Otherwise, that space could dissapears completely.
Then again there’s the issue of room-wide alignment. You can specify a target head height with the tool (which in typical houses is usually eighty-four inches). That’s good to know as a starting place, since it often matches up with tops of interior doors and kitchen cabinets. If all your doors are lined up at that level, and so are your windows, then eye has nothing to grab onto except the smooth flow around perimeter. If one or another doesn’t break that pattern, however, it will draw focus not to the room itself but to each opening. The page includes a handy reference table that makes this clear for various ceiling heights. For instance, a ninety-six inch head fits into a ten-foot room like a glove, but it leave no room for breath in an eight-foot space.
One more variable: Subfloors are frequently marked out by framers. When you add in any underlayment for tile and/or hardwood flooring, your subfloor won’t be flush with final floor. For that reason, the calculator wants to know how much higher your finished floor will be different than the subfloor. That way when we frame, we’ll precisely know where to put our header on the subfloor. Without doing so, you end up having windows appear a little bit off center after finish work is done. Little things like this matter a lot if you want your home to look professionally done.
But it’s not just about appearance: It’s also about function and privacy. If your unit height remains unchanged, but the sill is high (for privacy) in a bathroom, then the head go down. In an egress window of a bedroom, perhaps the sill needs to be low (for safety), so the head must go up. With the calculator, you can see whether these conflicting demands will fit within your ceiling line while following both structural requirements and avoiding crowded trim.
All in all, it’s just a matter of balance: where to place the structural element (the header) in the wall cavity and how you manage your sightlines. The amount of weight the header needs to support isn’t up for debate; that’s just physics. But where it goes, that’s under your control if you run the math before cutting lumber. That way you won’t end up with lovely new curtains and realize too late they’ll never fit because the only spot to hang them will touch ceiling.
Run the numbers, measure twice, maintain those head heights. They make a whole house of windows work together as one design.