Vertical Cladding Batten Spacing Calculator
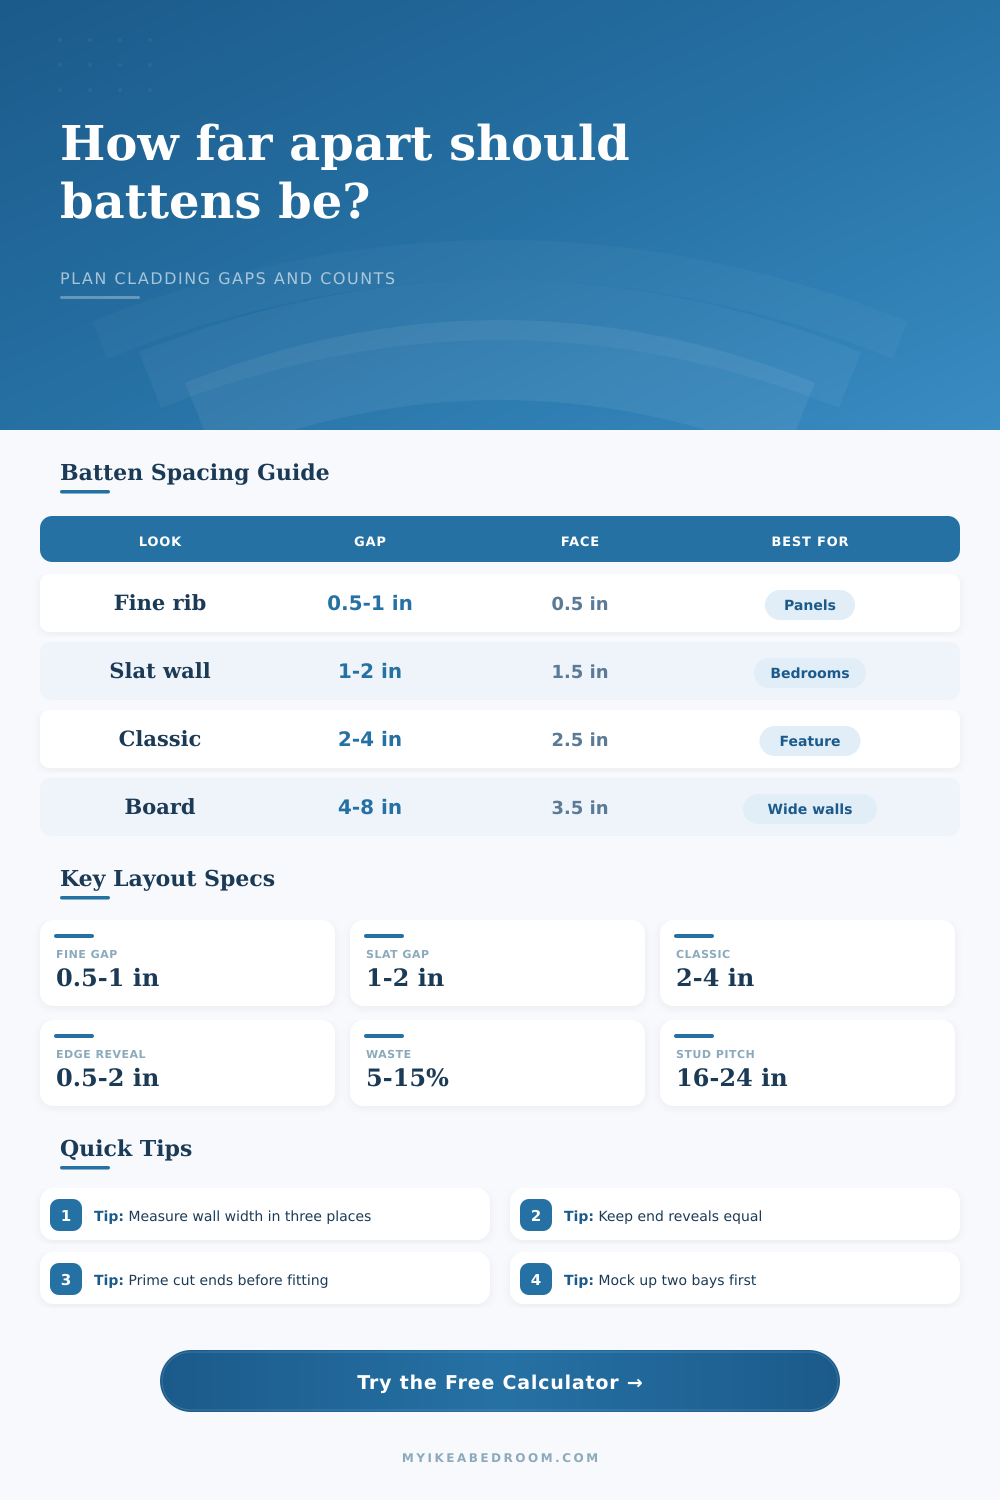
Plan a vertical batten wall by converting the target gap into a fitted layout with equal end reveals, exact center spacing, material length, and coverage.
Preview is proportional to count and gap, so dense layouts show as a grouped rhythm rather than a shop drawing.
Calculation Breakdown
| Layout Type | Typical Gap | Typical Face | Visual Effect |
|---|---|---|---|
| Fine ribbed cladding | 1/2 to 1 in | 1/2 to 3/4 in | Dense texture for panels, doors, and compact nooks. |
| Modern slat wall | 1 to 2 in | 1 to 1-1/2 in | Balanced bedroom feature wall with visible shadow. |
| Classic board and batten | 2 to 4 in | 1-1/2 to 2-1/2 in | Distinct vertical rhythm without feeling crowded. |
| Wide panel battens | 4 to 8 in | 2-1/2 to 3-1/2 in | Calmer layout for broad walls and half-height panels. |
| Face Width | Metric Face | Common Stock | Good Gap Range |
|---|---|---|---|
| 0.50 in | 12.7 mm | Thin rib or trim strip | 0.50 to 1.25 in |
| 0.75 in | 19.1 mm | Screen molding or square strip | 0.75 to 1.75 in |
| 1.50 in | 38.1 mm | Actual 1 x 2 face | 1.50 to 3.50 in |
| 2.50 in | 63.5 mm | Actual 1 x 3 face | 2.00 to 5.00 in |
| 3.50 in | 88.9 mm | Actual 1 x 4 face | 3.00 to 8.00 in |
| Formula Item | Formula | Why It Matters | Unit |
|---|---|---|---|
| Usable width | Wall width minus 2 side reveals | Keeps the first and last margins equal. | in or cm |
| Batten count | Round((usable width + gap) / (face + gap)) | Finds the nearest whole number of battens. | pieces |
| Adjusted gap | (usable width - count x face) / (count - 1) | Makes every internal space identical. | in or cm |
| Center pitch | Face width + adjusted gap | Gives repeat marks from batten center to center. | in or cm |
| Linear length | Count x height minus opening deduction | Estimates total batten stock before allowance. | ft or m |
| Opening Type | Deduction Method | Layout Check | Allowance Note |
|---|---|---|---|
| Outlet or switch | Area usually negligible | Keep gaps visually continuous. | Add small cut allowance. |
| Window | Deduct glass or trim block area | Plan split battens above and below. | Add 10 to 15% for returns. |
| Door opening | Deduct door rectangle area | Confirm casing reveal before marking. | Add side jamb offcuts. |
| Cabinet or wardrobe | Deduct covered rectangle area | End the rhythm at visible edges. | Use higher sorting waste. |
For installed layouts, mark from a fixed centerline or a verified side reveal, then re-check every five to eight battens before fastening.
| Project | Wall Size | Example Face And Gap | Typical Count | Layout Note |
|---|---|---|---|---|
| Queen bed feature wall | 12 ft x 8 ft | 1.5 in face, 2 in gap | 41 battens | Good for centered headboard layouts. |
| Desk nook backdrop | 5 ft x 7.5 ft | 0.75 in face, 1 in gap | 34 battens | Dense ribbing reads clean in a small zone. |
| Half-height hallway panel | 10 ft x 4 ft | 2.5 in face, 5 in gap | 16 battens | Wide spacing keeps short cladding calm. |
| Media wall with openings | 14 ft x 8 ft | 1.5 in face, 2.75 in gap | 39 battens | Deduct blocked zones before stock planning. |
| Wardrobe side feature | 3 ft x 8 ft | 0.75 in face, 1.25 in gap | 18 battens | Small panels usually need tighter rhythm. |
The vertical coverings give the illusion of adding depth to an otherwise flat wall. But how far apart do you space them? Get the rhythm incorrect and effect is accidental, not design.
Homeowners are reluctant to take this plunge until they understand the visual impact (i.e., fear of failure) without considering the math that enables success. Enter the dimensions of your walls into the calculator; it crunches numbers for you. No more guesswork on whether twelve battens will be sparse or crowded.
How to Space Your Vertical Boards Correctly
The worst thing to do is order boards labeled as “one by two” or whatever the size, then find out they’re actually only an inch and a half wide once you’ve sanded and planed them down. Then every gap look different if you plan the layout based off that label instead of measuring with a ruler. Batten face width matter; that’s the part you’ll see against the wall and the tool needs to know that. Measure the board as it will be, not how it was packaged. And when you have 12 feet of wall to keep the same shadow line on, that make a difference.
The other factor is reveal at the edges. In other words, this is how much of the edge of your cladding shows around a door frame or the corner trim. You don’t want final batten to be too squashed and you don’t want it to be out of kilter with the others. That’s why the calculator ensures an even reveal on this side (as well as all the internal gaps). It may not sound like a big deal but it give the whole job a sense that someone thought about it rather than just jamming bits in randomly!
It also depends on material choice. For example pine is light and forgiving but will move with humidity. MDF is stable but heavier and will add weight to the wall structure. Different density affect how you handle it. It also affects the overall load, as shown in the reference table on the page. Oak is heavier so needs a stronger adhesive and secure backing. PVC is lighter and installs quicker but can be hollow sounding if not well supported. It’s a question of balancing structural reality against looks.
Overages occur in the waste allowance. Nothing comes off the truck straight. Some boards bow. Others knot out in places you didn’t want them to. Each time you make a cut, you lose a fraction of an inch called kerf. Ten or fifteen percent for waste isn’t being pessimistic. It’s realistic. Fail to factor that loss and what do you end up with? You will be three battens short just when it is time to put the finish coat on. The tool accounts for the overage when estimating how much stock you’ll need to complete the job, in other words, it estimates your total linear length.
First, create a little mock-up before you mark anything. Dry fit two pieces together on the wall then cut them out. You may discover that a two-inch gap feels too wide in low light or too tight with busy wallpaper behind it. The good thing about building a small mockup is it’ll save you hours of ungluing joint after joint, as well as show you how your studs are lining up with your battens. If not, you’re going to have some blocking behind the drywall to hold everything nice and snug vertically.
How do you want it to FEEL? That’s up to the visual flow you choose. Tight is dense and textural. It is ideal for behind beds or any small nook where a tight fit are needed. It is moddern and airy, which is perfect for an open livig area. There is no correct choice, just the one that fits your space. You can quickly switch between these presets using the calculator, to compare a narrow entry divider with a queen-sized headboard wall. Every layout tell a different story.
At its core, cladding is a study of how the eye travels over a surface. Well-spaced rows build confidence in the maker’s handwork. Messy gaps scream “rush-job”. Measure twice; cut once, as they say. Follow the math and it’ll lead you to something solid-feeling, built-to-last. Those vertical lines will trick your eyes into believing they are looking at nothing but the wall. Once the light hits them just right, you won’t be able to think about anything else except for enjoying the wall.
You should of checked your measurements twice.