Upholstered Headboard Height Calculator
Size an upholstered headboard from the finished floor, mattress top, pillows, visible fabric goal, wall clearance, bed width, and ceiling height before you order or build the panel.
Pick a real bedroom situation, then adjust the floor, mattress, pillow, panel, and ceiling constraints to match your room.
Reading the result
Panel height is the physical upholstered piece from its bottom edge to top edge.
Top line from floor is where the finished headboard lands on the wall after the floor gap or mounting reveal.
Visible above pillows is the part that still shows once the mattress and pillows hide the lower fabric.
Fit limit checks the ceiling, top margin, and any entered sconce or shelf obstruction.
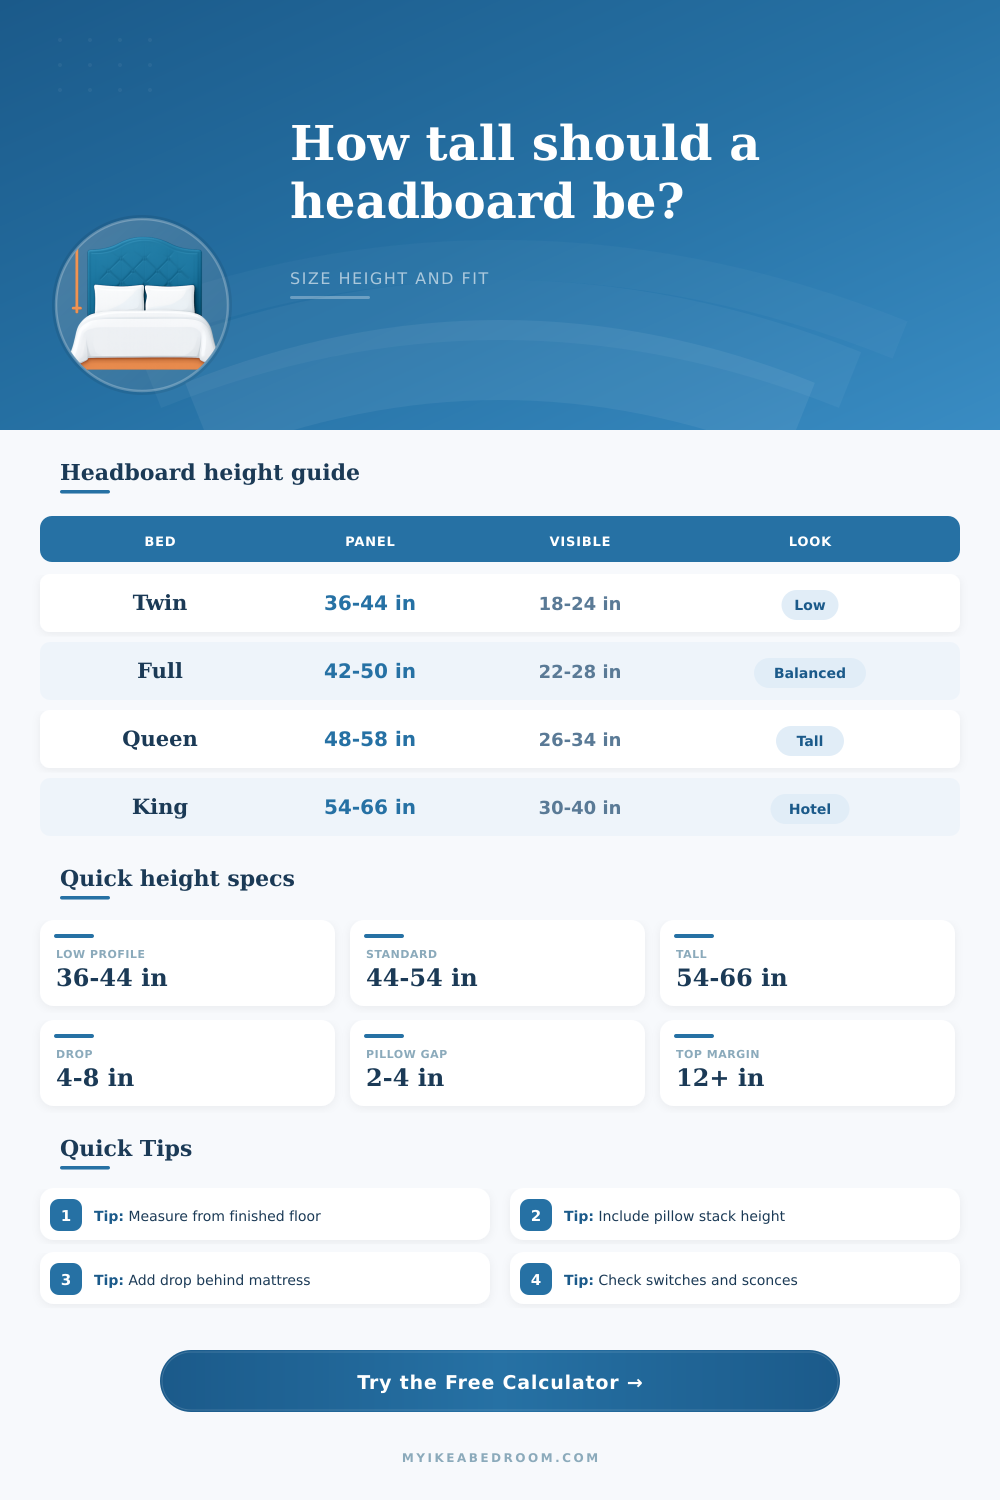
| Bed or room type | Typical panel height | Visible above pillows | Best use |
|---|---|---|---|
| Twin or daybed | 36 to 44 in | 16 to 24 in | Compact rooms, kids rooms, window walls, daybed nooks. |
| Full bed | 42 to 50 in | 20 to 28 in | Apartment bedrooms and guest rooms with standard pillows. |
| Queen bed | 48 to 58 in | 24 to 34 in | Balanced primary bedrooms with upholstered or padded panels. |
| King bed | 54 to 66 in | 30 to 40 in | Hotel look, euro pillows, thick mattresses, and wide rooms. |
| Wall panel | 66 to 84 in | 36 to 54 in | Full focal wall panels when ceiling and lighting clearances allow. |
| Measurement | Typical range | Why it matters | Calculator use |
|---|---|---|---|
| Platform or rail height | 7 to 16 in | Raises the mattress and hides more of the headboard bottom. | Added before mattress thickness to find the pillow base line. |
| Mattress thickness | 10 to 16 in | Thick mattresses need taller panels for the same visible fabric. | Creates the mattress top height from the finished floor. |
| Panel drop | 4 to 8 in | Prevents a wall gap from showing behind pillows and bedding. | Added below mattress top when sizing the physical panel. |
| Mounting reveal | 0 to 4 in | Allows base trim clearance or a planned shadow gap. | Sets the installed top line from the floor. |
| Pillow arrangement | Stack height | Suggested visible fabric | Notes |
|---|---|---|---|
| Sleeping pillows only | 6 to 9 in | 16 to 24 in | Keeps a simple, lower profile and works well in tight rooms. |
| Sleeping plus shams | 9 to 12 in | 20 to 30 in | The common balanced choice for full and queen beds. |
| Euro pillows | 12 to 16 in | 26 to 38 in | Needs more headboard height so the panel still reads above pillows. |
| Layered hotel bed | 14 to 20 in | 32 to 48 in | Usually paired with tall or wall-panel headboards. |
| Upholstery build | Vertical pull allowance | Height planning note | Use in calculator |
|---|---|---|---|
| Plain padded panel | 2 to 4 in | Simple fabric wrap around foam and backing board. | Smallest fabric pull estimate. |
| Button tufted | 5 to 9 in | Tuft depth consumes more fabric across the height. | Adds larger fabric pull allowance. |
| Vertical channel | 4 to 8 in | Channels need extra fabric for seams and foam rolls. | Estimates channel spacing and panel count. |
| Slipcovered panel | 6 to 10 in | Needs hem, seam, and fastening allowance. | Largest sewing allowance estimate. |
Measure after bedding decisions. Mattress toppers, euro pillows, and thick shams can hide several more inches of upholstery than a bare mattress suggests.
Check the wall before finalizing height. Sconces, switches, outlets, window trim, sloped ceilings, and picture rails can set a lower maximum than the ceiling height alone.
Plan the hidden drop. A panel that stops exactly at the mattress top may show a gap when pillows shift, so add a hidden drop behind the mattress.
Mock up the top line. Tape the calculated top height on the wall and dress the bed before ordering fabric, foam, or a custom panel.
Now imagine getting a brand new mattress, and when you unzip the packaging you realize there’s something wrong with your bedroom. When you tug open the sheet you find yourself staring at exposed drywall on the opposite side of the bed. Without a headboard the wall look incomplete, and covering one fills that void with an anchor for the area.
Here’s the catch: How to know what to measure? Height from floor to ceiling doesn’t tell the whole story. Everyone assumes the length in the photos is what you will get but no one sees what is under there! The photos don’t include the base frame beneath, nor do they include depth of your mattress or the stack of pillows behind them. You order your panel assuming a clearance of 6 inches above the pillows for a headboard. And then you put your pillows up and boom: your fancy schmancy shams is now visible over the top.
How to Measure for Your Headboard
Enter the math done by the layer-by-layer calculator on the page. Plug in how thick each layer is (including mattress thickness, pillow stack, base frame, platform base, or toppers), and it figure out what length to send you, eliminating the risk that your panel will look embarrassingly small compared to your bed and bedding.
Before we talk about the headboard, the actual variable are the stack height. How tall is your mattress off the finished floor? That’s the starting point. Add in a platform base and add that. Got a fat topper? Yup. Add it. From there, it tells you where the exposed fabric starts. Guessing at how high it will be doesn’t work without that number.
Then there are the pillows, which can be decorative or for sleeping on. Standard sleeping pillows sits lower than the Euro shams or decorative bolsters you likely keep for guests and photos. For example, if your headboard is fourteen inches above your mattress, it should of being tall enough to clear your pillows comfortabley. As your pillow stack becomes more complex, what you see of your upholstery shrinks (see reference table, below). It is a tiny detail but it matters, since hiding half of your linens behind a headboard defeat the whole point of having one.
There’s one other dimension to the equation: ceiling height. A headboard that towers over your bed may be fine if you have an average-height eight-foot ceiling, but in smaller spaces like bedrooms, it will close things in on you. To allow your eye to continue upward without hitting a wall, leave at least a dozen inches of clearance between the top of fabric and the ceiling trim. With taller ceilings, go bigger (within reason). It’s always a balancing act between vertical space and visual weight.
It’s also worth remembering those things on the wall that’ll get in the way: Artwork, sconces and switches is frequently found at heights which will crash into big headboard plans. Avoid embarrassing moments by measuring down from the lowest piece of wall art/fixture above your bed; you don’t want to cover half a lightswitch (or worse, bump into a picture rail) with your new headboard.
There’s also the quieter part of math, the fabric selection. It involves how the fabric contributes to the overall look and how much is needed for construction reasons. With tufted pieces, there is more fabric needed vertically versus something with just padded panels. If you adore channel tufting, you has to add extra fabric for the depth of those buttons. Otherwise, they will squash your design at the end of the run. Best to check these allowances before cutting.
Measure your bed stack. Measure how much space you want between the pillows. From here, let the tool do all the hard work. We’re not just trying to fill in the wall. We’re also trying to ground the bed and make it appear finished from the start.