Trim Paint Linear Foot Calculator
Estimate finish paint, primer, coated area, and container counts from measured trim runs.
Measure only surfaces that will be painted. For door and window casing, include both sides if both faces are being painted.
Trim paint estimate
Best control on narrow profiles, edges, grooves, and casing returns. Uses the coverage value directly.
Fast on flat baseboards and doors, with a small allowance for nap loading and tray transfer.
Useful before flooring or final assembly, but needs a larger allowance for masking and overspray.
Routed profiles add real surface area; raise the detail factor for grooves, beads, and crown shapes.
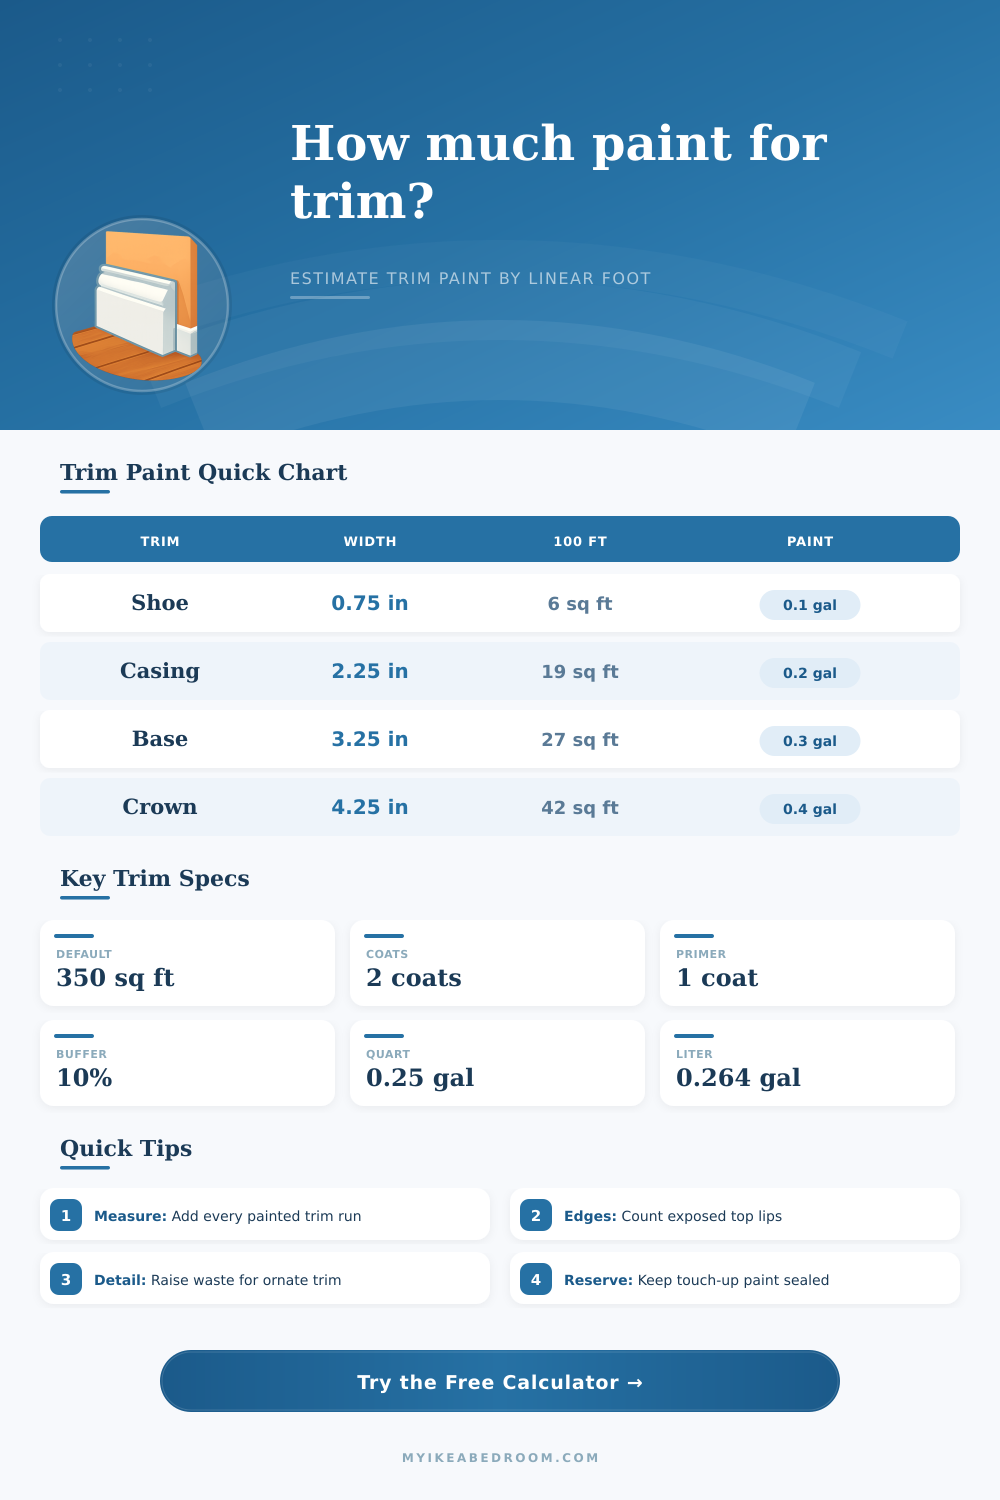
| Profile | Typical face width | Area per 100 linear ft | Use this for |
|---|---|---|---|
| Shoe molding | 0.75 in | 6.3 sq ft | Floor edge touch-ups |
| Low baseboard | 2.25 in | 18.8 sq ft | Modern low-profile rooms |
| Standard baseboard | 3.25 in | 27.1 sq ft | Most bedroom base trim |
| Tall baseboard | 5.25 in | 43.8 sq ft | Older homes and feature rooms |
| Door casing | 2.25 in | 18.8 sq ft | Door and closet surrounds |
| Crown molding | 4.25 in | 35.4 sq ft | Ceiling perimeter molding |
| Surface condition | Finish coats | Primer coats | Planning note |
|---|---|---|---|
| Same color refresh | 1 to 2 | 0 | Use 350 to 400 sq ft/gal |
| Darker or glossier change | 2 | 0 to 1 | Use 325 to 375 sq ft/gal |
| Bare wood or MDF | 2 | 1 | Primer prevents uneven sheen |
| Patched or stained trim | 2 | 1 to 2 | Spot prime stains first |
| Container | Volume | Coverage at 350 sq ft/gal | Trim planning use |
|---|---|---|---|
| Half pint | 0.0625 gal | 22 sq ft | Small touch-up reserve |
| Pint | 0.125 gal | 44 sq ft | Closet trim or reserve |
| Quart | 0.25 gal | 88 sq ft | Most single-room trim jobs |
| Gallon | 1.00 gal | 350 sq ft | Large rooms or whole suites |
| Project | Linear length | Profile | Typical finish paint |
|---|---|---|---|
| 10 x 12 bedroom base | 44 linear ft | 3.25 in base | About 1 quart |
| 12 x 14 bedroom base | 52 linear ft | 3.25 in base | About 1 quart |
| Two door casings | 68 linear ft | 2.25 in casing | About 1 quart |
| 15 x 20 living room base | 70 linear ft | 5.25 in base | 1 to 2 quarts |
Trim gets painted last; it’s an afterthought to wall paint. Homeowners pick a color on instinct and grab a gallon at the store. They think their baseboards requires just as much paint as surrounding drywall, but then they run out halfway through the job or come home with leftover gallons of waste.
But here’s the truth: Painting trim is a geometry problem masquerading as a decorating exercise. It isn’t a matter of coating large, flat surfaces. It’s a maze of skinny strips and pointed corners and all kinds of tricky shapes that hide it’s true size from casual inspection. That concealed space use up more paint than you’d think.
Why Measuring Trim Is Harder Than You Think
After inputting the linear footage and profile type, it’s left to the calculator to do the work for you; no need to worry about coefficients and conversions. However, as any homeowner knows, length is deceiving. Two pieces of molding may be the exact same length but they have very different surface areas (for example), a piece of 3” standard baseboard has far more surface area than a narrow shoe molding! By allowing you to choose from common profiles such as crown, casing, etc., the calculator takes this into consideration and changes to match. The different face widths of each profile affects how much paint you use per foot.
The edge count is what gets most people. If you paint the inside of a chair rail or a door casing, you’re not usually just going to paint the front of that thing, right? More likely, you’ll cut in both sides and maybe even the top lip. That adds some pretty substantial square feet (especially on long molding runs). The good news: the calculator lets you show if you want to paint the face only or have a single or double exposed edge. Why does this matter? Because on complicated moldings, a small edge can represent 20 percent or more of total paintable area. Don’t forget about it, and you may find yourself out of paint when it’s time for final coat.
Your paint application method alters the math too. For instance, spraying may look like an efficient way to go, but it produces overspray that doesn’t hit the wall. Brushing gives you control. However, it can load the hairs with extra paint. This paint doesn’t make its way onto the trim, but into the tray instead. These losses is accounted for by the tool as well so you’re estimating what actualy went on versus what would of if everything was done perfectly.
And then there’s the detail factor. Ornate profile add-ons such as crown molding will hold more paint than flat board due to all the little shadows where the paint gets to settle in. It is a small thing, but it adds up fast around a perimeter like a ceiling.
And then there’s primer strategy. You could potentially skip it altogether when refacing your existing painted trim, or just spot prime. With bare MDF (or other patched drywall) though, you’ll need to go ahead and put down a full coat of primer. This keeps the shine even and prevents stains from bleeding through. The calculator separates primer needs from finish paint so you can buy the right amount of each without mixing them up in your head.
It also adds a buffer for waste and touch-ups. Primer and allows you to purchase exactly as much of each as needed, no more, no less. Without confusing the two inside your brain. It also includes a little wiggle room for touch ups and other waste. That spare stash should be stored tightly closed. A half-used quart of dried paint is worthless. However, a few containers of fresh paint stashed away in an air-tight container will let you patch scuffs months from now without having to buy another whole gallon.
To put all this in perspective, I looked to the reference table on the page which details the actual amount of space 100 linear feet covers depending on width. For instance, you can see that a basic piece of crown molding requires substantially more material (because it’s wider) and is typically more ornate than a similar-sized piece of baseboard, so that will be reflected in how much paint you use too! So, if you have a large project don’t underestimate!
But all in all, estimating correctly saves us from the most dreaded DIY problem: running out of paint mid-project in the middle of a room. If you take your time, measure exactly, and account for depth, edges, and coats, you’ve moved from guessing to planning. You’ll spend an additional 5 minutes getting your figures correct, which will save you HOURS in frustration down the road. We want enough paint to complete our project cleanly without being wasteful.