3 Size Tile Pattern Calculator
Plan a three-size modular floor or wall field using room dimensions, A/B/C tile sizes, pattern ratio, grout joint, cut band, straight or diagonal setting, waste allowance, and box coverage.
Load a room-and-pattern starting point, then adjust the tile sizes, box coverage, or cut assumptions to match the cartons and layout drawing in front of you.
Layout breakdown
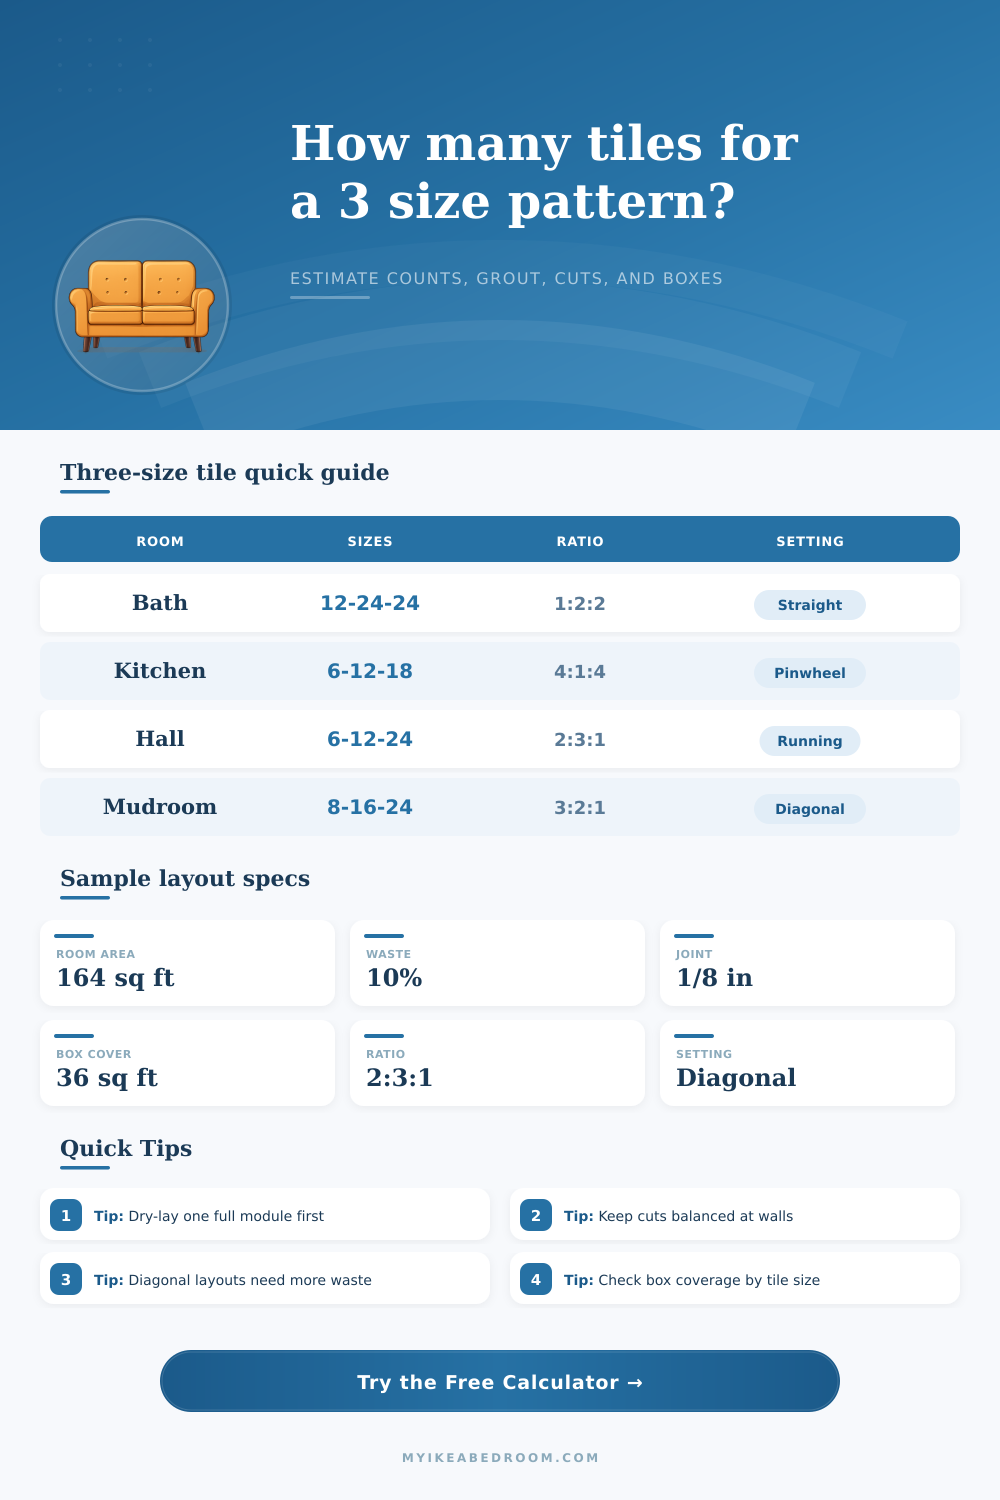
Modular tile floors use three size of tiles in a specific ratio. A modular floor is more complex than a grid floor because there are three different dimension to calculate for the tiles. If you dont calculate the proper amount of small tiles or the proper amount of large tiles, you will not have enough to complete the floor.
Find the number of modules in the total square footage of the area to be tiled. Multiply that by the ratio of each tile in the module. Using a calculator will help you calculate the proper numbers of tiles needed for the job.
How to Figure How Many Tiles You Need for a Modular Floor
The ratio of the three sizes of tiles will determine the visual aspect of the floor. A balanced ratio use a mix of squares and rectangles to create a more traditional floor. A pinwheel floor feature use a single small tile in the center and places the larger tiles around it in a rotating fashion.
A running mix of tiles is used to fill in a narrow area with long planks of tiles. Use the reference tables to determine the proper ratio for your desire floor. Another consideration in planning the floor is the perimeter of the area to be tiled.
In a grid pattern, any cut tiles to the perimeter of the room are easy to calculate. In a modular floor, the calculation of the perimeter is more difficult. There is a perimeter cut zone for each edge of the room to be tiled.
This area of the floor require the cutting of floor tiles to the perimeter of the room. The larger the percentage of the total area of the room that must be covered by this cut zone, the more tiles will be wasted. Small rooms require a higher percentage of the floor to be comprised of the cut perimeter zone.
Another issue to consider is the angle of installation of the tiles. If you install the floor in a straight set, it is relatively easy to calculate the number of tiles that will be needed. For diagonal installations, though, more tiles will be wasted in the cutting of triangular offcuts of the tiles.
These triangular offcuts may not be useful in other areas of the room to be tiled; thus a setting multiplier will be used in the calculation of the number of tiles to be purchased for the job. Another issue to consider is the size of the grout that will be used between the modular tiles. If there are many small tiles of the same size, there will be more linear feet of grout joints.
This will slightly reduce the number of tiles that are needed to be purchase for the job. It is important to understand the area of the grout face to determine the amount of grout that will be needed to complete the job. If the estimation of the amount of grout is incorrect, its possible that you will run out of grout before the job is complete.
It is important to include a waste allowance in the calculation of the numbers of tiles to be purchased. A ten percent waste factor is typically used in tiling jobs. An additional percentage of waste should be included if the job includes a diagonal installation.
Any job that includes notches in the flooring, such as a closet or bump out in the wall, will require an additional percentage of tiles to be purchased. It is helpful to purchase a few extra tiles in case the manufacturer changes the dye lot of the replacement tiles for the job. Use the box coverage input to round the number of tiles to the nearest full carton of tiles.
Before the installation of the modular tiles, perform a dry lay of the first full module of tiles. This dry lay will allow you to see how the grout joints will appear. Additionally, it will allow you to ensure that the ratio of the tiles appears to be correct in the room in which the floor will be installed.
Use the custom ratio option to alter the number of large or small tiles in the module. When planning a modular floor, account for each of these elements to determine the proper amount of floor material to purchase for installation. After you have accounted for all the elements of a modular floor, you can prepare to purchase the materials.
When buying the materials, ensure that they are the same product as those to be used in the installation. If the tiles are to be delivered in different sizes, they should match the sizes to be used in the project. When purchasing these products, you can use the tile calculator to determine the amount of each type of material to purchase.
When purchasing modular floor tiles, ensure that any waste allowance are included in the calculations. When placing the order for the modular floor materials, use the box coverage input when determining the number of boxes to order for the job. Before beginning installation, perform a dry lay of one full module of tiles.
This dry lay will allow you to inspect the module and ensure that all calculation are correct. Additionally, it will allow you to check that the modular floor tiles will look good in the area to be tiled. The dry lay will also allow you to ensure that the grout will allow the different sized tiles to adhere properly to the floor.
If you experience any issue during the dry lay, you can correct the problem before installing the modular floor. Use the ratio input to change the number of large or small tiles in the module. When performing a dry lay of the first module of modular tiles, you will be able to ensure that there are the correct number of each type of tile for the job.
The dry lay is an essential step in the modular floor installation process. Once the dry lay is complete, you can begin to install the modular floor.