Tieback Placement Height Calculator
Calculate the holdback height, distance below the rod, side offset, and balance check for curtain tiebacks before drilling into trim or wall.
Your tieback placement
Enter measurements and calculate to see mounting notes.
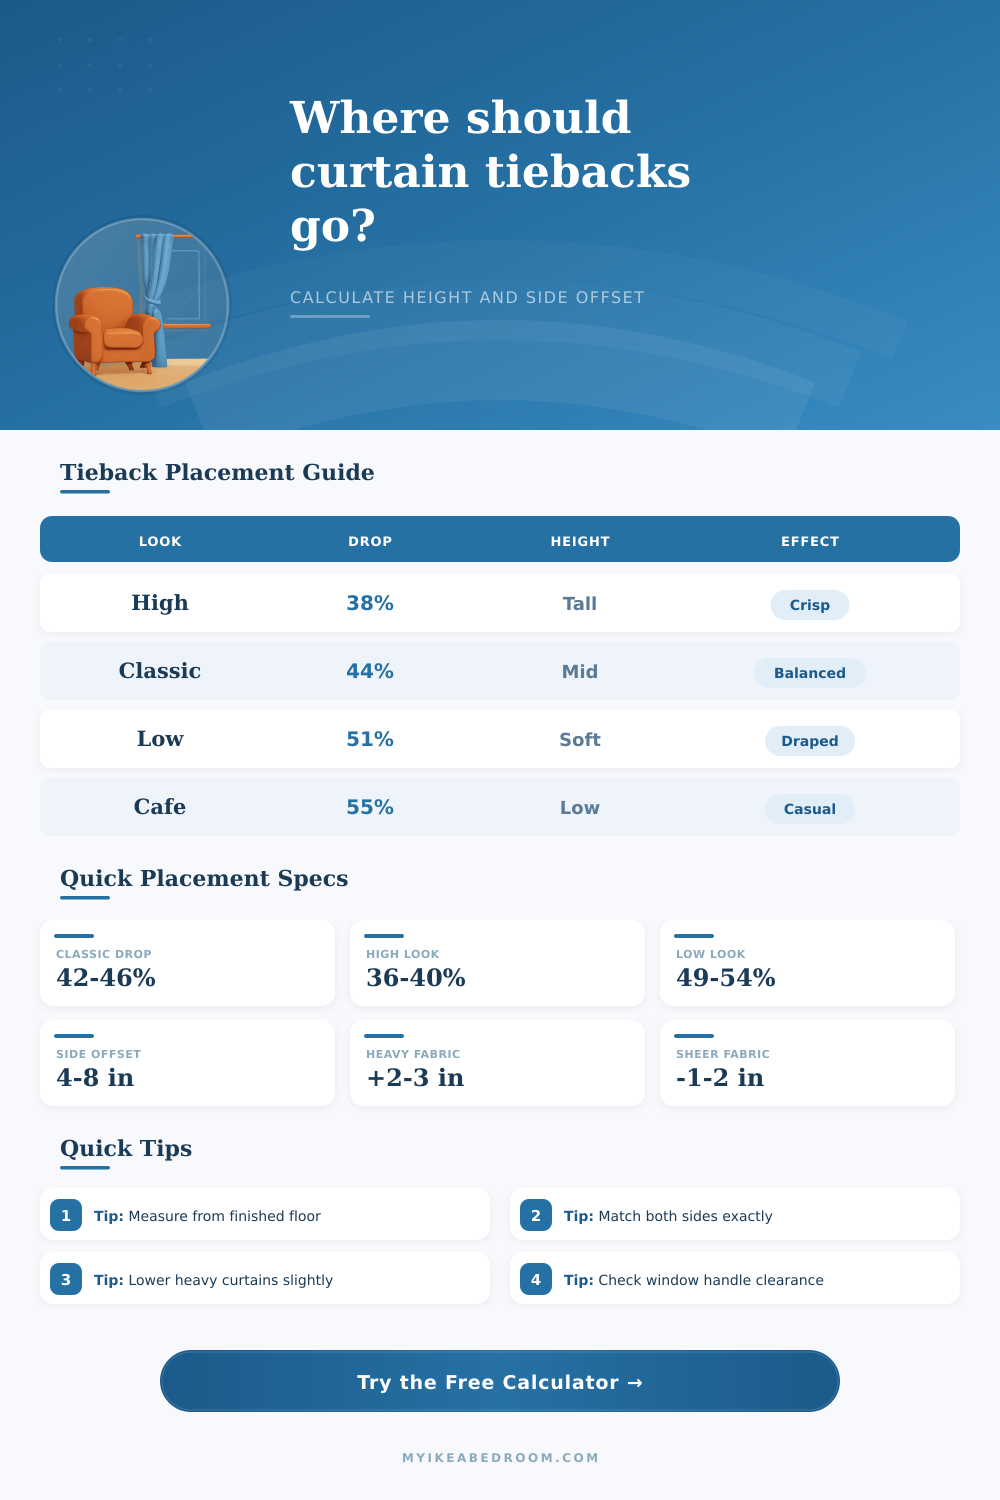
| Look | Starting drop from rod | Best for | Visual result |
|---|---|---|---|
| High and tailored | 36% to 40% of curtain drop | Shorter rooms, sheers, narrow windows | Lifts the eye and keeps fabric crisp |
| Classic balanced | 42% to 46% of curtain drop | Most floor-length drapes | Natural hourglass without looking low |
| Low relaxed | 49% to 54% of curtain drop | Wide windows and soft linen panels | Creates a longer swoop and softer stack |
| Puddle or formal | 46% to 52% of curtain drop | Puddle panels and formal bedrooms | Keeps upper fabric calm and lower fabric full |
| Apron or cafe | 50% to 58% of curtain drop | Short panels, cafe curtains, kitchens | Centers the tieback on the visible panel |
| Fabric type | Height adjustment | Side offset adjustment | Reason |
|---|---|---|---|
| Sheer or voile | Raise 1 to 2 inches | Keep close to trim | Light fabric collapses into a small bundle |
| Light cotton or linen | Use calculated height | Standard offset | Easy to shape without heavy sag |
| Medium drapery | Use calculated height | Add about 0.5 inch | Needs a little room for the gathered panel |
| Heavy blackout or velvet | Lower 2 to 3 inches | Add 1 to 2 inches | Thicker folds sit better with more support |
| Interlined thermal | Lower 2 to 4 inches | Add 1.5 to 2.5 inches | Bulkier fabric needs a wider sweep path |
| Mounting surface | Recommended offset | Check before drilling | Calculator treatment |
|---|---|---|---|
| Wall outside trim | 4 to 8 inches past glass or casing | Studs, anchors, and furniture clearance | Standard placement |
| On side trim | 1 to 3 inches from inner trim edge | Trim width and screw depth | Limits offset to protect casing |
| Inside return | Keep projection shallow | Blind handles and window operation | Reduces offset and warns about crowding |
| Near wall corner | Use the smaller available side offset | Finial, rod return, and side wall | Caps the offset for corner clearance |
We all do it: Hang a curtain roughly toward center of the window, hoping it will fall nicely. It rarely does. Without a plan, curtains never seem to work well. Often, placement of those holdbacks make the difference between a half-done looking room and one that’s truly finished.
Once you know how much the curtain panels drop and the height of the rods they’re meant to hang from, the rest is simply geometry. Plug those numbers into our curtain calculator and it transforms a vague notion of “about here” to a precise number you can draw on the wall with a pencil. The guesswork is gone, it’s physics and proportion.
How to Place Curtain Holdbacks Correctly
Here’s where the magic begins: If you know that heavier fabrics (velvet) behave very differently than airy ones (linen), and if you also know their drape, then you understand the trick is not simply aesthetics; but rather weight distribution. In other words, choosing your curtain weight in the tool isn’t just organizing materials by type. It’s instructing the system on how much fabric there is, what the knot will look like, and where it will be located. Thick fabrics produce heavy puffs of material that knot tightly and pull down, right? So logic changes height accordingly, adjusting it slightly lower to accommodate heaviness, without overstressing the hem or mount. On the other hand, lighter sheers collapses into a small puff that looks best supported a bit higher.
Why does this matter? This is why most tieback looks so off-balance or overstrained. But what about the visual silhouette? Before you drill your first hole, you’ve got to choose where you want that to be. Generally speaking, a classic balanced look are shaped like an hourglass. It feels familiar and naturaly. Pulling that point up higher draws eye upward. This creates a sharper, more tailored look and makes room feel taller. An inch or two difference can change the whole mood of the window. The tool does this for you by mapping out those percentages, converting unclear style goals into real vertical measurements. Pick the vibe, it gives you the coordinates.
Height isn’t everything, nor does anyone mention how important side offset can be. Mounting the holdback flush to the window trim causes fabric to bunch up on the frame, blocking more light than needed. Pull it back several inches and boom, that very same panel now flows smoothly away from glass. Our calculator takes into account the width of the panel and length of rod extension to recommend an offset where the drapery clears the sill while still providing adequate open space to see through. This is especially helpful when you have wide panels with large amounts of fullness that need extra clearance so they don’t hit wall or furnitures while swinging open.
Consider the practical details of your own windows as well. Are they mounted directly on the wall, or is there some sort of casing in between? Is the width of that casing large enough to fit screws? Will you be hanging on that casing vs. The actual wall? Because there are limits to how far off you can place the screw (depending upon what mounting option you choose), the tool will limit those offsets if you opt for a trim-mounting solution, it won’t let you plan something that just wouldn’t of worked structurally. Finally, remember that there may be things like built-in shelving, light switches, or window handles that could gets in the way. Find out about conflicts on paper, not after you’ve made holes in the plaster.
Afterwards, be careful to transfer those numbers to either side of the window (and use a level!). Floors aren’t usually perfect, and rods will start to sag a bit as they age. To ensure both tie backs is at eye-level with each other in relation to the rest of the room, measure “up” from the finished flooring. Then place the panel where it should be and open-close a few times to see how it feels. Does it pinch the fabric? Is the sweep looking wonky? Make a small tweak now and you’ll thank yourself later.
A well-measured window treatment is comfortabley and looks like it was always there… not an afterthought, but part of the plan. With clean lines and proper proportions, it ties all of the design elements together.