Stencil Repeat Quantity Calculator
Estimate stencil placements, columns, rows, sheets, paint volume, registration marks, and cleanup pauses for repeating wall, floor, furniture, and border patterns.
Full stencil repeat breakdown
| Stencil style | Common repeat size | Open area used | Planning note |
|---|---|---|---|
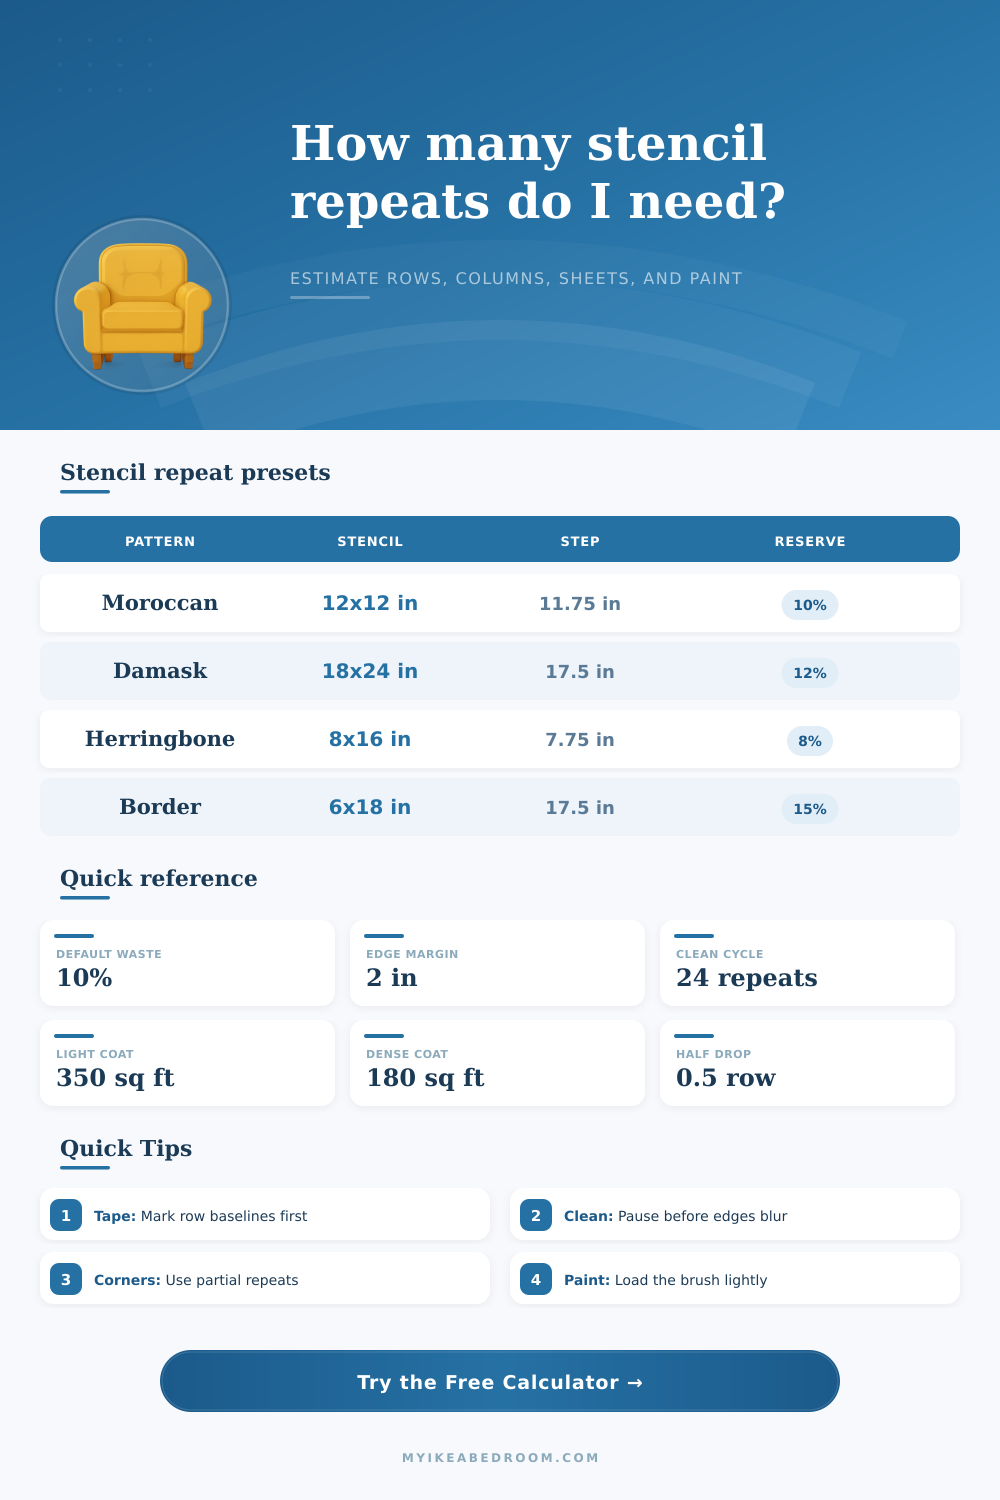
| Moroccan tile stencil | 12 x 12 in | 28% | Works as a straight grid with small overlap. |
| Large damask stencil | 18 x 24 in | 38% | Often needs plumb centerline and half motifs at edges. |
| Herringbone stencil | 8 x 16 in | 24% | Rows need frequent registration checks. |
| Border strip stencil | 6 x 18 in | 22% | Count by linear run and allow end caps. |
| Cement tile floor stencil | 16 x 16 in | 30% | Floor work benefits from extra cleaning pauses. |
| Leaf half-drop stencil | 14 x 20 in | 34% | Alternate rows shift half a repeat. |
| Repeat step | Repeats per 8 ft width | Repeats per 10 ft width | Repeats per 12 ft width |
|---|---|---|---|
| 6 in border step | 16 columns | 20 columns | 24 columns |
| 8 in small tile step | 12 columns | 15 columns | 18 columns |
| 11.75 in tile step | 9 columns | 11 columns | 13 columns |
| 15.5 in floor step | 7 columns | 8 columns | 10 columns |
| 17.5 in damask step | 6 columns | 7 columns | 9 columns |
| 23.5 in mandala step | 5 columns | 6 columns | 7 columns |
| Surface type | Suggested reserve | Cleaning rhythm | Registration priority |
|---|---|---|---|
| Simple accent wall | 5% to 10% | Every 24 to 30 repeats | Top baseline and centerline |
| Full room walls | 10% to 15% | Every 18 to 24 repeats | Corners and starting wall |
| Painted floor stencil | 15% to 20% | Every 12 to 18 repeats | Chalk grid and traffic path |
| Furniture panel | 5% to 10% | Every 12 to 20 repeats | Panel center and reveals |
| Border runner | 12% to 18% | Every 20 to 30 repeats | End caps and level line |
| Common project | Typical area | Repeat family | Expected quantity |
|---|---|---|---|
| Bedroom feature wall | 100 to 140 sq ft | 12 in tile or leaf | 90 to 140 placements |
| Powder room walls | 180 to 260 sq ft | Damask or half-drop | 80 to 160 placements |
| Small floor stencil | 70 to 110 sq ft | 16 in cement tile | 45 to 80 placements |
| Chair rail border | 28 to 60 linear ft | 6 x 18 in strip | 20 to 45 placements |
| Dresser drawer fronts | 12 to 25 sq ft | 9 x 12 in panel | 16 to 40 placements |
Straight grid
Fastest to calculate. Every row starts on the same vertical line, so columns multiplied by rows gives the core repeat count.
Half-drop
Alternate rows shift half a stencil width. The calculator adds offset marks and a small reserve for partial edge motifs.
Border strip
Uses width as a linear run and height as the number of border bands. End caps and corners raise the reserve.
Panel motif
Best for furniture and centered features. Count stays lower, but alignment marks per repeat matter more.
The room gets quiet when you put down your first line of stencil patterns; it feels like success. Then, stepping back, you see the grid has shifted slightly, ever so slightly, off its path toward the corner. This is how most projects comes off the tracks. It is not because someone didn’t have enough style, but because they didn’t calculate how many repeats there would be.
This tool will do the math for you. It turns dirty wall measurements into precise amounts of paint, placement numbers, and cleanings in between. This way, you can get on with the doing instead of the counting.
How This Stencil Tool Helps You Plan
The trouble with doing repeats is that nothing are truly a straight rectangle, meaning every wall isn’t cleanly divisible into even parts. There’s a ceiling, there’s a baseboard, there’s a window… the list goes on and on. So, entering your width and height doesn’t mean the tool is dividing those numbers. It takes into account the margin around the edge, since obviousy no stencil is going to touch up against a trim line without being obvious that it’s been cut out. The two inch margin I’m showing here as input represent the physical reality of working with foam brushes on uneven surfaces. Without taking this margin into account, your last repeat will be cut in half and look awkward.
The other variable that makes all the difference between professional success and DIY doomsday is overlap. Unless your stencil design call for perfect straight lines, most designs should has some overlap (often a quarter inch) so it blends into a continuous pattern rather than leaving bare spot in one area or a doubled-up line with paint buildup. This overlap will also affect the actual distance you’ll move across the wall. For instance, if you’re using a twelve-inch-wide stencil but overlapping every application a quarter inch, you’d really be making only eleven and three-quarter-inch steps across the wall. Sounds small, right? But on a ten-foot span, that’s the difference between a snug, crooked last motif and ending up at the start of the next column.
The paint estimates are also difficult, since how much goes on depends more on density than surface area: while both stencils may be the same size, applying them with a dense, high contrast roll will use far more paint then a lighter dry-brush stroke. It accounts for your choice of painting style and how many layer you use. It also accounts for clean-up cycles; if there’s dried-on paint on the sheet, it’ll clog up its tiny insides, ruining any further repeats. There’s no point in painting forever, you have to stop and wash the sheet after twenty-four placements or the edges will blur from built-up gunk and you’ll get frustrated. Pacing yourself beforehand helps avoid this by knowing when to take a break before it gets annoying.
The most truthful input is perhaps the reserve percentage. When we stencil in real life, we make mistakes. You drop your stencil. You slip with the brush. You suddenly notice a whole row is crooked. You’ll waste repeats. To account for these unavoidable human errors and not have to buy triple the amount of paint you need, add an additional ten to fifteen percent. This is perfectionist insurance.
The concept of aligning half-drop (and all grid) patterns are also enlightening. Half-drop patterns shift by alternating rows; it appears more organic than a straight grid, yet can be tricky without registration marks. This tool figures out those marks for you, leaving you plenty of time to tape down baseline or snap a chalk line, before any painting begins. It takes an otherwise messy process and makes it a more structured workflow.
This is the bottom line. Ultimately, stenciling is as much about logistics as it is about design. A good plan is what makes the beauty in the pattern come through. Front-load the math. Do the work ahead of time so there’s no worry of running out of paint, or losing your place on the last corner. Relax into the rhythm of placing everything and know that the grid won’t fail, so you can confidently remove your sheet. It should of been easier but now you are ready to begin.