Standing Desk Keyboard Tray Height Calculator
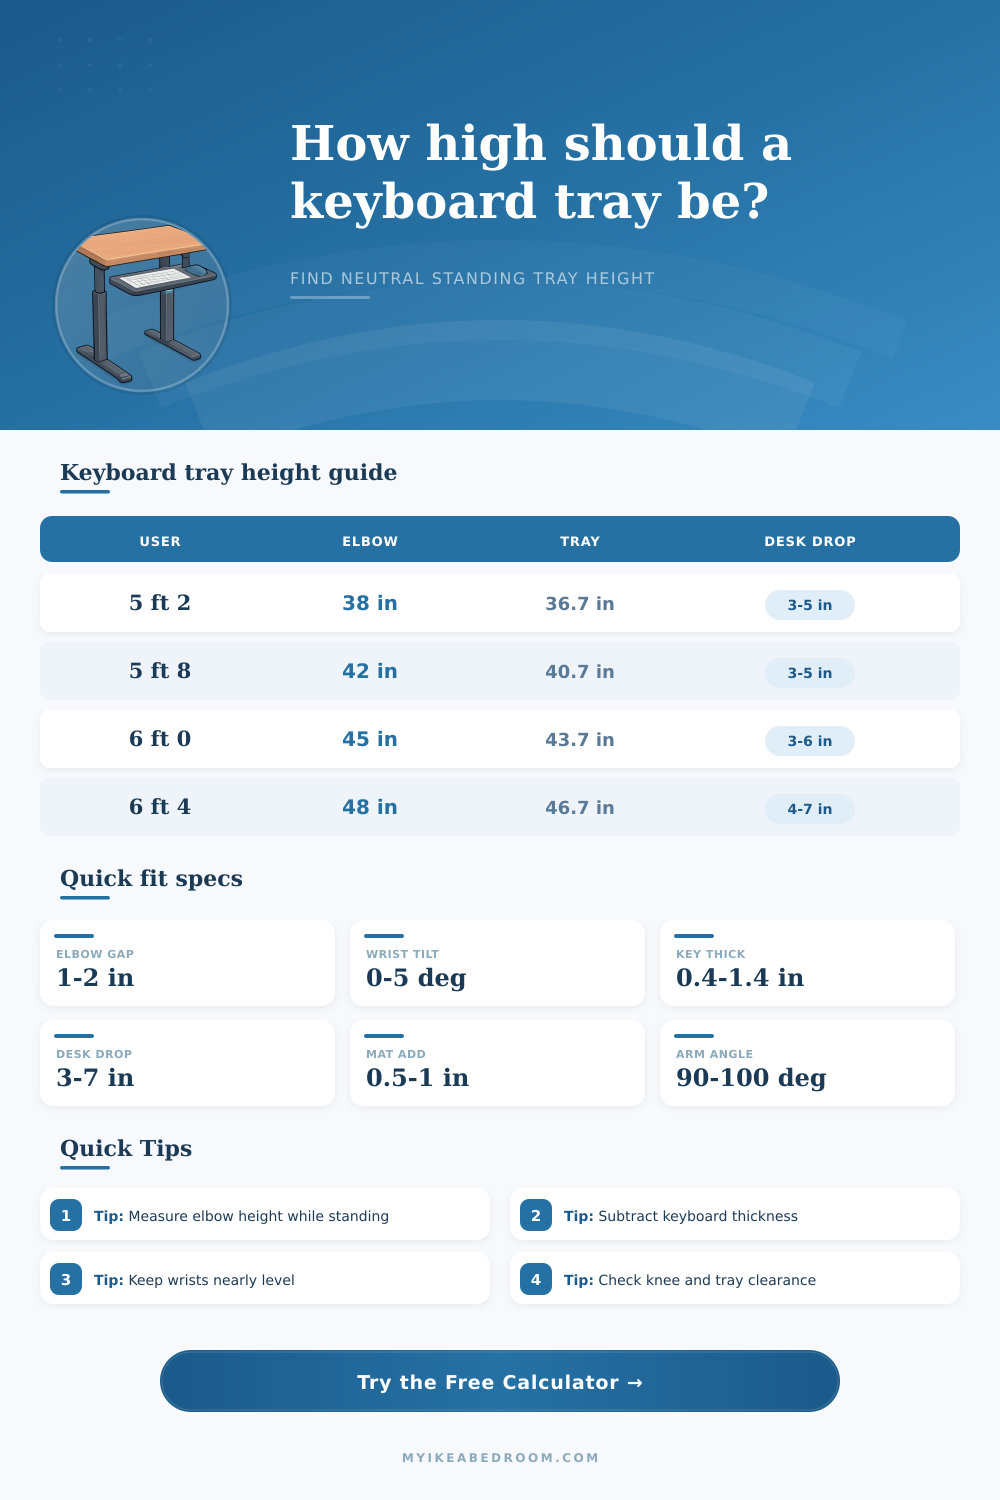
Calculate the keyboard tray surface height, keyboard top height, desk-to-tray drop, elbow gap, and monitor reference height for a standing workstation with neutral shoulders and wrists.
Choose the closest body, keyboard, and desk scenario, then adjust the exact measurements for the person using the workstation.
Neutral tray setup
Enter the workstation measurements to calculate a standing keyboard tray height that keeps elbows relaxed and wrists close to level.
Formula core: working elbow height minus posture gap minus keyboard top thickness, then rounded to the tray bracket increment.
Best check: after mounting, type for five minutes. Shoulders should stay dropped, elbows close to the torso, and wrists should not bend up toward the keys.
| User height | Estimated elbow height | Slim keyboard tray | Mechanical keyboard tray | Notes |
|---|---|---|---|---|
| 5 ft 0 in / 152 cm | 37 to 38 in | 35.5 to 36.5 in | 34.8 to 35.8 in | Many desks need a tray below the desktop. |
| 5 ft 6 in / 168 cm | 40.5 to 42 in | 39 to 40.5 in | 38.3 to 39.8 in | Common for a 42 to 44 inch desk top. |
| 6 ft 0 in / 183 cm | 44 to 45.5 in | 42.5 to 44 in | 41.8 to 43.3 in | Desktop may be close to tray height. |
| 6 ft 4 in / 193 cm | 47 to 49 in | 45.5 to 47.5 in | 44.8 to 46.8 in | Check desk lift range and monitor height. |
| Shared users | Average both elbows | Use midpoint minus 1.2 in | Use midpoint minus 2 in | Choose the lower setting if one user has shoulder tension. |
| Keyboard style | Typical top height | Tray surface offset | Wrist rest check | Best posture use |
|---|---|---|---|---|
| Low-profile compact | 0.35 to 0.65 in | Subtract about 0.5 in | Usually no rest needed | Minimal desk drop and close mouse reach |
| Standard membrane | 0.6 to 0.9 in | Subtract about 0.75 in | Keep rest near key front height | Most office trays and daily typing |
| Mechanical keyboard | 1.0 to 1.5 in | Subtract about 1.25 in | Rest may be useful but not too tall | Lower tray or negative tilt helps wrists |
| Split ergonomic board | 0.7 to 1.3 in | Subtract measured key height | Match palm pads to front edge | Shoulder-width placement and neutral wrists |
| Keyboard with thick pad | 0.9 to 1.6 in | Use higher of key or pad top | Avoid lifting palms above keys | Short typing sessions or soft wrist support |
| Desk condition | Good drop range | Watch point | Mounting note | Calculator signal |
|---|---|---|---|---|
| Desk too high for typing | 3 to 7 in | Tray must clear knees when seated | Use an adjustable rail or drop bracket | Good or Check |
| Desk already near elbow height | 0 to 3 in | Keyboard thickness can still raise wrists | Low-profile tray may be enough | Good |
| Desk lower than tray target | Negative drop | Tray would need to sit above desktop | Raise desk or use desktop keyboard surface | Review |
| Walking pad or mat | Add deck height | Elbow height rises with the feet | Measure on the exact standing surface | Recalculate |
| Shared workstation | 2 to 6 in | Midpoint may favor the taller user | Mark two bracket positions if possible | Compromise |
| Scenario | Elbow basis | Likely tray target | Secondary check | Adjustment priority |
|---|---|---|---|---|
| Small bedroom standing desk | Measured elbow | 36 to 40 in | Desk drawer and tray rail clearance | Low-profile keyboard |
| Home office daily typing | Measured elbow plus shoes | 39 to 44 in | Mouse tray same height as keyboard | Neutral shoulder position |
| Mechanical keyboard enthusiast | Elbow minus larger key height | 38 to 43 in | Wrist rest should not lift palms | Tray lower or negative tilt |
| Walking pad desk | Elbow on walking deck | 41 to 47 in | Stability and mouse reach | Slightly lower key top |
| Shared standing desk | Average of two elbows | Midpoint minus keyboard | Shoulder tension for shorter user | Two marked height presets |
Measure from the real standing surface. Shoes, an anti-fatigue mat, or a walking pad all raise the body, so the tray and desk should rise by the same amount.
Use the keycap top, not the tray board, as the posture reference. A thick keyboard can make a correct-looking tray feel too high once typing starts.
Let the mouse follow the keyboard. If the mouse surface is much higher or lower than the keys, one shoulder often lifts or reaches forward.
Keep a small adjustment range available. A half-inch bracket step is useful because fatigue, shoe choice, and task type change the comfortable height.
If you’re using a standing desk and finding your shoulders creeping up near your ears, chances are good that your keyboard tray sitting at an improper height. In many cases, the desk surface has been adjusted to be roughly elbow height, which sounds right in theory, but neglect to consider how much thicker the keyboard itself will make it. There should be space between your elbow and keycaps, rather than just empty space beneath them. This adjustment also safeguard your wrists from being stretched out in an unnatural position.
If your keys is positioned too high, then you will have to bend your wrists upwards to type, straining your tendons. This results in tired wrists as time goes on. The calculator does all the math for you. All you need to do is enter your own measurements (no more guesswork regarding conversions or coefficients). Once you input your standing elbow height, the calculator calculate the height of your keyboard deck plus the required clearance. It then subtracts that total too determine the true typing plane.
How to Set Your Standing Desk Height
So here’s the catch: What are we measuring? Measure yourself from the floor (with whatever shoes you’ll wear to work), and then stand naturaly, hands relaxed at your side. Your feet will be higher if you are barefoot or perhaps even lower if you wear high heels. If you’re going to sit typing in sneakers, add a few inches for the sole thickness. Half an inch sounds like nothing, but it all matter to the way you align yourself. And don’t forget about adding the height of any anti-fatigue mat you use. People often skip over these tiny layers which means they end up with a setup that feels ever-so-slightly off.
Then there’s the keyboard. Is it a chunky mechanical board with thick keycaps and tall switches? Or a thin laptop-style one set down well below it? To account for that, the tool ask how far away the tops of your keys are from the surface of the tray. What happens if you skip that question? Your tray will be too high because you assume the surface is flat, but there is actualy a couple of inches of vertical space here. That’s the bit most folks mess up on. They tinker till their elbows rests against the frame of their desk; without remembering that their fingers are now operating several inches above that mark.
In practice, the feel of the final number depends on your target posture as well. Some folks prefer a neutral wrist position with forearms perfectly level. Others prefers a little more relaxed shoulder posture by having their arms sit on a slightly lower tray. With this style option, the calculator adjust the vertical gap to fit. For those who use a split ergonomic keyboard, another consideration is height of the wrist rest. Ideally, your palms will be resting comfortabley but not too high relative to your typing fingers. This way, there’s an even distribution of tension in the forearms.
There are compromises that come with shared work stations as well. For example, if you share a desk with someone much taller or shorter than you, setting it at the perfect elbow height for one person will just frustrate the other. The best compromise is typically to settle in the middle where neither user gets a perfect fit, but both users gets something close enough. Strained shoulders are worse then slightly awkwardly positioned elbows, so it’s better for both users to be a little off than for one to be perfect and the other to strain. Marking out two positions on the rail will help make it easy to switch back and forth without needing to measure each time.
To see if this works in real life: Do the numbers make sense? Does the mouse roughly match the height of the keys on your keyboard? You don’t want it much higher or lower. If you do, one shoulder will reach out or sit too high or low which defeats the point of the ergo setup. So keep a narrow range of adjustability in mind when selecting hardware. Half an inch of tweak-able space in your tray can go a long way.
That’s all it is: maintaining a posture which allows gravity to assist with your body instead of fighting it. If your arms, wrists, and elbows is aligned neutrally, typing becomes easy and painless. The desk falls out of consciousness. Neutral, seamless; that’s good ergonomic design. It is not about high-end gadgets or equipment but about making sure the distance between your seat and desk is right so you can relax into a dropped-shoulder posture and let it settle. You should of checked the measurements before buying any furnitures.