Stacked Floating Shelf Spacing Calculator
Plan two to five floating shelves with usable vertical gaps, bottom-edge wall marks, top-limit clearance, side balance, bracket inset, and anchor counts before drilling.
Choose a real wall layout, then adjust shelf count, object height, shelf thickness, wall limits, and bracket rules.
| Shelf use | Typical item height | Clear gap target | Best shelf count |
|---|---|---|---|
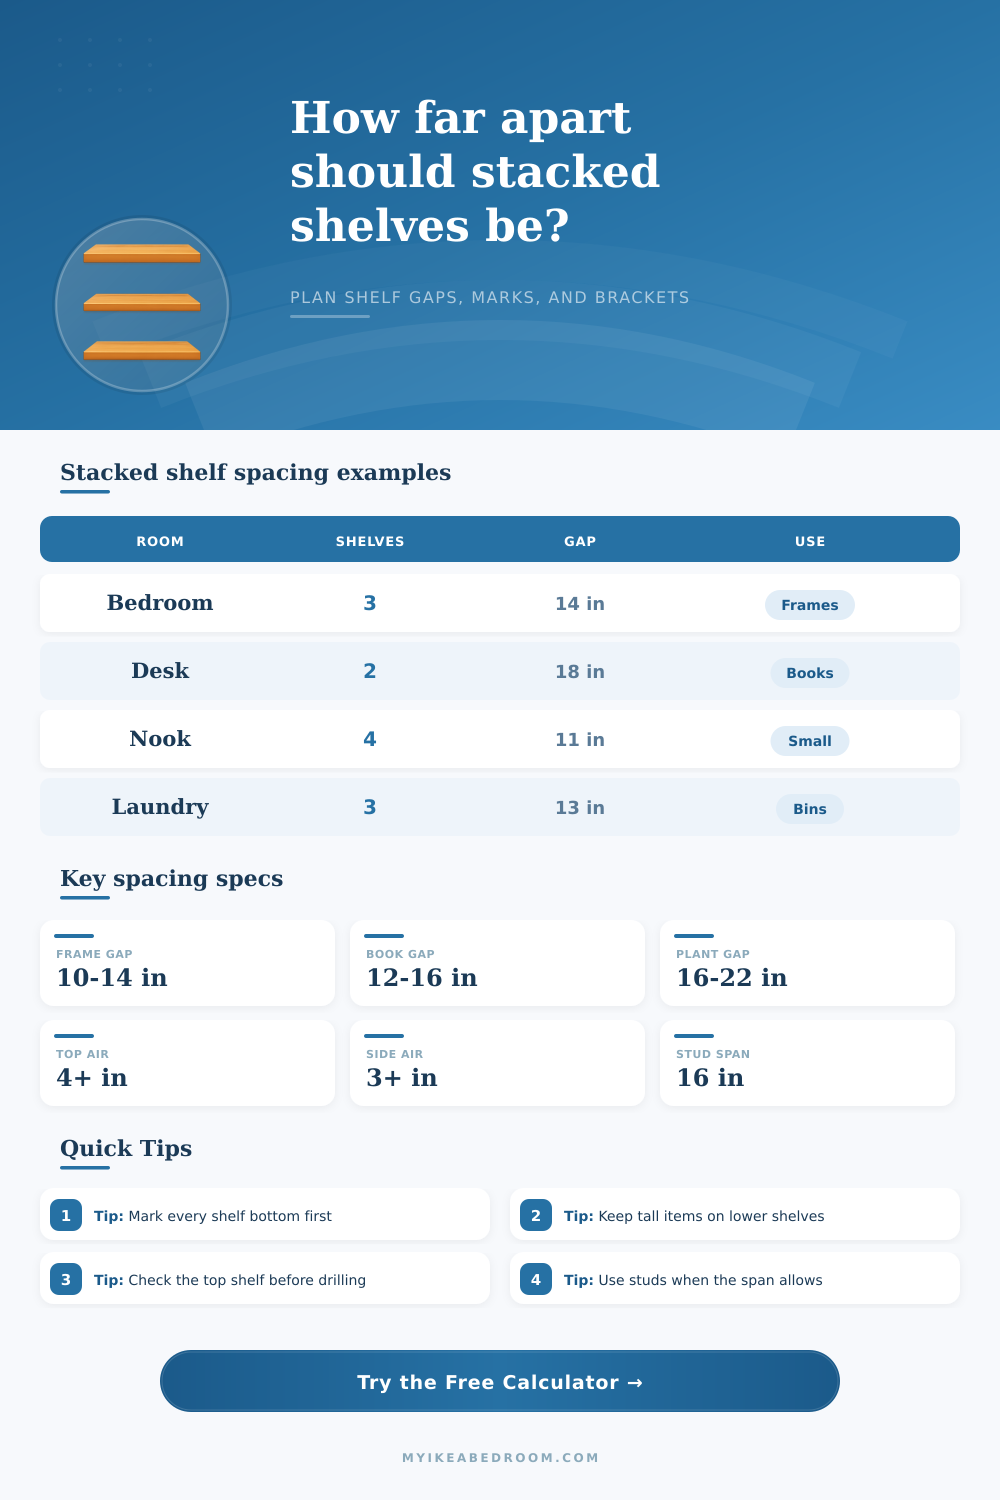
| Small framed photos | 6 to 9 in | 10 to 14 in | 3 or 4 shelves |
| Novels and decor books | 8 to 11 in | 12 to 16 in | 2 or 3 shelves |
| Storage bins or towels | 10 to 13 in | 13 to 18 in | 2 or 3 shelves |
| Plants, vases, speakers | 12 to 18 in | 16 to 22 in | 2 or 3 shelves |
| Location | Lowest shelf bottom | Common stack range | Watch point |
|---|---|---|---|
| Above desk | 52 to 60 in | 2 shelves | Keep headroom over monitors |
| Above dresser | 42 to 50 in | 3 shelves | Leave space for mirror or lamp |
| Beside bed | 30 to 42 in | 2 or 3 shelves | Clear pillows and wall lights |
| Entry or laundry | 48 to 58 in | 3 shelves | Keep lower hooks usable |
| Shelf length | Usual anchors | Inset range | Center support note |
|---|---|---|---|
| 24 to 30 in | 2 points | 4 to 6 in | Often one left and one right point |
| 31 to 48 in | 3 points | 5 to 8 in | Add a center point for flatter shelves |
| 49 to 72 in | 4 to 5 points | 6 to 10 in | Match hidden rods to studs when possible |
| 73 in and wider | 5+ points | 8 to 12 in | Use shorter spans for heavy displays |
| Preset layout | Shelves | Object zone | Wall condition |
|---|---|---|---|
| Bedroom dresser wall | 3 shelves | Frames around 10 in | Centered above furniture |
| Home office desk wall | 2 shelves | Books around 12 in | Higher bottom shelf |
| Kids reading nook | 4 shelves | Small books around 8 in | Compact vertical stack |
| Tall alcove stack | 5 shelves | Small display pieces | Narrow wall width |
Best for: clean stacked shelves with matching objects.
Use one clear gap from shelf to shelf and keep object heights similar.
Best for: taller objects low and lighter decor high.
Start with the calculator gap, then give the lowest opening extra room.
Best for: dressers, desks, nightstands, and media units.
Center the shelf stack over the furniture, then verify side clearance.
Best for: heavier books, jars, speakers, or deep shelves.
Allow anchor spacing to guide bracket positions while preserving the shelf gap.
Mark shelf bottoms first: Bottom-edge marks make the stack easier to check with tape on the wall because every pitch measurement starts from the same visible shelf reference.
Test the tallest object: Place the tallest item in the lowest or middle opening before drilling the upper shelf so the final stack still has usable hand clearance.
To achieve the proper spacing for a stack of float shelves, you must calculate the gaps between the shelves prior to begin the installation process. Many people attempts to achieve the proper spacing between the floating shelves by looking at the wall where the shelving will be installed and estimate the gaps between the shelves. However, by estimating the gaps between the floating shelves, you will likely encounter installation error in that the objects you intend to place on the shelves may be too tall for the space between the floating shelves.
If the gaps between the floating shelves are too small for the tallest objects you plan to feature, those objects will touch the floating shelves above them. Therefore, prior to installing the floating shelves, you must account for the height of the tallest objects you will feature on the floating shelves and the thickness of the floating shelves themselfs. The calculator provided in this article will allow you to input various measurements of your floating shelf installation to calculate the proper spacing between the floating shelves.
How to Measure Gaps Between Floating Shelves
The measurements that you will need to input into the calculator are the total number of floating shelves that will be installed, the height of the tallest object that will be featured on the shelves, and the amount of clearance that you would like to leave above the tallest object on the floating shelves. The calculator will use these three measurements to calculate the pitch of the floating shelves. The pitch is the distance that you will measure between the bottoms of each individual floating shelf.
In addition to determining the pitch of the floating shelves, you will also need to consider the thickness of the floating shelves. The thickness of the floating shelves will take up some of the height that is available for the shelves. When you install the floating shelves, the total height of the stack of floating shelves will be more greater than the depth of the gaps between the floating shelves.
The calculator accounts for the thickness of the floating shelves so that the mark that you will make on the wall indicate where the floating shelves will be installed. Another measurement that must be considered prior to installing the floating shelves is the amount of side clearance that is required for the floating shelves to be accessible. For instance, if you are to install the floating shelves adjacent to an object like a dresser, you must calculate the side clearance so that people can pass by the floating shelves.
The calculator will allow you to input the width of the wall and the length of the floating shelves so that you can determine if the side clearance is sufficient for the installation site. The dimension of the floating shelves determines the placement of the brackets that will be used to install the floating shelves. The deeper and longer the floating shelves are to be made, the more number of fasteners that will be required to install the shelves.
The calculator will determine the number of anchor points for the floating shelves based off the length of the floating shelves and the maximum distance between the fasteners. The position of the bottom edge of the lowest floating shelf must be decided prior to installing the remaining floating shelves. The position of the bottom edge of the lowest shelf will determine the position of all of the remaining shelves.
If the position of the bottom edge of the lowest shelf changes, the positions of all of the other floating shelves will change as well. The calculator will indicate the position of the top floating shelf so that you can ensure that the floating shelf does not come into contact with the ceiling or any lighting fixture that may be located in that area. Many individuals that install floating shelves make the mistake of making all of the gaps between the shelves of the same size.
An alternative approach to the spacing of the floating shelves is to use a graduated technique in which the gaps between the shelves are of different sizes along the shelves. For instance, you can use the calculator to design your floating shelves with larger gaps at the bottom of the shelves as compared to the gaps at the top of the shelves. The calculator allows you to change the height of the objects and the clearance that will be provided above them so that you can test a graduated method for your floating shelves.
The article provides a series of reference tables that list typical measurements for the gaps between floating shelves. For instance, the reference tables include the heights of the tallest objects for items like framed photos, books, and plants. In most instances, the height of the tallest objects in framed photos will be less than the height of the tallest objects in plants.
Thus, the tallest objects in plants will require a more greater depth for the gaps between the floating shelves. However, the dimensions in these tables dont have to be followed for the installation process. Instead, the calculator allows you to use your own measurements for the tallest objects on the shelves.
By using your own measurements, you can ensure that there is gaps between the floating shelves that match the heights of the objects that you own. To properly install your floating shelves according to the calculations made with the calculator, you should follow a certain order in the installation process. The bottom edge of the lowest shelf should be determined prior to determining the pitch of the shelves.
Based upon the pitch, the position of the shelves laterally along the wall can be determined. Once you have determined these dimensions, you can mark the shelves on the wall using a level. After you have marked the shelves on the wall, you can perform the anchoring of the shelves and the installation of the floating shelves themselfs.
Actually, you could of done this faster if you had a plan. Many people dont realize how much work it takes. The furnitures also needs to be moved first.
You’ll want to be careful with teh placement. It is alot more difficult than it looks. The rooms size will affect how many shelves you can fit.
Just make sure you recieve all the parts before you start. It is a luxurios feeling when they are finished. The shelves length should match the wall.
You should of checked the wall first. Its important to be accurate. Its hard to fix mistakes later.
You shouldve used a level. The installer should steers you in the right direction. One of the most common errors is when a person uses a armchair as a measurement point.
You cant just guess. The shelves looks great when done right. The shelf’s mounting is key.
Dont forget the level. The wall’s surface must be flat. Most people think they can do it quickly, they cant.
Its a long process. The height of the shelves depends on your needs. You’re gonna love the result.