Spray Foam Insulation Calculator
Estimate spray foam board feet, cubic volume, kit count, R-value achieved, lift passes, and waste-adjusted material for cavities, stud bays, rim joists, and panels.
Pick a familiar cavity, then adjust the dimensions, foam type, target R-value, lift thickness, waste, and kit yield for your exact job.
Open cell foam
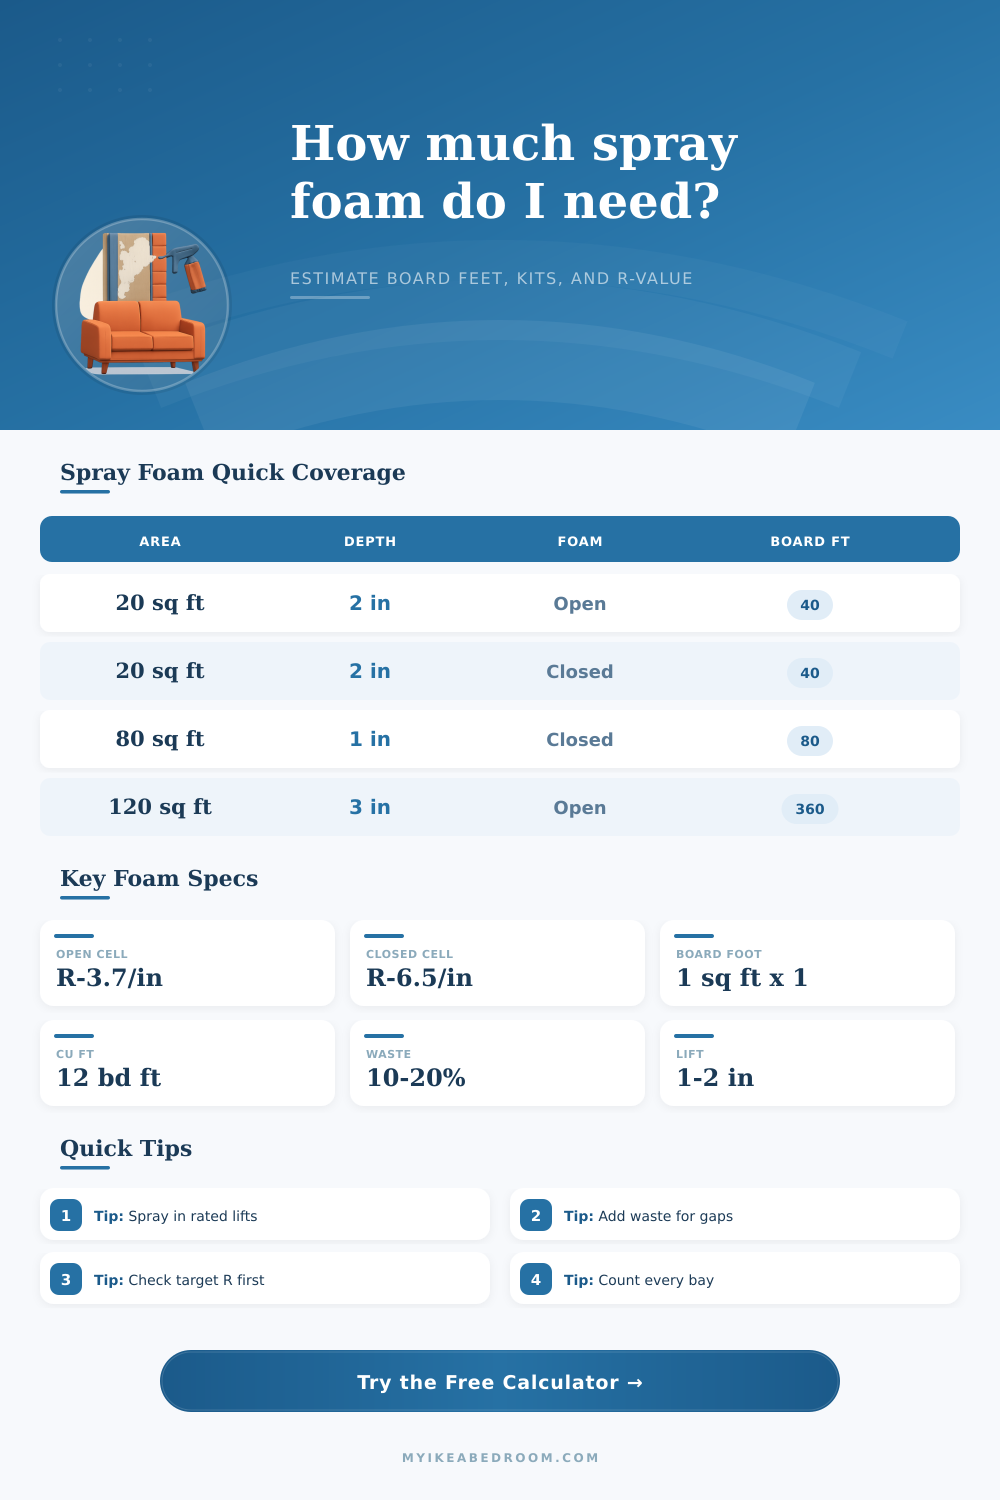
R-value: about R-3.5 to R-3.8 per inch.
Best fit: deeper cavities where air sealing and sound reduction matter more than high R per inch.
Closed cell foam
R-value: about R-6.0 to R-7.0 per inch.
Best fit: rim joists, shallow cavities, metal panels, and spaces needing more R-value in less depth.
Board-foot planning
Formula: square feet multiplied by installed inches.
Best fit: kit sizing, because most spray foam kits state rated yield in board feet.
Lift thickness
Formula: installed depth divided by maximum lift thickness.
Best fit: planning passes so each layer stays within the foam manufacturer's application limit.
| Foam type | Typical R per inch | Depth for R-13 | Depth for R-19 | Common use |
|---|---|---|---|---|
| Open cell spray foam | R-3.5 to R-3.8 | About 3.5 in | About 5.1 in | Stud bays, sound control, larger cavities |
| Closed cell spray foam | R-6.0 to R-7.0 | About 2.0 in | About 3.0 in | Rim joists, shallow spaces, metal panels |
| Hybrid flash and batt | Depends on layers | Foam plus batt | Foam plus batt | Air seal first, then add cavity insulation |
| Air sealing bead | Not rated alone | Use as seal | Use as seal | Cracks, seams, penetrations, small gaps |
| Measure | Equals | Cubic feet | Liters | Use in calculator |
|---|---|---|---|---|
| 1 board foot | 1 sq ft at 1 in thick | 0.083 cu ft | 2.36 L | Basic spray foam yield unit |
| 12 board feet | 1 sq ft at 12 in thick | 1.00 cu ft | 28.32 L | Volume cross-check |
| 100 board feet | 100 sq ft at 1 in thick | 8.33 cu ft | 236 L | Small kit planning block |
| 600 board feet | 600 sq ft at 1 in thick | 50.0 cu ft | 1416 L | Large kit planning block |
| Project | Typical area | Typical depth | Foam type | Planning note |
|---|---|---|---|---|
| Attic rim joist run | 15 to 35 sq ft | 2 to 3 in | Closed cell | Many small pockets increase waste. |
| Wall stud bay group | 80 to 160 sq ft | 3 to 5.5 in | Open cell | Count each clear bay separately. |
| Garage door panel | 60 to 120 sq ft | 0.75 to 1.5 in | Closed cell | Keep depth even to avoid bulges. |
| Crawlspace band joist | 20 to 55 sq ft | 2 to 3 in | Closed cell | Irregular framing usually needs extra waste. |
| Small gap sealing | 2 to 12 sq ft | 0.5 to 1 in | Closed cell | Use a high waste factor for starts and stops. |
| Installed depth | 1 in lift | 1.5 in lift | 2 in lift | Why it matters |
|---|---|---|---|---|
| 1 in | 1 pass | 1 pass | 1 pass | Thin sealing layer or metal panel foam. |
| 2 in | 2 passes | 2 passes | 1 pass | Common closed cell rim joist depth. |
| 3 in | 3 passes | 2 passes | 2 passes | May require cooling time between lifts. |
| 5.5 in | 6 passes | 4 passes | 3 passes | Full stud cavity depth with multiple lifts. |
Use the cavity, not the room. Board feet depend on the actual void being filled, so multiply one clear bay by the number of matching bays rather than using the whole wall outline.
Respect lift limits. If the desired depth is thicker than the allowed lift, plan multiple passes and use the calculator's pass count as a scheduling check.
When buying spray foam, you don’t just measure out your wall and buy a box. It’s not like that; this is world of thermal physics and expanding chemical reactions. And a normal tape measure doesn’t gets everything that needs to be constrained. While most homeowners start with R-values, the real problem are getting the stuff applied and fitting into space available.
If you don’t account for how much area each pass of foam cover or how much it expand during application, you will run into problems. You might waste money by ordering too many foam kit, or you might leave gaps in your walls due to under-application. Once you enter your dimensions into the above calculator, it do all the math for you, saving you from having to guess at conversions and coefficients.
How To Measure Spray Foam Correctly
It all starts with the core unit: the board foot. Yes, lumber terminology. But it’s simply depth in inches times square footage. A square foot of foam that are two inches thick equals two board feet. And a two-inch by two-inch piece of something else (like foam) would also equal two board feet.
Why does this matter? Because when buying a kit for spray foam, the amount you’re buying is measured in board feet, that’s how much it say on the label. You buy based off rated yield. Unless you consider depth, you’ll always end up underbuying material.
You enter dimensions of your cavity (length, width, and desired depth) into the tool. It then give you that raw number plus a waste factor so that you don’t run dry partway through. The plan accounts for overspray, uneven framing, and the learning curve that comes with the gun because spray foam is not a throw-away material like flooring or drywall.
For most average jobs, a typical 15 percent waste allowance will cover it. However, irregular areas such as crawlspace or rim joists tend to require a higher amount. Lots of starts and stops combined with tight pockets eat up foam fast. The waste factor may be less if you’re sealing a series of stud bays or even a garage door panel. You can adjust this number in the calculator, it’s your insurance policy should you could of come up short on day two.
There’s also the matter of thickness per lift. You can’t just spray on three inches at once with closed-cell foam. Due to curing times and potential brittleness of the foam itself, manufacturers only recommend a max lift of around an inch or two. So if you want a total of four inches, you’ll have to plan on waiting until the initial lift stabilize and then spraying another one on top. Your chosen max thickness determine how many lifts the calculator predicts will be necessary. This is helpful for scheduling the job and knowing what each layer should do.
From there, all bets are off: you need to decide whether you want closed-cell or open-cell foam. For those who need maximum performance from minimal space (shallow voids), go with closed cell (about twice the R-per-inch of open). And if you’re installing foam in your basement or rim joist, use the closed cell stuff; it’s a vapor barrier. If you’ve got extra depth and want to save money and weight, opt for open cell.
Here’s what that look like: The tables on the page do an excellent job of laying it all out: how much depth you’ll need for any given situation, different than your choice of foam type.
The biggest error most folks make is to think that spray foam is a caulking material: “fill this gap here with spray foam.” No. That’s the opposite of what spray foam are. Spray foam is a precise thermal and structural intervention. Measure for actual void you’re filling, not for the width of the wall surface. Inside the framing a typical stud bay is about fourteen inches wide, but there are chases for plumbing, electrical, etc., so you only have so much usable room within that space. When measuring the open cavity, your estimate will show actual number of board feet required.
The final verdict is that a little goes a long way. Bottom line: Know your limits. While the calculator spits out pass requirements, kit counts, and board feet, remember, this will never substitute for actual measurement. Begin in a smaller area where you can practice with the gun first. Compare your target R-value to the minimum required by local building codes (and confirm that the depth you plan to use actualy achieves your desired performance). From there, plug those numbers into the calculator and see what’s up. Doing so means you won’t waste money or time.
Most importantly, it ensures you are putting enough in the right place and doing all you can to make sure your insulation is working for you. Fill ‘er up. But only fill it the right way. Nothing more. Nothing less.