Shutter Frame Size Calculator
Calculate finished shutter frame size, panel openings, rail and stile cuts, divider rails, material length, and squareness checks for inside or outside mount shutters.
Shutter frame results
| Mount style | Frame size rule | Panel sizing note | Use when |
|---|---|---|---|
| Inside L-frame | Opening minus side and top clearances | Panel area is inside the finished frame | Window has square jambs or casing |
| Z-frame | Usually inside size with outside trim lip | Panel uses the smaller inside frame size | Drywall returns need hidden edges |
| Outside overlay | Opening plus twice the overlay | Panel split follows the finished frame | No clean jamb exists for inside mount |
| Cafe shutter | Full width with reduced height | Top rail stops below sight line | Lower privacy with open upper glass |
| Tier on tier | Full frame height split by tier gap | Each tier receives its own panel set | Upper and lower panels open separately |
| Opening width | Suggested panels | Typical panel width | Planning note |
|---|---|---|---|
| 18 to 28 in | 1 panel | 18 to 28 in | Simple small bathroom or side window |
| 29 to 48 in | 2 panels | 14 to 24 in | Most bedroom and kitchen windows |
| 49 to 72 in | 3 or 4 panels | 16 to 22 in | Choose even split if panels meet at center |
| 73 to 108 in | 4 or 6 panels | 18 to 27 in | Consider T-posts or multiple frames |
| Part | Count formula | Length basis | Check before cutting |
|---|---|---|---|
| Frame stiles | 2 per frame | Finished frame height | Confirm top and bottom clearance |
| Frame rails | 2 per frame plus optional tier rail | Finished frame width | Account for joinery style if needed |
| Panel stiles | 2 per panel | Panel height | Keep hinge side consistent |
| Panel rails | 2 plus divider rails per panel | Panel width | Mark divider positions by tier |
| T-posts | Optional at panel groups | Frame height | Use for heavy or extra-wide openings |
But the problem begins (with most of all window treatments) when they don’t make sense to your windows. They’re too big…or not big enough. You think you measured for a thirty-six inch opening. You only measured the width at the top, which appears widest. In reality, your shutters won’t sit flush and will bind on casing.
Because, frankly, it’s never just about precision: it’s also about strategy. And knowing how shutters works in an imperfect architectural world can be the difference between frustration and a perfectly installed product.
Why Proper Measurement Matters for Shutters
To understand why those figures are important, remember: Outside mount frames is applied outside the window recess by over-hanging the wall. Inside mount frames are set into the recess. These options either hide any unevenness or depth issues, or they provides more privacy and light control. Depending on which option works for your house, that will impact both your materials and finished frame size.
You can toggle between the two options instantly using the calculator above. But first, understand what each is capable of.
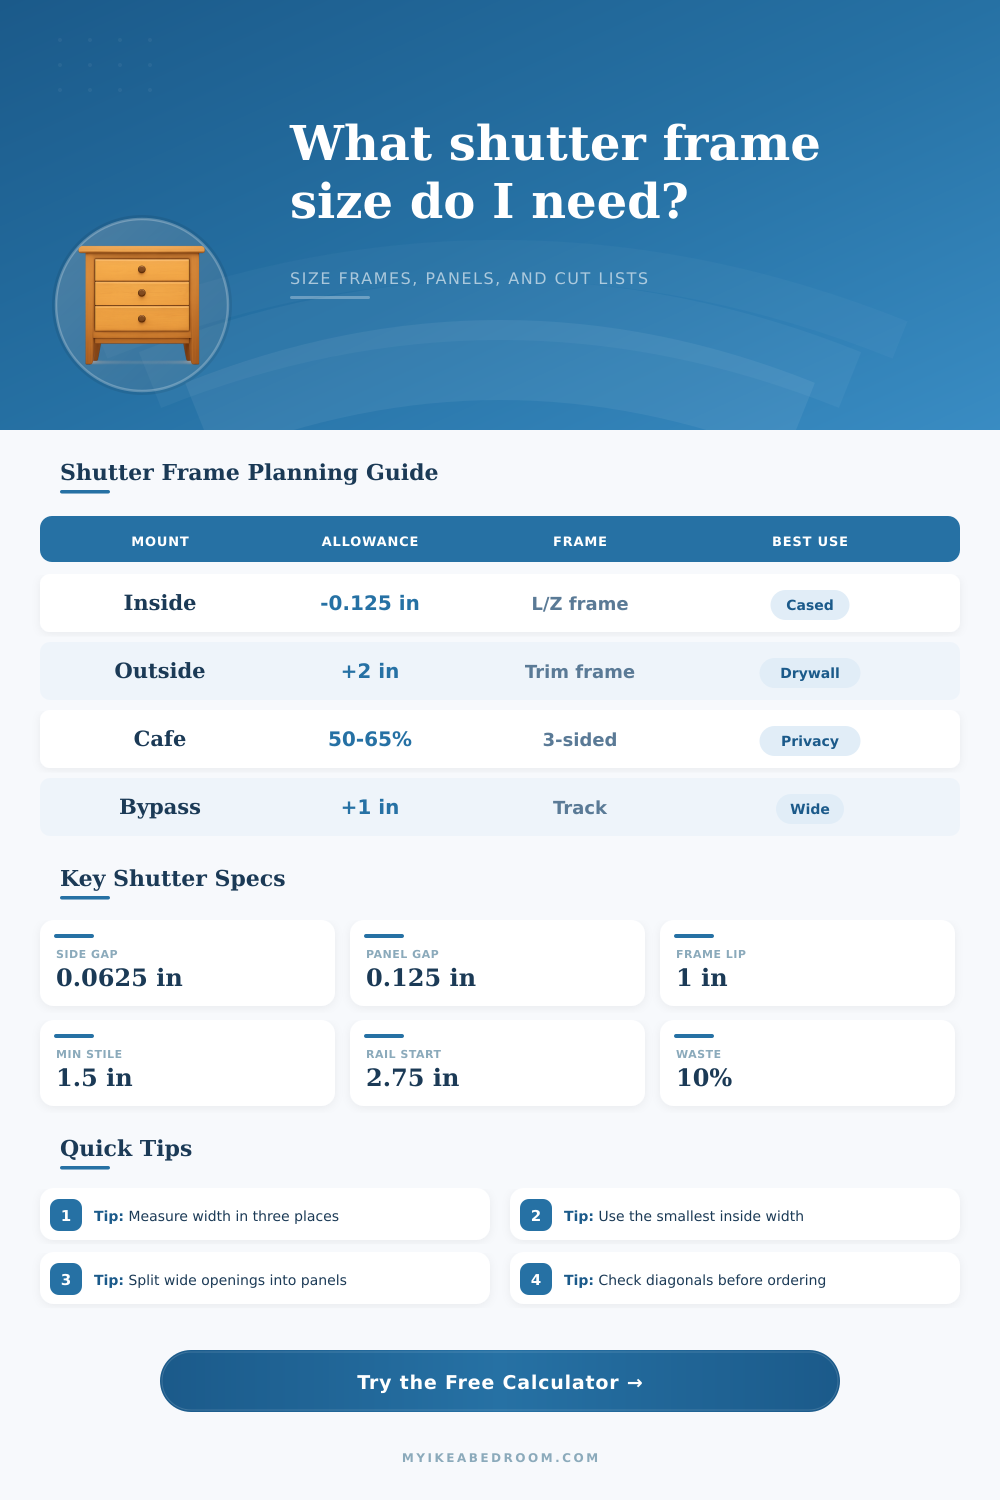
The first thing to do is take a measurement of your opening in 3 spots (one across the top, another around middle, one on bottom), because almost never are walls naturaly plumb. Casing isn’t always even and drywall can bow. If you check only the largest opening, your shutters will be oversized. So the calculator prompts you to check top and bottom specifically to account for variations like this. It will then use the smallest dimension, which ensures that the frame fit everywhere, not just where it is widest.
People do this wrong by designing for the perfect window rather than the actuall window. After establishing the frame size, the tool break down the panel configuration. Most kitchen and bedroom windows accommodates a typical two-panel arrangement; larger openings may require up to four panels, depending on how large you can manage one leaf. The math adjusts for panel spacing, and the number of divider rails required appears on the calculator. These small areas allow for expansion during humid weather without one piece of wood rubbing against another. If not for them, your shutters would of stick in summer and rattle in winter.
The other hidden cost? Material waste. Wood has defects, knots, grain direction, etc., and it’s not always possible to get every inch out of a board. That’s why the calculator comes with a buffer setting (add 10% on top of your cut list to account for natural imperfections, misalignments, and mistakes). No more panicking in the middle of a project when you realize you’ve run short by trying to be too efficient with your raw lumber.
Frame profile is also dictated by mounting style. For example, an L-frame suits cased windows well (the lip tucks up into the trim). A Z-frame fits better when there are rough edges to be covered, such as in a drywall return. That said, it all comes down to what your window look like. Don’t force a look that doesn’t work with the building’s design. Use the frame to highlight the strength of the opening instead of trying to get a specific look.
Lastly, test your opening for straightness with a few measurements before committing anything to the tool. Even if all of your other measurements prove exact, your frame can still twist and bend if the corners don’t match up. Because shutters work best when they’re rectangular in shape, the calculator relies on that assumption. If your window happens to be shaped like a trapezoid, fix it by repairing/re-shimming the casing first. As always, measurement is only as good as what you’re measuring based off.
Installing shutters is part carpenter/part waiting game. You’ll spend hours filling holes/sanding down if you get the wrong size initially…or have to return custom orders, so make sure you take the time to double check your dimensions. If you plan for waste AND use the smallest size, allowing room for expansion, you’ll ensure the frames fits properly without sticking or rattling. Treat the window how it is, not how you want it to be, and the frames will fit accordingly.