Shower Head Height Calculator
Plan a comfortable shower head centerline, wall outlet height, ceiling clearance, and splash zone from real fixture measurements.
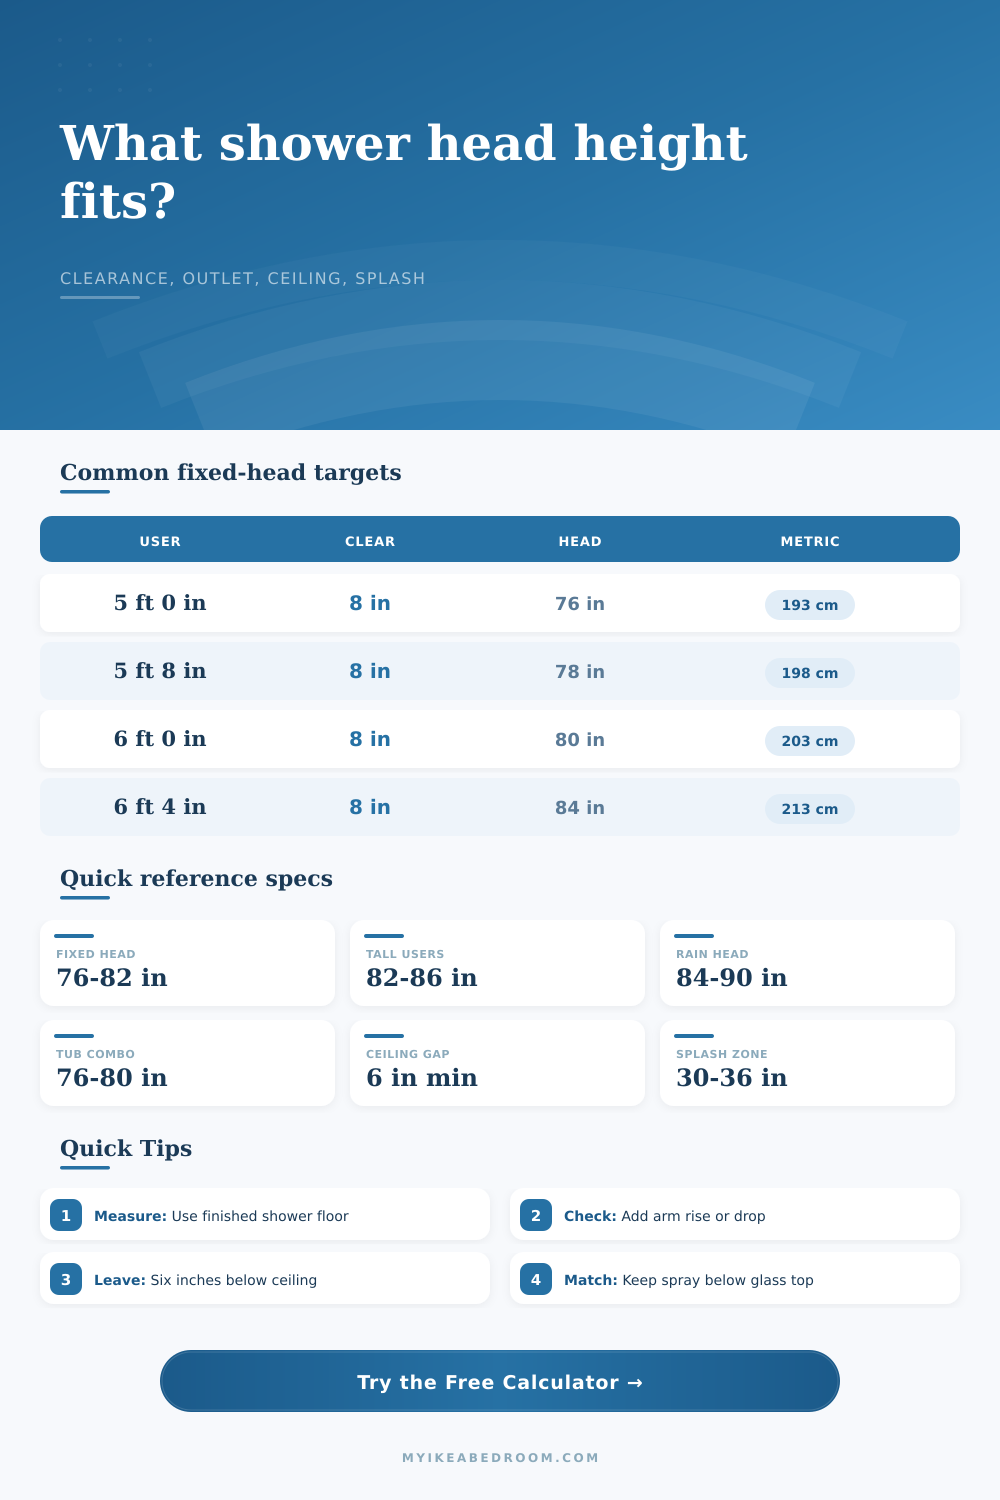
| Regular user height | Clearance allowance | Fixed head target | Metric target |
|---|---|---|---|
| 5 ft 0 in to 5 ft 3 in | 8 in above user, with practical minimum | 76 in above shower floor | 193 cm |
| 5 ft 4 in to 5 ft 8 in | 8 in above user | 76 to 78 in above shower floor | 193 to 198 cm |
| 5 ft 9 in to 6 ft 0 in | 8 in above user | 77 to 80 in above shower floor | 196 to 203 cm |
| 6 ft 1 in to 6 ft 4 in | 8 in above user | 81 to 84 in above shower floor | 206 to 213 cm |
| 6 ft 5 in to 6 ft 8 in | 8 to 10 in above user | 85 to 90 in above shower floor | 216 to 229 cm |
| Arm style | Typical vertical offset | How it affects outlet height | Use in calculator |
|---|---|---|---|
| Short standard wall arm | 0 to 2 in rise | Outlet sits close to finished head center | Enter 0 to 2 in |
| S-shaped extension arm | 3 to 8 in rise | Outlet can be lower than final spray face | Enter positive rise |
| Gooseneck high-rise arm | 6 to 12 in rise | Useful when the wall outlet is too low | Enter positive rise |
| Rain head wall arm | 2 in drop to 4 in rise | Depends on head diameter and arm bend | Use negative for drop |
| Slide-bar handheld bracket | Adjustable over 18 to 24 in | Set bracket range around likely users | Use center position |
| Condition | Useful reference | Reason to check | Calculator warning |
|---|---|---|---|
| Standard 8 ft bathroom ceiling | 96 in above shower floor | Most fixed heads fit with room to spare | Gap usually comfortable |
| Low basement shower ceiling | 84 to 90 in above shower floor | Tall users and rain heads may crowd the ceiling | Gap can become tight |
| Glass shower door top | 72 to 78 in above shower floor | Spray face above glass can push water outward | Compare head to enclosure |
| Shower curtain rod | 72 to 78 in above shower floor | A low rod may leak spray when head is high | Use splash reading |
| Rain head below ceiling | 6 in minimum gap preferred | Leaves room for head thickness and spray pattern | Warning below 6 in |
| Enclosure setup | Common depth to opening | Containment top | Height note |
|---|---|---|---|
| Standard alcove tub with curtain | 28 to 32 in | 72 to 76 in rod | Keep head near 76 to 80 in |
| Alcove tub with sliding glass | 30 to 34 in | 56 to 60 in door panel | High spray needs inward aim |
| Compact stall shower | 30 to 36 in | 72 to 78 in door | Use moderate head height |
| Open walk-in shower | 36 to 48 in | 72 to 84 in glass | More depth lowers splash risk |
| Curbless accessible shower | 42 to 60 in | Open or partial glass | Use handheld range check |
The mistake that most folks make: they take their shower head measurement starting from floor level in the bathroom. But they’re forgetting that the tub deck (or the curb) will add anywhere from 3-6” more height to the standing surface within the shower stall… Which means everything shifts up! It may seem like a minor detail, but it matters quite a lot when it comes to where you’ll actualy be hit by the water. Without taking this step-up into account, odds are good you’ll find yourself with a neck massage rather than a shower face-spray.
Once you input your own room dimensions into the calculator above, it does all the math for you (you won’t need to guess at arm offsets, or do any subtraction from floor heights). In other words, it translates what can otherwise be a confusing set of measurements into one solid target for your plumber.
How to Measure Shower Head Height
How high do I go? That depends on the tallest user who will ever sit there. Your goal is to have water hitting the top of their head, not their forehead. So, you’re going to want some clearance over the user’s head. How much? The industry rule of thumb is eight inches. This provides enough distance for the water to fan out a bit before it lands on the user.
With taller users, consider pushing that up to ten or twelve inches, still keeping the spray comfortabley. To account for this, the tool requests the user’s height, plus your desired clearance. Remember, it’s less about touching the ceiling than it is about where your body fits within the space.
And that’s just the hardware! There are factors at play here that homeowners don’t consider. One example is how low your showerhead will be. Does your rain head have a drop arm so that it’ll be quite a bit lower to the ground from where it connects in the wall? Or perhaps you’re using a gooseneck arm, and the spray face is going to be higher up. Enter the height of the showerhead, also known as the vertical offset, in the calculator, and it’ll calculate how far down from the ceiling the plumbing rough-in should be. Get this wrong, and there’s no easy way to remedy: you’ve got to chase after your drywall.
That’s what people do wrong. They think about the price tag of the fixture instead of where the pipe is going to end up. A third common surprise: Low ceilings can be a real constraint. You don’t want to install a shower-head closer than six inches to the ceiling because there won’t be enough room to mount it properly. This is also why showers can feel so cavernous and cramped! Therefore, you must have at least that much clearance between the ceiling and the shower head. For basement bathrooms with low ceilings, your only option may be to adjust the style of your fixture (see the options above), or sacrifice some head height instead. This is where the tool comes into play… It’ll scan your ceiling height automatically and alert you if your set-up is too snug.
And then there’s the enclosure itself. If the spray face of your shower heads is higher than your shower curtain or shower door, you’re going to lose water. It’s basic physics. Shallow, low-walled shower + high shower head = wet floor. For example, the splash zone reading in the results is particularly useful for open walk-in showers. This measures the height of the glass, the depth of the shower stall, and your own head height. If it’s a deep shower then you can have a taller head because it has further to fall and spread out before reaching the opening. For a shallower tub combo, you need to have a shorter head so that everything stays contained. These tradeoffs aren’t always apparent until after you’re soaked in the wet mess. The page lays them out with tables that show how the combination of height and depth control the overspray.
Finally, these are target numbers. They’re not promises. A plumber might elbow his pipes a fraction of an inch one way or another. There might be variations in the thickness of your tile. There might also be variation in how thick your mortar bed is. But if you aim for the middle line we calculate, you’ll have the greatest likelihood of having a comfortable showering experience. Ultimately, it is all about designing around the person, rather than making the person conform to the space. So once you know where the shower sits, particularly once you nail down its height, the rest of the bathroom layout slots into place. You won’t feel weirded out by a shower that’s screaming in your face. You won’t have to twist yourself around for a decent rinse-off. You can just get in there and have a routine that feels right.