Shiplap Pattern Calculator
Plan a bedroom shiplap layout from wall size, board face, reveal gap, orientation, stagger rhythm, openings, trim deductions, and waste allowance.
Pick a bedroom wall or panel layout, then refine board width, reveal, seams, and offcut strategy.
| Visible face | Pitch with reveal | Rows on 8 ft wall | Coverage per 8 ft board |
|---|---|---|---|
| 3.5 in face | 3.625 in pitch | 27 rows | 2.33 sq ft |
| 5.5 in face | 5.625 in pitch | 18 rows | 3.67 sq ft |
| 7.25 in face | 7.375 in pitch | 14 rows | 4.83 sq ft |
| 9.25 in face | 9.375 in pitch | 11 rows | 6.17 sq ft |
| Pattern | Starter offset | Seam rhythm | Best planning use |
|---|---|---|---|
| Straight stack | 0 board | Repeated vertical line | Formal panel bands or hidden seams behind trim |
| One-third bond | 1/3 board | Three-row repeat | Long walls where half-board seams feel too regular |
| Half-board bond | 1/2 board | Two-row repeat | Classic bedroom accent wall with predictable cuts |
| Balanced random | 2 ft plus | Varied field joints | Reusing offcuts while avoiding tiny starters |
| Layout condition | Suggested buffer | Why it changes | Check before cutting |
|---|---|---|---|
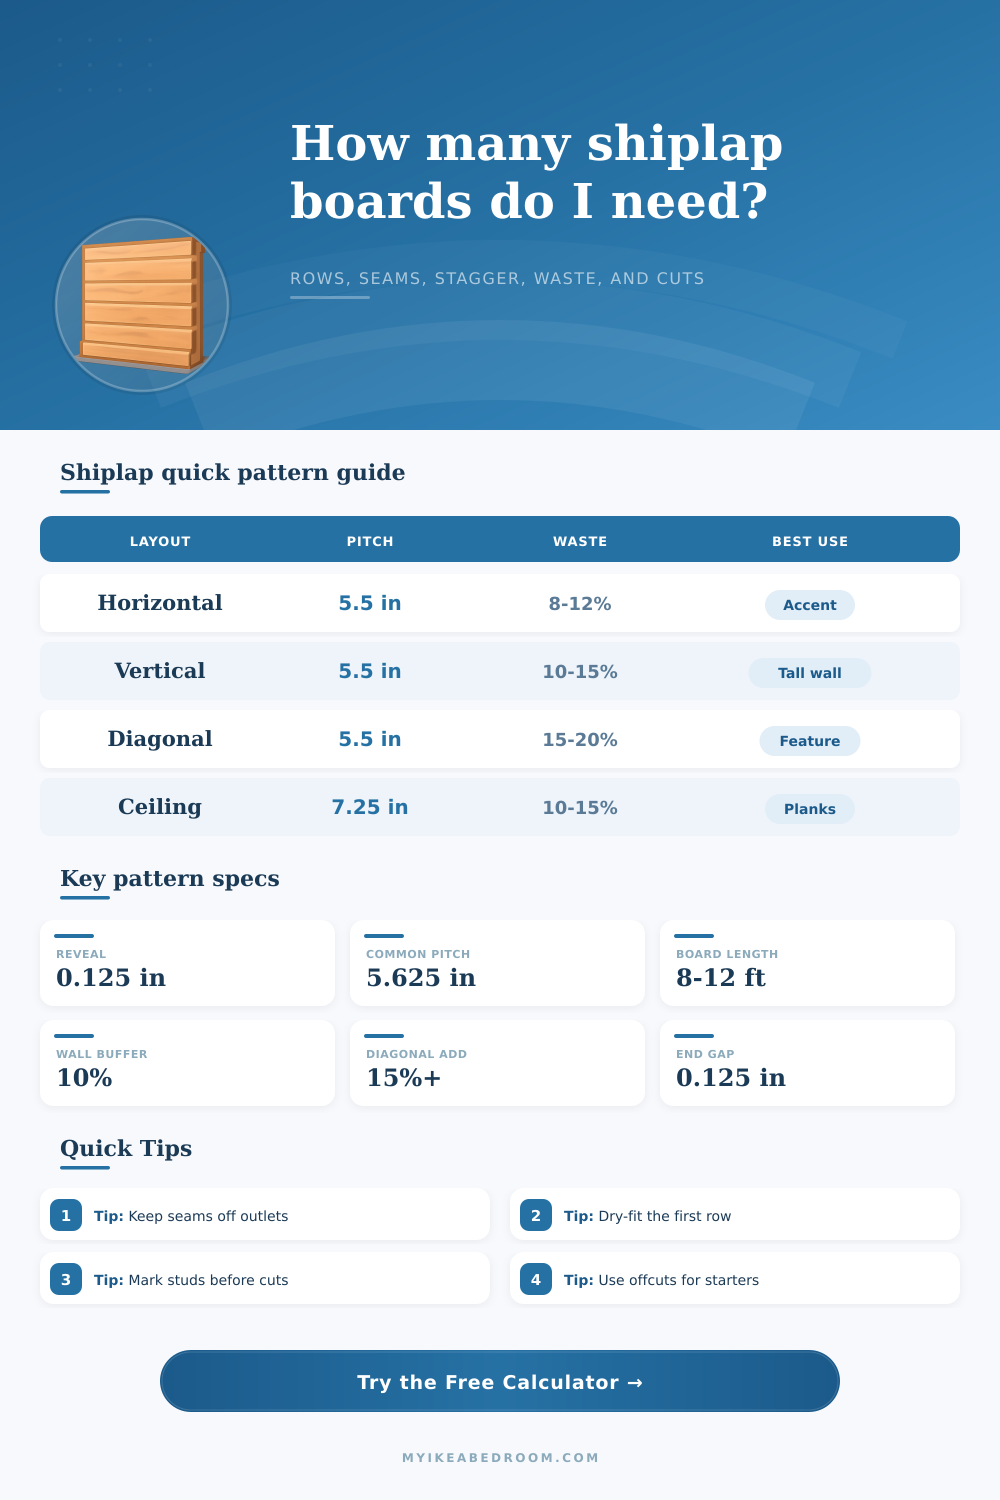
| Simple horizontal wall | 5 to 10 percent | Few interruptions and repeatable course length | Confirm first and last row width |
| Window wall or closets | 10 to 15 percent | Short pieces and returns create extra offcuts | Map seams around casing |
| Diagonal feature wall | 15 to 20 percent | Angled ends cannot always be reused | Dry-fit edge triangles |
| Ceiling planks | 10 to 15 percent | Joist direction and long runs affect joint spacing | Plan board ends on framing |
| Project | Typical field | Board direction | Pattern note |
|---|---|---|---|
| Queen headboard wall | 12 ft by 8 ft | Horizontal | Half-board seams keep the wall balanced behind the bed |
| Closet nook | 6 ft by 8 ft | Vertical | Full-height planks reduce visible horizontal joints |
| Half wall paneling | 10 ft by 4 ft | Horizontal | Narrower boards give the wainscot more rows |
| Ceiling feature | 12 ft by 14 ft | Lengthwise | Align board ends with joists when possible |
Best for: widening the feel of a bed wall.
Watch: stacked seams and outlet breaks.
Best for: tall closet nooks or narrow rooms.
Watch: plumb layout and top trim.
Best for: small feature panels.
Watch: extra angled waste at edges.
Best for: a plank effect above the bed.
Watch: joist spacing and end support.
Starter rows: For a running bond pattern, keep the first visible starter longer than the smallest reuse length so short slivers do not collect at one side of the wall.
Openings: Deduct window and door area for board quantity, but still sketch the courses across those openings because casing edges can force extra cut pieces.
Reveal lines: A 1/8 inch reveal adds up over many courses; include it in pitch so the top row does not finish narrower than expected.
Board ends: On ceilings and long walls, place end joints over framing or backing and avoid lining up seams directly above the bed centerline.
To install a shiplap accent wall in a bedroom correctly, you first must understand how the shiplap pattern can affect the appearances of the bedroom. The shiplap pattern is based on the way that the boards is placed next to each other and the way that the cuts of the boards end. Because the pattern will change the appearance of the bedroom in particular, you should use a calculator to determine how many shiplap boards you will need.
Using the calculator will help you to avoid guessing at the number of shiplap boards that you will need to purchase. The first decision that you will need to make with your shiplap accent wall is the orientation of the boards. If you use horizontal boards, your wall will appear more wider.
How to Calculate Shiplap Boards for a Bedroom Accent Wall
This can be helpful if installing shiplap behind a bed, as using horizontal boards will make the room look more settled. If you use vertical boards, your wall will appear taller. Vertical boards work well for narrow space within the bedroom.
However, if you opt for diagonal boards, they will add movement to the wall, but you will lose some of the boards because you will waste them on the diagonals. The calculator will ask you for the type of orientation that you would like to use for your shiplap. The next aspect of the calculation that you must make is the width of the shiplap boards.
If you choose wider boards, your shiplap will take up less rows than if you use narrower boards. Fewer rows mean that there will be fewer seams along your accent wall. If you use narrower boards, you will have more seams along your wall, but it may look more handcrafted.
The next piece of information that the calculator requires is the gap between the boards, also referred to as a reveal gap. If the reveal gap is small along your shiplap boards, it will allow your wall to create shadow lines. However, because the gap can add up along the row of boards, if you do not account for the gap along your top row, your final strip of shiplap could either be too thin or too wide.
The calculator will account for this when it determines the number of rows of shiplap that you need. Another aspect of the calculation of the number of shiplap boards that you will need is the allowance for waste. For walls without openings, such as doors or windows, an eight or ten percent allowance for waste may be sufficient.
However, if your shiplap project includes doors, windows, or boxes for electrical outlets, you will need to make an allowance for the waste of the boards that you cut to accommodate these openings. If you are using diagonal shiplap boards due to an odd ceiling height, you will also need to allow for some waste of the boards due to the diagonal cuts. The calculator will ask you to determine the percentage of waste that you would like to allow in your project.
The third variable of the calculator will ask you for the stagger pattern of your shiplap boards. If you choose the straight stack pattern, your shiplap will have vertical lines along it. If you use the half-board running bond pattern, it will be more common for shiplap projects and will produce an offset pattern along your accent wall.
Lastly, if you choose the random offset shiplap pattern, it will look more organic. However, there will be more measuring of your boards due to the lack of standard size of the half-board offset pieces. The calculator will calculate the number of extra cuts that will occur due to your choice of stagger pattern for the shiplap.
Stud spacing is another variable within the shiplap calculator. While it is not likely that every seam of your shiplap will fall directly on a stud once you have installed a stagger pattern for your shiplap boards, you can use the stud spacing to figure out where you will need to add blocking to your wall. The calculator estimates the number of lines that will be used to secure your shiplap to the studs.
This will also help you to determine how long that your installation will take to complete. The number of openings within the area that you plan to install the shiplap can complicate your installation. If there are openings in the wall, such as for a window or a door, your shiplap will need to be cut into shorter boards for the area above and below the opening of the window.
These boards will likely be wasted on your installation. The calculator will ask for the size of each opening. It will calculate the number of shiplap boards that you will require to cover the area, but it will also take into account the extra shiplap boards that you will need if you are to cut them to accommodate these openings in the wall.
It is important to consider that while the calculator may calculate the area that is to be covered, the number of cuts will be greater than the area to be covered. Another table within the shiplap calculator can help to show you the number of rows that the different faces of the shiplap boards will create on an eight-foot wall. This can be helpful for those who would like to use either 1×6 or 1×8 boards for their shiplap project.
The 1×8 boards will require fewer rows and fewer seams than the 1×6 boards. However, they may not look as good from across the room in the bedroom. The side-by-side comparison within the reference table can help you to make a decision about the type of shiplap that you would like to use.
Many shiplap projects in bedrooms will use common dimensions. For example, the wall behind the queen bed will be twelve feet in width and eight feet in height. Additionally, the half-wall that may be used for a bed or dressers may be ten feet in width and four feet in height.
These dimensions are common in bedrooms due to the size of the beds and the ceilings within the bedrooms. If you are familiar with these common dimensions, you will find that the shiplap calculator will become faster to use due to your knowledge of where the numbers will fall. By taking the time to perform the calculations before purchasing the shiplap boards, you will be able to remove any doubt in your mind as to the length of each board that will be needed.
You will know the number of shiplap boards that you will need for your project. You will know the percentage of waste that you will create in the cutting of the boards. Additionally, you will know if your choice of stagger pattern will result in too many scraps of boards to be used for your shiplap accent wall.
Once you have installed the boards, you can focus on ensuring that the seams of the boards avoid the electrical outlets in the wall, and that the reveal of the boards is even from floor to ceiling. The shiplap accent wall can be installed in a manner that allows for the seams to interact with the other elements in the bedroom. The calculator for shiplap boards will provide you with the quantities that is needed so that you can make decisions regarding the proportion of the shiplap accent wall to the remainder of the bedroom.