Roof Batten Spacing Calculator
Set out roof battens from eaves to ridge using covering gauge, first-course gauge, ridge clearance, roof faces, waste allowance, and standard stock length assumptions.
Each preset loads a realistic covering type, roof face count, slope length, eaves length, eaves course, and batten gauge. Check final values against the tile or slate manufacturer schedule.
Full roof batten breakdown
Plain tile
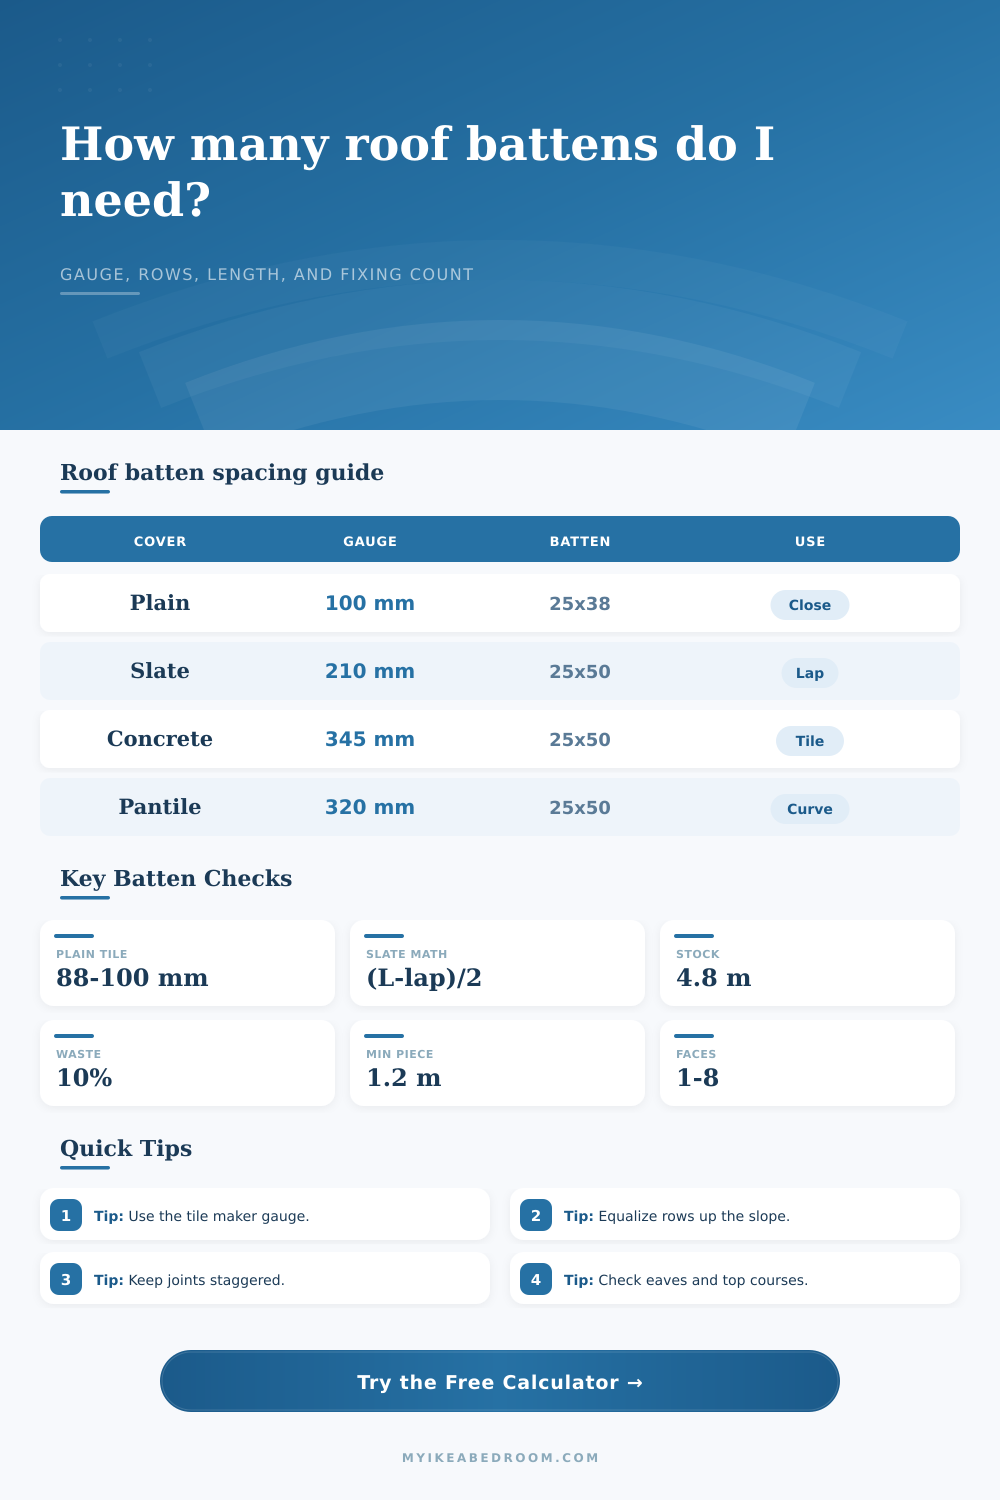
Typical gauge: 88 to 100 mm for roof work.
Layout behavior: many close rows, high linear batten per square metre.
Check: minimum headlap and eaves course set-out.
Natural slate
Typical formula: gauge equals slate length minus headlap, divided by 2.
Layout behavior: double-lap rows with larger battens often preferred.
Check: lap, nail hole position, and slate length.
Concrete interlocking
Typical gauge: often around 310 to 345 mm by profile and pitch.
Layout behavior: fewer rows with gauge governed by tile lugs.
Check: manufacturer maximum gauge and rafter centres.
Pantile and roman
Typical gauge: commonly near 300 to 345 mm depending on tile.
Layout behavior: curved profiles can need strict coursing alignment.
Check: top course length, verge fit, and dry ridge details.
| Covering type | Typical gauge | Linear batten per roof area | Set-out note |
|---|---|---|---|
| Plain clay or concrete tile | 88 to 100 mm, often 100 mm maximum | About 10.0 m per m² at 100 mm gauge | Close courses; keep the required headlap. |
| Natural slate 500 mm with 80 mm lap | (500 - 80) / 2 = 210 mm | About 4.76 m per m² at 210 mm gauge | Double-lap formula depends on slate length and headlap. |
| Concrete interlocking tile | 310 to 345 mm typical profile range | About 2.90 m per m² at 345 mm gauge | Tile lugs and pitch define the maximum gauge. |
| Clay pantile or roman tile | 300 to 345 mm typical profile range | About 3.13 m per m² at 320 mm gauge | Maintain even rows where exposed courses are visible. |
| Fiber cement slate 400 mm with 80 mm lap | (400 - 80) / 2 = 160 mm | About 6.25 m per m² at 160 mm gauge | Follow the slate maker headlap and fixing pattern. |
| Formula item | Expression | What it controls | Why it matters |
|---|---|---|---|
| Usable slope | Slope length - ridge clearance | Distance available for batten rows | Leaves the top detail out of the regular gauge field. |
| Main intervals | Ceiling((usable - eaves gauge) / max gauge) | Regular spaces above the first course | Prevents the equalized gauge from exceeding the limit. |
| Total courses | Main intervals + 1 | Full batten row count per roof face | Includes the first eaves batten row. |
| Equalized gauge | (usable - eaves gauge) / main intervals | Actual field spacing | Spreads the small remainder through all main rows. |
| Linear battens | Courses x eaves length x faces | Total run before waste | Counts one full horizontal batten line for each course. |
| Reference item | Metric value | Imperial value | Practical use |
|---|---|---|---|
| Common graded batten section | 25 x 38 mm | About 1 x 1.5 in | Often used for many tile roofs at moderate rafter centres. |
| Larger common section | 25 x 50 mm | About 1 x 2 in | Often selected for slate, wider rafter centres, or heavier detailing. |
| Minimum useful piece length | 1.2 m | About 4 ft | Short pieces should still span enough supports where rules require it. |
| Standard stock length assumed here | 4.8 m | 16 ft | Used to round total batten length into purchasable pieces. |
| Fixing estimate | 2 fixings per rafter crossing | 2 fixings per crossing | Uses a 600 mm or 24 in assumed rafter spacing for planning. |
| Roof layout | Input gauge | Example roof face | Typical result |
|---|---|---|---|
| Small porch plain tile | 100 mm | 3.0 m eaves x 2.4 m slope, 1 face | About 25 rows, 75 m before waste |
| Garden room slate | 210 mm | 4.8 m eaves x 3.6 m slope, 2 faces | About 18 rows, 173 m before waste |
| Garage interlocking tile | 345 mm | 6.0 m eaves x 4.0 m slope, 2 faces | About 13 rows, 156 m before waste |
| Hip roof with extra cuts | 320 mm | 5.5 m eaves x 4.2 m slope, 4 faces | About 14 rows, 308 m before waste |
Set-out tip: If the last course lands awkwardly below the ridge, reduce the main field gauge slightly and distribute that adjustment through every course instead of hiding one tight row at the top.
Ordering tip: Hips, valleys, dormers, and staggered joints increase offcuts. Use 12% to 20% waste for cut-up roofs, then keep the result rounded to whole stock lengths.
Pre-install is where most roofs fails. It begins with counting rafter. You guess how many batten courses will run from the ridge down to the eaves, then divide that by number of rows you can fit in that space. It sounds straightforward until real life gets involved, such as uneven course heights, waste, and ridge clearance. These is all accounted for by the calculator, which give you an exact number of row. Knowing why it changes means you don’t over-order wood or end up with a raggedy-looking top line.
What is first important piece of information? That’s right: it’s the gauge. Why does the gauge matter? Each roof type have its own set of physics for how overlap works. Some roofing materials must be supported closely; others can absorbs much wider spacing. For instance, short roofing tiles like plain clay tiles require closer support different than long roofing tiles like concrete interlocking tiles. These longer tiles is also mechanically locked into place. To prevent water getting behind the headlap, you’d space your battens around a hundred millimeters apart. Because concrete interlocking tiles are longer and mechanically locked, you can space your battens as far apart as three hundred forty-five millimeters or even further.
Why Planning Your Roof Battens Matters
Crowding your slate, for example, won’t help you achieve anything except wasting timber and money. Similarly, if you attempt to use a broad gauge on plain tile, they’ll lift and break in time. The tool addresses this by allowing you to choose the profile, setting baseline spacing rule. This rule doesn’t just look good but keeps structure standing too.
There’s also ridge clearance. That seems like a minor consideration, but it instantly reduces row count. You have to clear room for ventilation strips and the ridge board at the very top of roof. Without accounting for this, there may not be enough room left at the top to finish last row of battens. Now you either have to run an odd half-course or leave one tile course unsupported.
The calculator accounts for this gap by reducing the overall slope length and then calculating row count. That way each batten will support a tile and won’t just float aimlessly up around ridge. This is a little change that would of save you time when you are up on scaffolding trying to make everything work out.
Your budget is also affected by waste. You’ll never be able to cut timber perfect efficiently, so allow for it as a percentage. Dormers, hips and valleys cause odd angles that lead to short offcuts. Staggered joints see some lengths end up in the bin rather than on your roof. For a simple gable, a standard ten percent buffer should do it. With complex roofs, expect fifteen or twenty percent. Ignore this variable and you might well be making a trip to the yard midway through your project, as you’re missing out on three crucial rows of timber. Better to buy extra then halt progress while you wait for delivery truck to turn up on a rainy day.
The output gives you a total linear length and breaks it down into standard stock pieces, usually sixteen feet or four point eight meters. It divides that up into standard stock lengths, typically four point eight meters or sixteen feet. Why? You can’t purchase partial lengths. They round up to full boards, which lets you know exactly how many pack to order.
They also estimate the amount of fixings required assuming a given distance between the rafters. That way you can plan for screw or nail requirements. The math will give you a starting place for your materials list but doesn’t take into consideration each odd shaped rafter or other surprise you may encounter on site. Take the numbers and add some wiggle room based off your specific site conditions.
If you get the spacing correct from the beginning, the roof will be straight, shed water properly, and stay fastened together for decades.