Roman Shade Headrail Size Calculator
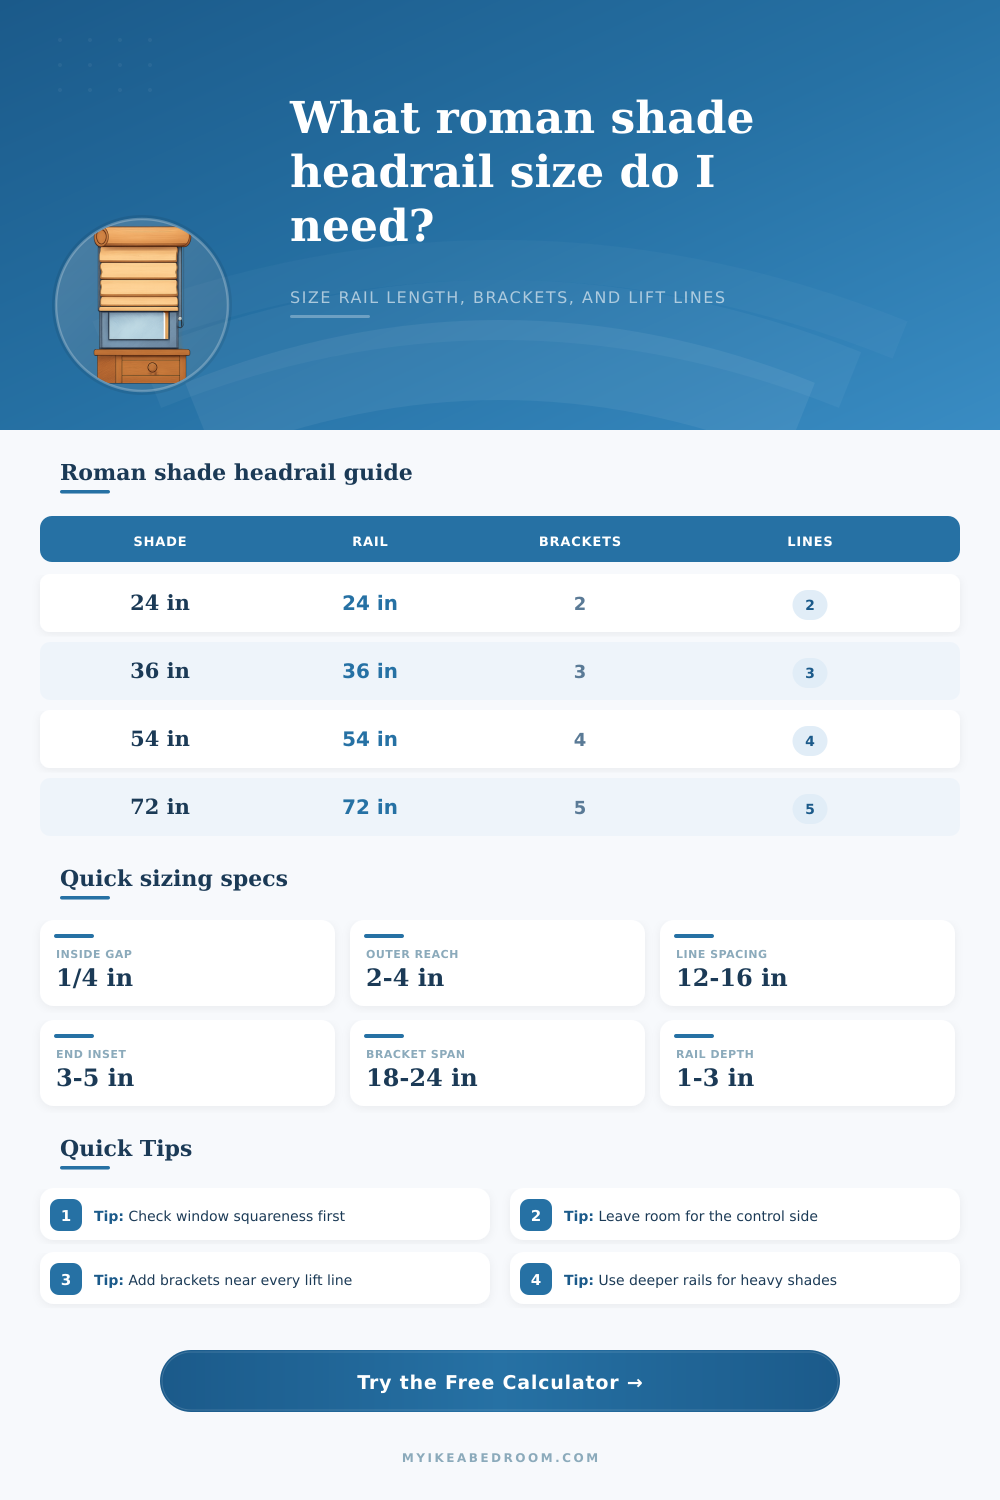
Size a roman shade headrail from the finished shade width, mount type, lift system, fabric weight, fold style, bracket spacing, control side, and window clearance.
Start with a common shade situation, then adjust the measurement fields to match your exact window and shade hardware plan.
Lift line and bracket markers update after each calculation.
| Profile | Typical depth | Useful width range | Best fit |
|---|---|---|---|
| Compact rail | 1 to 1.5 in projection | 18 to 42 in shades | Small inside mounts and door shades with light fabric. |
| Standard rail | 1.5 to 2 in projection | 24 to 60 in shades | Most bedroom roman shades with lining and cord or clutch lift. |
| Deep rail | 2 to 2.5 in projection | 42 to 84 in shades | Wide shades, heavy linings, and hobbled folds that stack deeper. |
| Cassette rail | 2.5 to 3.25 in projection | 30 to 96 in shades | Motor-ready systems or chain clutch hardware needing side clearance. |
| Finished shade width | Suggested lift lines | Line spacing target | End inset note |
|---|---|---|---|
| 18 to 28 in | 2 lines | 10 to 16 in apart | Use 3 to 4 in inset unless seams need different placement. |
| 29 to 44 in | 3 lines | 11 to 16 in apart | Place one line near center and keep edges balanced. |
| 45 to 62 in | 4 lines | 12 to 16 in apart | Add a fourth line before folds start drooping between rings. |
| 63 to 84 in | 5 to 6 lines | 12 to 15 in apart | Use a stronger rail and brackets near the outer lift lines. |
| Mount | Rail length rule | Projection check | Control clearance |
|---|---|---|---|
| Inside mount | Opening width minus 1/8 to 3/8 in total | Rail must fit inside casing depth | Keep chain or cord clear of side jamb. |
| Outside mount | Opening width plus side overlap both sides | Brackets fasten to trim, wall, or board | Allow extra room beyond the chosen control side. |
| Ceiling mount | Finished shade width or bay width minus clearance | Rail depth must clear handles and trim | Check side walls before choosing control side. |
| Door mount | Glass width plus slim overlap | Choose shallow profile for door swing | Keep controls away from latch hardware. |
Measure at the top. The headrail fits where it mounts, so the top opening measurement matters most for inside shades.
Keep lift lines symmetric. Equal spacing prevents one side of the shade from climbing faster than the other.
Plan control clearance early. Chains, cord locks, motors, and end caps can need space outside the fabric width.
Bracket near loads. Add brackets close to lift hardware, rail ends, and any joint in a wide rail.
If you’ve ever bought roman shades and found they don’t fit when installed then you know what I mean. You measured wrong. But it was not because of a mistake. The thing is, we all measure the glass. We should of measuring the hardware. And while that’s true with most window treatments, it can be particularly harsh with roman shades.
The fabric can be heavier than it looks, and it relies on headrail (or skeleton) to hold it up. Light will leak if rail is too short. It’ll hit the wall trim or casing before the fabric stretch out if the rail is too long. Length has everything to do with your particular mechanism and how much actualy space it takes within window frame.
Why You Should Not Measure the Glass
After entering the desired lift system and your opening dimensions, the calculator does the rest. It spares you from wondering if that extra half-inch will be enough for the cord lock to breathe. And it prevents most novice from underestimating the size of control hardware.
The chain clutch looks like a nice loop but is actualy a mechanical assembly sticking into area of fabric fold. You must subtract clearance for the depth of the rail plus clearance for the side control mechanism (if mounted within standard window case). Common deductions includes a quarter-inch off the rail width itself.
Many people forget this until they are standing at the bottom of a ladder, holding a drill in one hand and realizing the screw won’t fit: you also have to subtract clearance for the cord lock or chain on one side, or your shade won’t hang straight against jamb.
And then there’s the weight of the fabric: How does that change how the rail behaves under load? For instance, light cotton may drape nicely unsupported while heavy blackout linen will be like trying to raise a wet towel. To account for this, the tool has been designed to suggest closer bracket spacing and more lift lines for heavier fabrics.
It’s kind of like suspension engineering. If you were trying to suspend a large piece of wood with small springs, you wouldn’t use your truck to haul logs, right? So why do you think a couple of brackets can holds a wide shade (lined, no less) across an eight foot span without sagging?
That sag isn’t just unsightly, it messes with the clean lines of a flat roman shade by causing top to stack unevenly. Distributing that weight through added lift lines helps, but only if you have enough bracket below to anchor those lines, without cracking wood or bending the metal.
So you’re scaling up (or down); based off mount type. For inside mounts, precise trimming ensures a smooth slide-in without the rail getting stuck. For outside mounts, you can overlap the edges. This is good for light control but hard to get right unless you align center of the shade with center of window.
This is why it’s important to imagine how that headrail is going to fit into 3D space. With ceiling mounts, deeper rails may be necessary to mask hardware from view, particularly when the ceiling height draws attention upwards. What looks sleek on paper could reveals ugly pulleys and chains when seen from below. Here are the profile options laid out neatly on the page. This lets you pair the desired look with function (depth).
Step back from the drop-down boxes and look at the bigger picture. First thing: check for squareness. I know this can be tricky if it’s narrowing very slightly as it goes up, so if you measure just below, say the bottom of the frame, the rail size you order will be to large. Get your tape up there. Where is it the narrowest? That measurement is your limit.
It is not where it looks best or where you think it should be centered. Just where it fits. This is not about symmetry. A beautiful shade might hang evenly off the ground, but it is useless if it won’t fit in window because the rail was ordered a half-inch too large. Understand what exactly is getting measured and let the numbers do their job to ensure a neat install.