Roman Shade Lift Cord Quantity Calculator
Estimate how many lift cord columns, rings, ring rows, cord cuts, pull tails, and total spool length a roman shade needs from finished shade size and routing details.
Start with a real shade layout, then adjust width, drop, fold spacing, lift-column spacing, control side, cord style, and buffer.
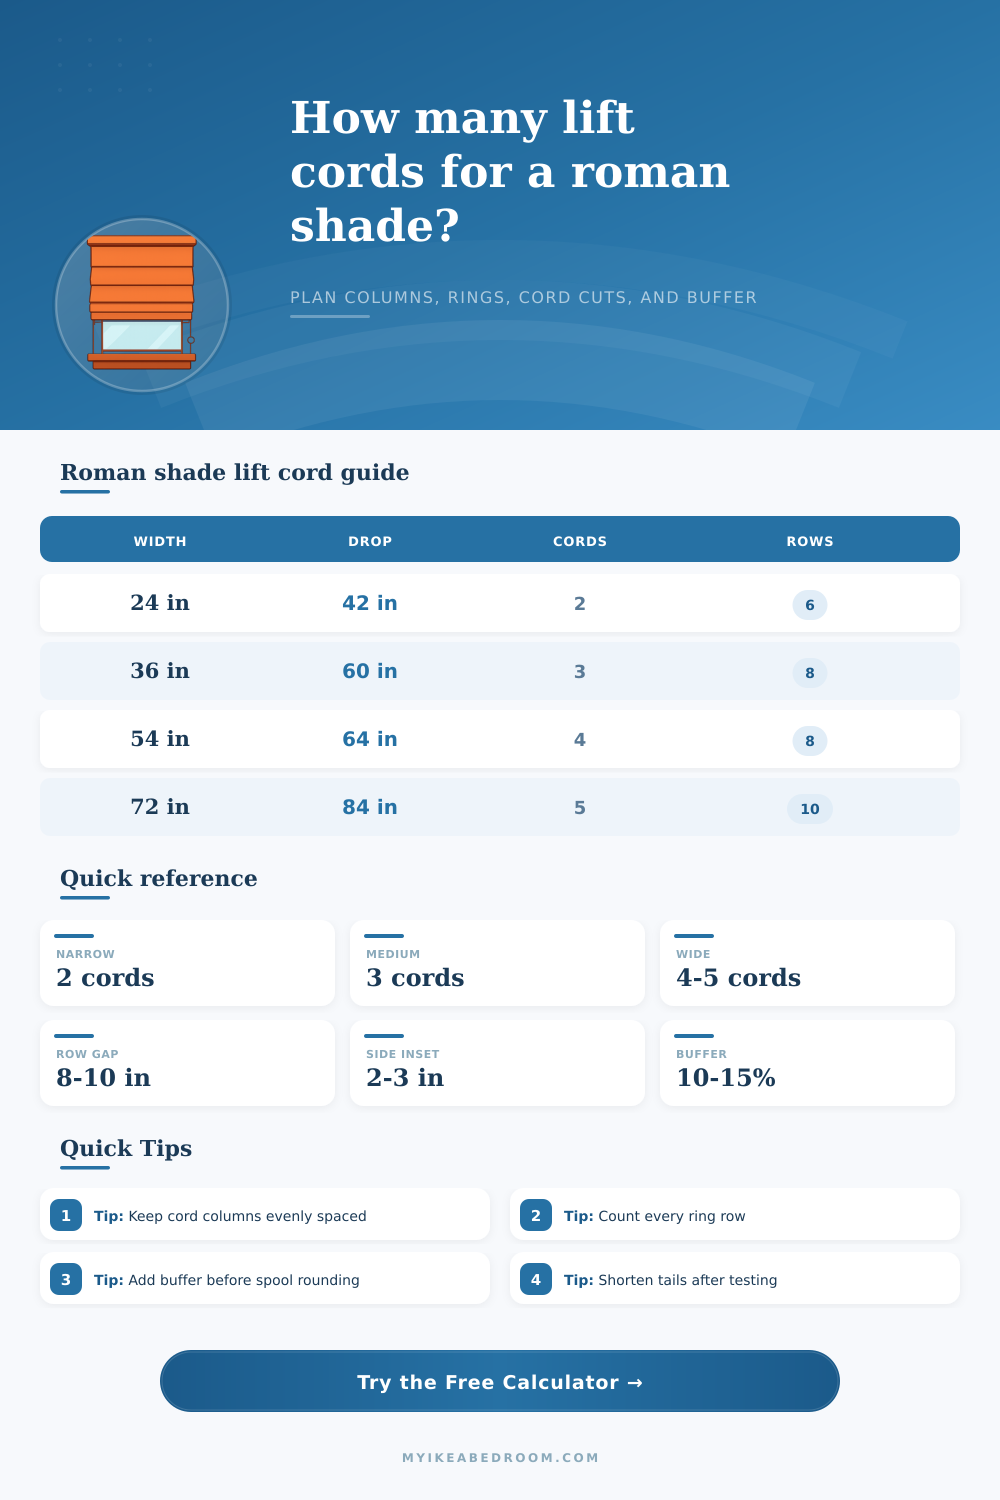
| Finished width | Usual cords | Outer inset | Column spacing note |
|---|---|---|---|
| 18 to 28 in | 2 lift cords | 2 in | Use a left and right column only. |
| 29 to 42 in | 3 lift cords | 2 to 2.5 in | Add a center column to control sag. |
| 43 to 60 in | 4 lift cords | 2.5 to 3 in | Keep spans near 12 to 16 in. |
| 61 to 78 in | 5 lift cords | 3 in | Use extra support on heavy fabrics. |
| 79 to 96 in | 6 to 7 lift cords | 3 to 4 in | Split controls can reduce friction. |
| Shade style | Typical row gap | Bottom offset | Quantity effect |
|---|---|---|---|
| Flat roman shade | 7 to 9 in | 2.5 to 3.5 in | Balanced rows and clean stacking. |
| Classic batten back | 8 to 10 in | 3 to 4 in | Rows often align with battens. |
| Relaxed roman shade | 9 to 12 in | 3 to 5 in | Fewer rows, softer lower curve. |
| Hobbled roman shade | 5 to 7 in | 2.5 to 3 in | More rows and more ring points. |
| Lined blackout shade | 7 to 8 in | 3 to 4 in | Closer support for heavier fabric. |
| Routing choice | Header travel | Tail count | Best use |
|---|---|---|---|
| Right side lock | Each column crosses to right | One shared tail | Common wall-side control. |
| Left side lock | Each column crosses to left | One shared tail | Useful near right obstructions. |
| Center pull point | Columns route to center | One compact tail | Narrow balanced shades. |
| Split left and right | Columns route to nearest side | Two controlled tails | Wide shades with less friction. |
| Individual tails | Same header route | One tail per cord | Testing or specialty hardware. |
| Shade example | Finished size | Columns x rows | Planning quantity |
|---|---|---|---|
| Kitchen sash shade | 30 x 42 in | 3 x 6 | 3 cords, about 18 rings. |
| Bedroom blackout shade | 36 x 60 in | 3 x 8 | 3 cords, about 24 rings. |
| Wide living room shade | 58 x 54 in | 4 x 8 | 4 cords, about 32 rings. |
| Tall door shade | 25 x 72 in | 2 x 9 | 2 cords, about 18 rings. |
| Extra-wide shade | 84 x 70 in | 6 x 9 | 6 cords, about 54 rings. |
Column count: Add lift cords when the gap between columns gets wide enough for the shade face to sag or twist while lifting.
Ring rows: Count only rows that carry lift cord; decorative folds that do not have rings should not inflate the hardware count.
Routing test: Dry-route the longest cord first and operate the shade before trimming the final pull tail.
Spool plan: Round total cord upward after buffer so all lift cords can be cut from the same cord type and dye lot.
Making a roman shade sounds simple: attach some rings to some fabric, then sew it shut. But realy, it’s an exercise in managing tension. The number of cords matter, not enough and it’ll either be twisted into a pretzel or sag to one side. If there is too much, it won’t stack up nicely at the top. This results in a project that look great in place but doesn’t work when you try to use it.
The calculator (above) spares you having to guess at these coefficients, since it does the math for you given your inputted dimensions. But knowing why they matter is what keeps shade flat.
How to Choose Cords for Your Shade
How many vertical columns of lift cord do I want? That’s the first question. If you have a narrow opening, maybe just two will be fine. As soon as you get into wider openings, however, two cords becomes a liability. There’s too much unsupported width between the two and the fabric sag in the middle when lifted. The solution is to add a third column in the middle, which divides the load. But there are limits even to that. Generally speaking, for a shade four feet wide or more, you’ll need four (or five) columns to maintain a taut face.
It’s not just aesthetics. Physics enter here, too. More columns = less drag per individual cord, resulting in a smoother mechanism and less wear on your lift hardware.
Another thing that gets people: how much space between the rings? The general rule is more, the better, right? Nope. There’s such a thing as being over-supported. When they’re packed too tightly, your shade stack will be too high when opened, wasting valuable headroom because those cramped folds make it stack too high. Conversely, too much separation makes the fabric sag between rows and creates an uneven, wavering look.
If you have a traditional style or a flat, spacing them eight to ten inches apart is a good bet. This is close enough for clean folding but far enough away to keep structure strong. Relaxed shades are made to flow freely, so they can be spaced further out. Blackout lined or hobbled fabrics require closer spacing to handle the extra weight.
And then there’s the path of the route, that’s where it gets complicated with no tool. The path goes from the bottom ring to the pull tail, through the pulley system in headrail, and then back down again. Each cord must cross the entire width of the header box if your lift columns are on one side (say, right) but your control lock is on the other (left). That additional horizontal length realy extends total length of each cut, meaning you run out of cord three-quarters of the way into assembly if you don’t take it into account. It is hard to hide the splice later.
Finally, always add a buffer to your total length, and always add at least ten percent (a safe minimum) for those just starting out. That allows for the trial-and-error process of learning how much tension to apply. It also covers minor measurement errors or knot tying. You don’t want the shade binding with the pull tail being two inches too short… That’s worth buying another twenty-five feet of cord to avoid starting over.
Once you’re ready to cut, round up to the next increment available on whatever spools you have. Mixing dye lots or cord types will ruin the balance by causing slight variations in strength, so consistency matters. Measure your routing, plan your columns, add your buffer and then cut. It is a small thing, but it matters.