Resilient Channel Quantity Calculator
Estimate resilient channel rows, linear footage, stock pieces, framing fasteners, lap allowance, and coverage for bedroom walls, ceilings, media rooms, and apartment sound isolation layouts.
Choose a realistic wall or ceiling layout, then adjust channel spacing, stock length, framing spacing, openings, and waste to match the actual surface.
RC-1 Single Leg
Best for: common wall assemblies with one screw flange.
Typical stock is 8 ft to 12 ft. Orientation matters because the free flange supports the drywall edge.
RC-2 Double Leg
Best for: straighter rows where a slightly stiffer channel is preferred.
Count similarly to RC-1, but verify the exact tested assembly spacing before hanging board.
Clips And Hat Channel
Best for: high isolation ceilings and heavier wall layers.
Channel footage is similar, while clip count replaces the simple fastener crossing estimate.
Layout Tools
Useful gear: laser line, tape, snips, screw stop, marker, and stud finder.
The calculator includes row count, piece count, screw count, lap allowance, and perimeter clearance.
| Channel spacing | Rows per wall | Linear ft per 12 ft wall | Typical use |
|---|---|---|---|
| 24 in on center | 5 rows | 60 linear ft before waste | Standard wall assemblies with lighter drywall layers |
| 16 in on center | 7 rows | 84 linear ft before waste | Walls with heavier board or ceiling layouts |
| 12 in on center | 8 rows | 96 linear ft before waste | Dense ceiling support or manufacturer-specific assemblies |
| Custom verified spacing | Calculated from height | Rows x wall run | Use the tested assembly or project specification |
| Stock length | Pieces per 100 linear ft | Lap planning | Best fit |
|---|---|---|---|
| 8 ft channel | 13 pieces before waste | More joints on long walls | Small rooms, closets, stair landings, and patch work |
| 10 ft channel | 10 pieces before waste | Moderate joint count | Bedrooms with 10 ft to 14 ft runs |
| 12 ft channel | 9 pieces before waste | Fewer end overlaps | Long walls, ceilings, media rooms, and full-room work |
| Mixed lengths | Use longest practical stock | Reserve short pieces for returns | Rooms with offsets, doors, and built-in interruptions |
| Framing spacing | Fasteners per 12 ft row | Fasteners per 16 ft row | Planning note |
|---|---|---|---|
| 24 in framing | 7 crossings | 9 crossings | Often older ceilings, garages, or nonbearing partitions |
| 16 in framing | 10 crossings | 13 crossings | Common stud and joist spacing for residential rooms |
| 12 in framing | 13 crossings | 17 crossings | Dense framing, short spans, or reinforced ceiling layouts |
| Clip system | By clip schedule | By clip schedule | Use clip spacing from the isolation clip manufacturer |
| Project layout | Assumed dimensions | Channel rows | Base linear footage |
|---|---|---|---|
| Single shared bedroom wall | 12 ft x 8 ft wall at 24 in spacing | 5 wall rows | 60 linear ft |
| Four bedroom walls | 12 ft x 14 ft room, 8 ft high, 24 in spacing | 20 wall rows | 260 linear ft |
| Bedroom ceiling only | 12 ft x 14 ft ceiling at 16 in spacing | 10 ceiling rows | 120 to 140 linear ft by direction |
| Media room shell | 14 ft x 18 ft x 8.5 ft, walls plus ceiling | Wall and ceiling rows | Calculated by selected direction |
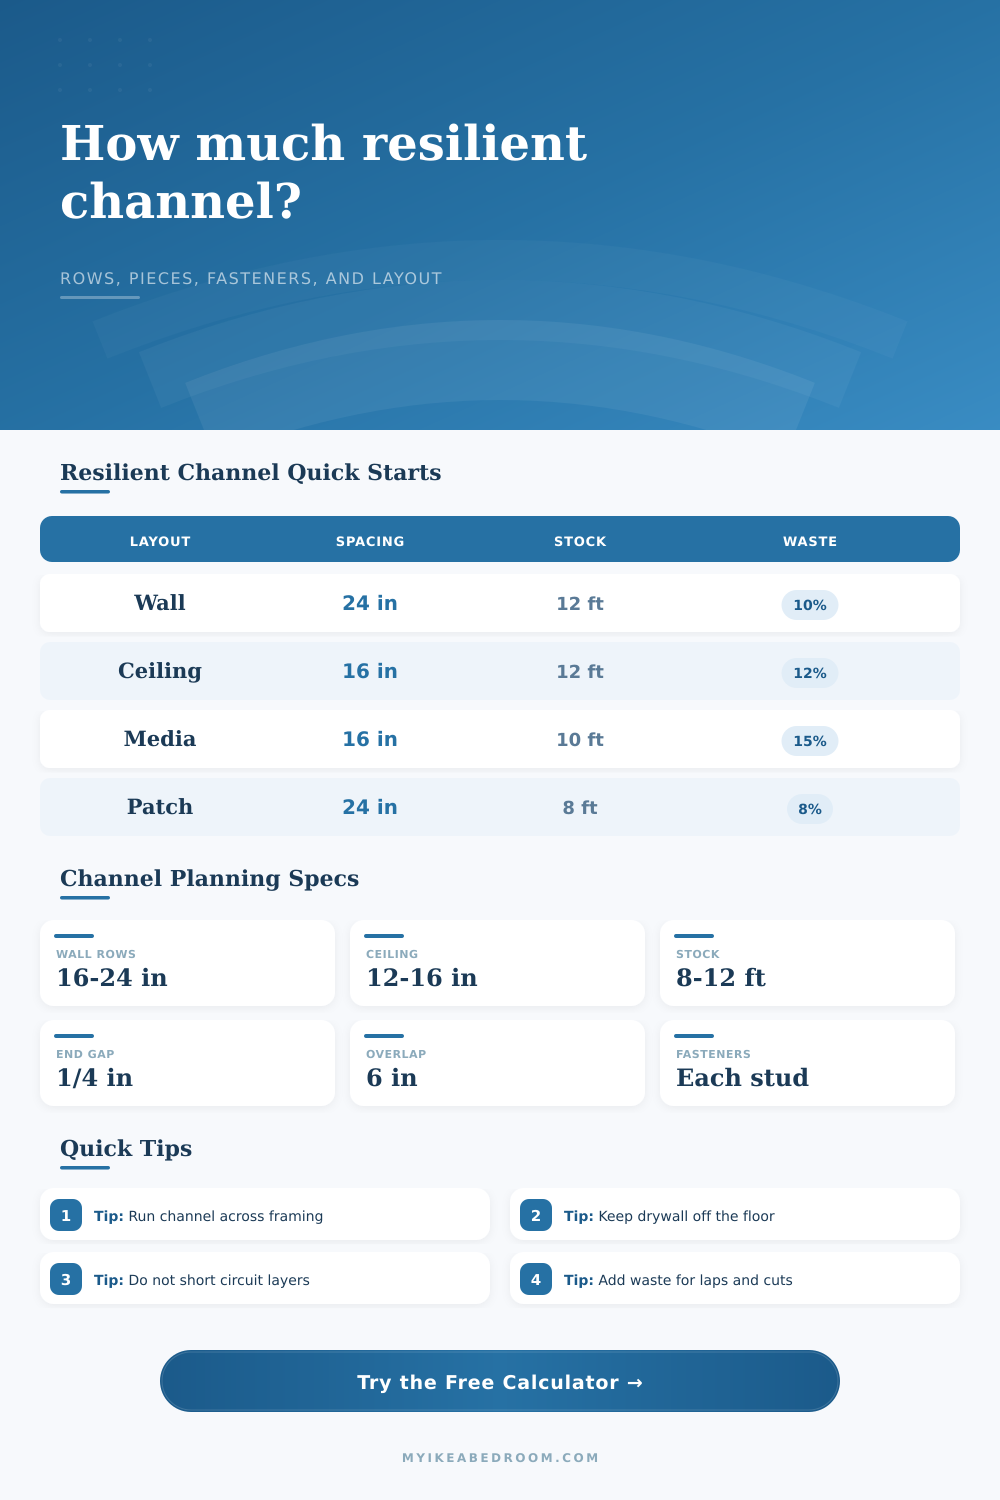
Layout tip: resilient channel normally runs perpendicular to studs or joists, and drywall fasteners must hit the channel only, not the framing behind it.
Quantity tip: count full rows across openings unless the channel is truly interrupted, because door and window deductions reduce board area more than channel footage.
The whole thing sounds complicated, but it’s easy when you consider math. All you’re doing is purchasing metal strips to apply to your walls.
To figure out how many you’ll need, well, that’s key. You don’t want to get carried away and blow your wad on resilient channel. Resilient channel isn’t measured in square footage like drywall; it’s measured in linear feet (rows). Treat it like sheets of drywall and you’ll end up with excess strips. Because you underestimated the number of rows required, your wall still be permeable to sound. It is a mistake easily made.
How to Use the Calculator for Resilient Channel
Then there’s the calculator, which turns room measurements into a shopping list. Enter size of your ceiling and wall height (because, y’know, most ceilings aren’t square), along with the desired spacing between rows of channels. Pick this last number wisely: it determine everything else. Most residential walls uses studs spaced sixteen inches on center, though running your resilient channels on centers of 24 inches may cause you to skip over some stud completely. This is bad: now your fasteners is gripping nothing but empty air.
The tool makes you consider the relationship between isolation layer and the framing behind it right away. You can watch the row count adjust as you tighten spacing, which instantly shows how many more strips is needed to provide better support.
The issue arise with linear footage. A dozen foot long wall? That’s just going to take a single, neat twelve-foot length of channel, right? Uh-uh. There must be some clearance above and below because you wouldn’t of want your drywall bridging any connections between the existing layer and new. Then there are those little gaps that create overlaps and require cutting scraps and/or overlapping pieces.
The calculator allow for all this by including an allowance for “waste”… Cutting, laps, and other possible miscues. For a typical room, allow ten percent; if you’ve got a lot of odd corners or doors, go to fifteen. Three more strips might cost a few bucks more but another run to the hardware store midway through a dusty construction process will cost a LOT more.
Twelve-foot lengths are also efficient. It’s fewer pieces and every joint is a possible weak spot that allows sound to bridge back across unless it’s properly sealed. While eight-foot lengths may appear less expensive per strip, you’ll be purchasing more strips to cover the same area and will ultimate have more leftover wood scraps. Scraps) taking up space in your garage. So, as the stock length increases, amount of pieces decreases as you can see in the reference table on the page. It’s a simple trade-off: do you want fewer purchases or do you want to lug around more material?
Keep in mind that you’ll also need some screw points. You can’t use any old screw; they has to be screws designed to go into a resilient channel, never through the channel into the stud itself. The calculator will estimate the required number of screws based off the number of rows and stud spacing. It assumes one fastener per stud crossed in basic installation. This may vary with double layer drywall or a heavier ceiling assembly where you may need additional support or other clip systems altogether.
The key here is acoustic decoupling vs. The key is acoustic decoupling versus structural stiffness. You want something that flexes just enough to break up the sound wave, but stays flat enough so it doesn’t cause two sheets of gypsum board to bow. The math tells you how many, but careful installation brings the quiet. When done right, you’ll notice the distinction between a wall that simply reduces sound to silence and one that seem to float it away.
So don’t over-torque your screws, use an acoustic caulk to seal any perimeter gaps, remove the drywall from the floor and ensure there’s no direct contact with a stud; otherwise, the channel provides a mechanical disconnect, but most folks pay attention naturaly only to the decibel rating of the drywall.