Ramp Length for Rise Calculator
Estimate straight ramp run, landing footprint, threshold-adjusted rise, segmented runs, and handrail clearance using an ADA-style 1:12 reference or your own slope.
Choose a common rise and layout, then adjust the fields for the actual door, porch, room threshold, or entry approach.
Ramp sizing results
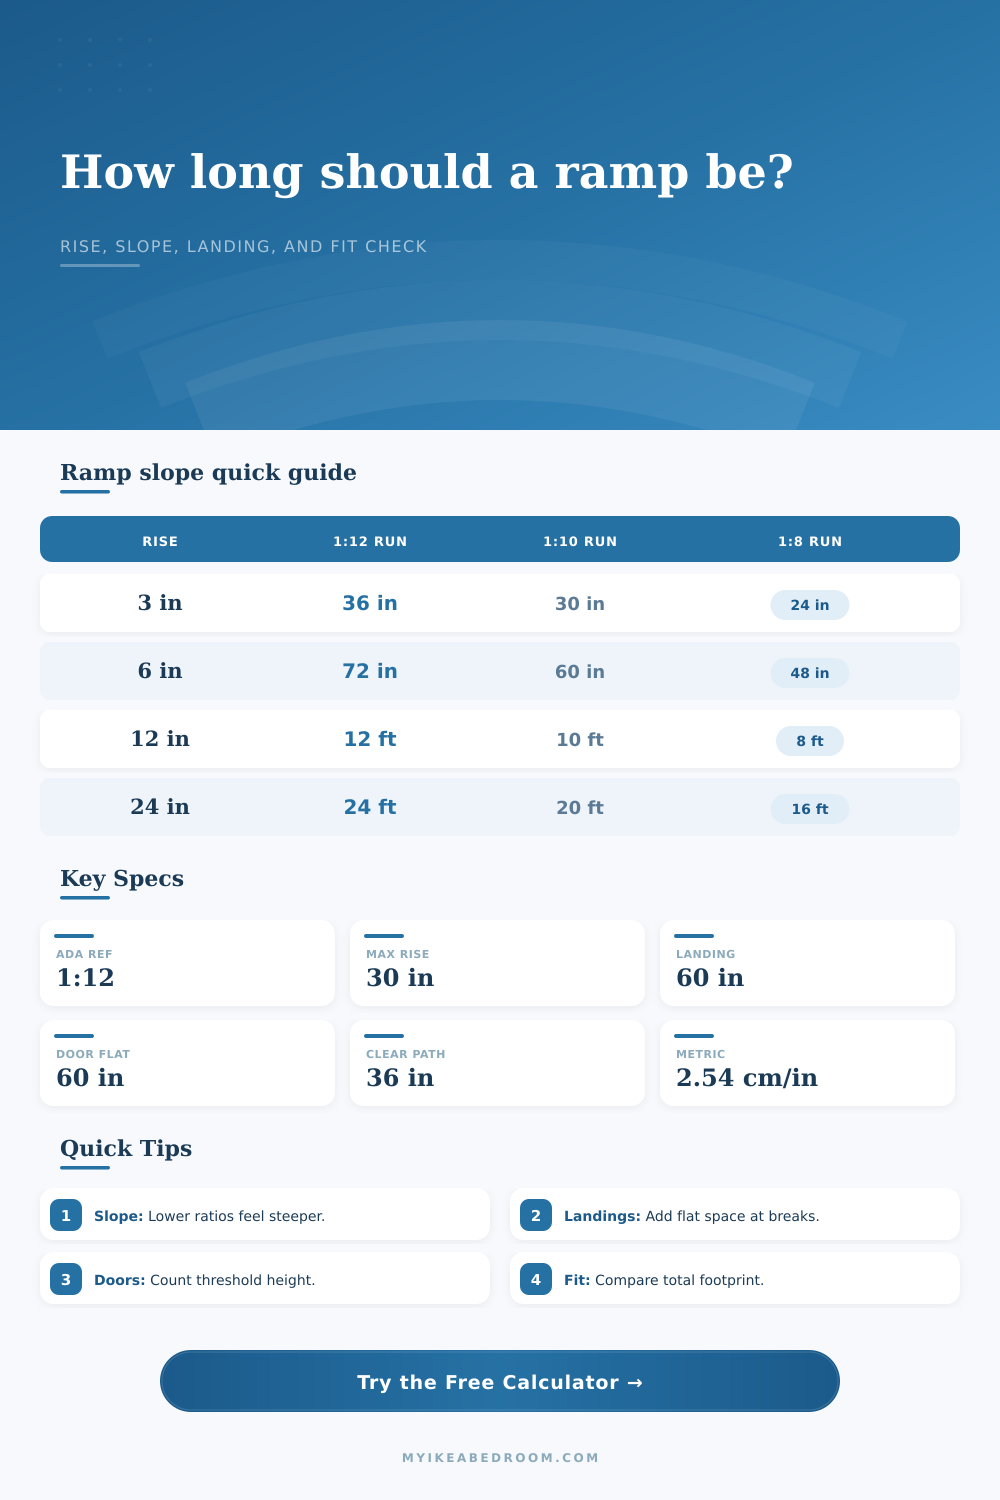
| Total rise | 1:12 ramp run | 1:10 ramp run | 1:8 ramp run |
|---|---|---|---|
| 3 in / 7.6 cm | 3 ft / 0.91 m | 2.5 ft / 0.76 m | 2 ft / 0.61 m |
| 6 in / 15.2 cm | 6 ft / 1.83 m | 5 ft / 1.52 m | 4 ft / 1.22 m |
| 12 in / 30.5 cm | 12 ft / 3.66 m | 10 ft / 3.05 m | 8 ft / 2.44 m |
| 24 in / 61 cm | 24 ft / 7.32 m | 20 ft / 6.10 m | 16 ft / 4.88 m |
| 30 in / 76.2 cm | 30 ft / 9.14 m | 25 ft / 7.62 m | 20 ft / 6.10 m |
| Layout | Ramp runs | Landings counted | When to use |
|---|---|---|---|
| Straight short ramp | 1 | Top + bottom | Low rise with direct approach |
| Two-run switchback | 2 | Top + bottom + turn | Limited straight yard depth |
| Three-run layout | 3 | Top + bottom + two turns | Higher porch or deck rise |
| Long compliant style | Auto split | Rest landings as needed | Runs longer than 30 ft |
| Item | Typical input | Calculator use | Planning note |
|---|---|---|---|
| Door threshold | 0.5 to 2 in | Adds to total rise | Measure the actual lip height |
| Top landing | 60 in | Adds to footprint | Needed for a level door area |
| Clear path width | 36 in | Sets usable width | Measure between rails |
| Handrail clearance | 1.5 in each | Adds outside width | Allow both sides if rails project |
| Scenario | Effective rise | Reference run | Typical layout |
|---|---|---|---|
| Door threshold lip | 1.5 in | 1.5 ft at 1:12 | Short threshold ramp |
| Single step entry | 7.5 in | 7.5 ft at 1:12 | One straight run |
| Two-step stoop | 14.5 in | 14.5 ft at 1:12 | One or two runs |
| Raised deck access | 24.5 in | 24.5 ft at 1:12 | Two-run layout |
| Long accessible run | 42.5 in | 42.5 ft at 1:12 | Split into landings |
The typical person believes a ramp is simply a sloping surface between two planes. Grab yourself some lumber, set it against porch, and there you go!
The issue is that paper never translates well in reality. Turns, landings, door swings, available yard space, these variables will all compromise your straight-line-on-paper plan. This is when planning tools is better than intuition.
How to Plan Your Ramp
It all starts with the vertical rise, but how you define it can be more important than actual number. Don’t take your measurement from the end of the stair stringer to the top of the concrete slab. Take it from the finished surface where someone will walk on top of stairs to the finished surface where they’ll walk on top at the bottom. This includes the deck board lip up to the threshold and even the mat that will sit in front of the door. It’s only a half inch, but when you multiply that by a typical twelve-to-one slope ratio, it means we needs an additional 6″ of run length to accommodate this increased height. Small thing but if you’re shoehorning a design in a tight corner then it matter.
The length of the incline are determined by the slope ratio (once you’ve got the actual rise). The typical reference standard is a twelve-to-one ratio: one inch of rise, twelve inches of horizontal run. That’s what most of us find comfortable. Whether we’re walking, on a walker, or in a wheelchair.
For a shorter utility ramp where linear feet are at a premium, consider going with an eight-to-one ratio, or ten-to-one. These feel noticeably steeper and may fatigue someone climbing them, but they will certainly save linear footage. You can enter your own constraints into the calculator up top and let it do the geometry work for you; no more hand-cranked trigonometry and guessing!
There’s also the hidden cost: footprint. That doesn’t just mean the length of the incline; it means the area needed on either side as well. To be able to safely move a wheelchair up and down a ramp, you require flat landing areas at both ends that is typically at least sixty inches in length. If you need to include a bend or turn in the ramp then you’ll need yet another landing for that. Every landing you add increase the overall linear distance required.
A forty-two inch rise seems do-able, but wait, you’re looking at needing thirty-five feet of run for the ramp alone. Now throw in three more landings, each measuring five feet long and all of a sudden you’re needing more than fifty feet of unobstructed space.
But what if the straight line approach isn’t possible because your yard measure only thirty feet deep? Well, now you’ve got to go with a switchback design, using the width instead of depth of property.
Another thing they don’t think about till the framing goes up is width. To accommodate a wheelchair, there must be a minimum of thirty-six inches from handrail to handrail along clear path. However, handrails consume space. When you build against a wall, the handrail eats into the clearance. When you’re building a freestanding ramp, you have to have clearance on both sides. Sometimes it’s only a few inches on each side that makes the difference between a compliant, narrow path and one that’s safe and comfortabley to use. Across the length of the project, those inches add up.
The ultimate height also depends off the material. Decking boards, treads, and stringers all has different thicknesses. Add them together as rough lumber and you may find your ramp fit the frame exactly. But if you add the top layer, it could of been too high and leave a gap that is uncomfortable to step over or might even cause someone to trip. Design for the completed size, not the rough lumber.
Don’t lose sight of the fact that this thing will actualy be installed in real life. The number on a slope works hand-in-hand with the other things you’re going to want to think about. Because while the minimum might be required, you also don’t want your transition feel unnatural or unsafe.
And the truth is that what you see when you look at your house and see a step isn’t necessarily just a step; it’s a volume problem. It has a limited amount of horizontal space to work with and a given vertical height to overcome. Is there enough of one to compensate for the lack of the other? That’s where the math come into play.
After you grasp how landings, run, and rise relate to each other, the answer stops feeling like a mystery and begins to feel like a set of manageable decisions. Measure twice, build once. Leave room for the turn.