Radiant floor heating planner
Radiant Floor Heating Coverage Calculator
Estimate heated floor area, mat or cable coverage, electrical load, thermostat zones, and clearances around cabinets, tubs, islands, and fixed furniture.
Full Breakdown
| Heating profile | Typical output | Best floor type | Coverage note |
|---|---|---|---|
| Thin electric mat | 12-15 W/sq ft | Tile, stone | Use full mats in open floor zones. |
| Loose resistance cable | 10-15 W/sq ft | Tile, membrane | Spacing changes the watt density. |
| Foil mat | 6-12 W/sq ft | Laminate, engineered wood | Lower heat for floating floors. |
| Hydronic panel | 8-12 W/sq ft | Wood, tile, slab | Loop design needs product data. |
| Floor covering | Planning output | Coverage target | Important limit |
|---|---|---|---|
| Porcelain or ceramic tile | 12-15 W/sq ft | 70-90% | High transfer and stable surface. |
| Natural stone | 12-15 W/sq ft | 70-90% | May need higher warm-up allowance. |
| Luxury vinyl plank | 8-12 W/sq ft | 55-75% | Check product temperature rating. |
| Laminate floating floor | 6-10 W/sq ft | 50-70% | Use compatible foil or low-profile mat. |
| Engineered wood | 8-10 W/sq ft | 50-70% | Keep surface temperature controlled. |
| Thin carpet or rug zone | 6-8 W/sq ft | 40-60% | Avoid insulating over heat wires. |
| Room scenario | Gross area | Unheated area | Common target |
|---|---|---|---|
| Bathroom with vanity and tub | 80 sq ft | 14-24 sq ft | 75-85% |
| Kitchen with island | 190 sq ft | 45-70 sq ft | 60-75% |
| Primary bedroom comfort zone | 220 sq ft | 40-70 sq ft | 55-70% |
| Basement family room | 400 sq ft | 20-50 sq ft | 70-80% |
| Mudroom or entry | 90 sq ft | 8-18 sq ft | 75-90% |
| Cable spacing | Cable per sq ft | Heat density | Use case |
|---|---|---|---|
| 2.5 in spacing | 4.8 ft | Higher | Cold tile bathrooms. |
| 3 in spacing | 4.0 ft | Standard high | Most tile floors. |
| 4 in spacing | 3.0 ft | Moderate | Kitchens and entries. |
| 5 in spacing | 2.4 ft | Lower | Supplemental comfort heat. |
Nothing feels quite as good as going barefoot onto a warm tile floor. But then you remember all the work involved for that luxurius. Most homeowners think about radiant heating like they is choosing paint colors; they only consider how it feels instead of physics under the subfloor. This results in damage to floors (from trapped heat), tripping breakers, and cold spot.
Knowing just which areas are covered by cabinets, tubs, and vanities, and how many square feet of floor you CAN heat, compared to how many square feet you want to heat, is often the difference between a successful install and a costly mistake. The math’s pretty simple: Plug all this stuff into the calculator above. But avoiding common pitfall requires knowing what each input represents.
How to Avoid Mistakes When Installing Radiant Floor Heating
First, consider the shape of the room. This seems obvious but your coverage area can be radically altered by a large island in a kitchen or an L-shaped entryway. Remember to subtract the square footage covered by fixtures or furnitures that won’t be moved. Don’t waste time trying to heat under a cabinet, thermal runaway!). And never forget about edge clearances. They’re not just a rule; they keeps heat from being sent into wall cavity, where it does nobody any good. Leave a couple inches of empty space next to walls.
Be picky about your system profile. A typical bathroom is a regular space with high demand for lots of power in a small area; that’s why electric mats is the default here. A loose cable is more versatile where there’s an awkward layout or plumbing to weave around. When you’re dealing with engineered wood or laminate flooring, you’ve got to back off the heat considerabley. Wood won’t take as much heat than tile… Running too many watts will eventually cause it to crack or bubble on its surface.
The tool will adjust the maximum allowable watt-per-square-foot based off the floor coverings you choose. This is a minor constraint, but sticking to it will save your floor.
The weakness of most DIY plans lie in electrical load. Sure, you’d love to warm the whole slab of your basement, but does your house’s electrical panel feel the same way? There’s only so many watts that a 120-volt circuit can safely delivers. Beyond this point, you’ll want to divide the floor into multiple “zones,” each with its own thermostat. The calculator will estimate your zone count from the total watts and the voltage you select. This keeps you from ordering too much heat for your wire to bear. Two perfectly controllable zones is worth far more than one oversized circuit that repeatedly trips when you run the dishwasher.
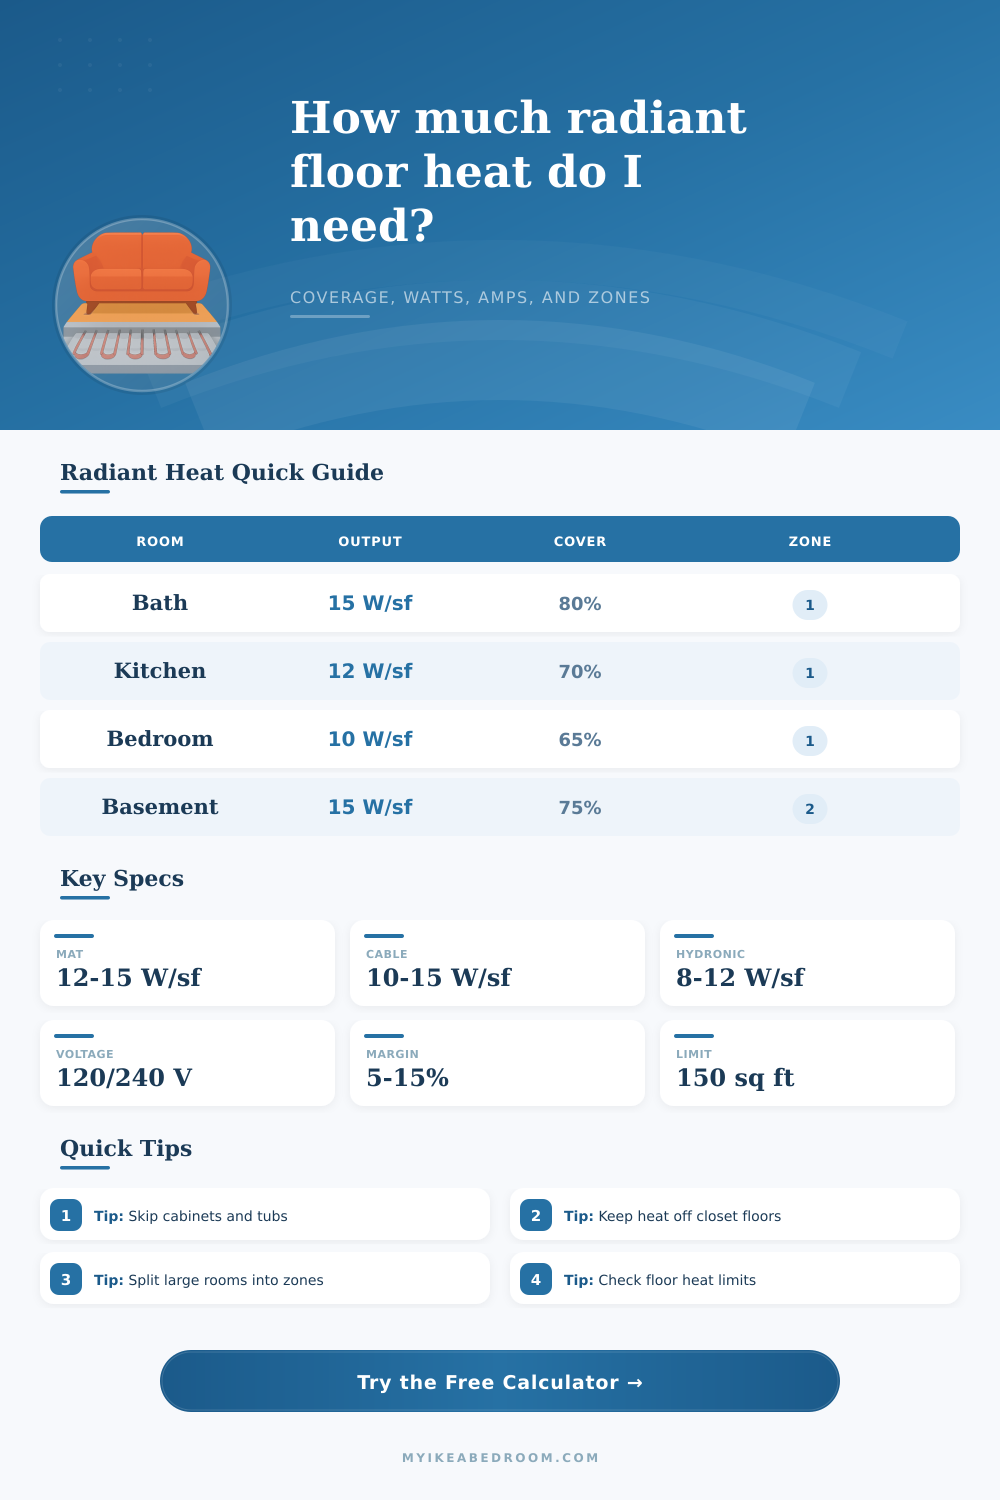
And then there’s coverage: here our gut instinct goes awry again. Of course I want to cover 100% of my bathroom floor! But who really does? No one does. You just want to be warm where your feet touch down. So for most people in most rooms, you’re aiming at somewhere between 70 and 85 percent coverage of what’s an open area that someone might choose to stand in. That’s comfortabley enough, without driving up energy expenses too much. The chart at right (on the room types page) illustrates that principle: kitchens tend to need less coverage than bathrooms, since we don’t tend to stand motionless as long in a kitchen as we do in a bath.
Zone first; feel the chill. Lastly, know that this is slow radiant heat we’re talking about. The slab will warm up, but it’s going to take some time before it actualy begins radiating all that energy into the space. Because of this lag, there’s no need to keep adjusting your thermostat like a madman… Program a schedule and stick to it. Lay it out, understand electrical limitations, and let the system do its thing over time.
You shouldn’t of stepped off the shower and have to suck in your breath as the floor scorches your feet. That’s when it becomes worth the investment.