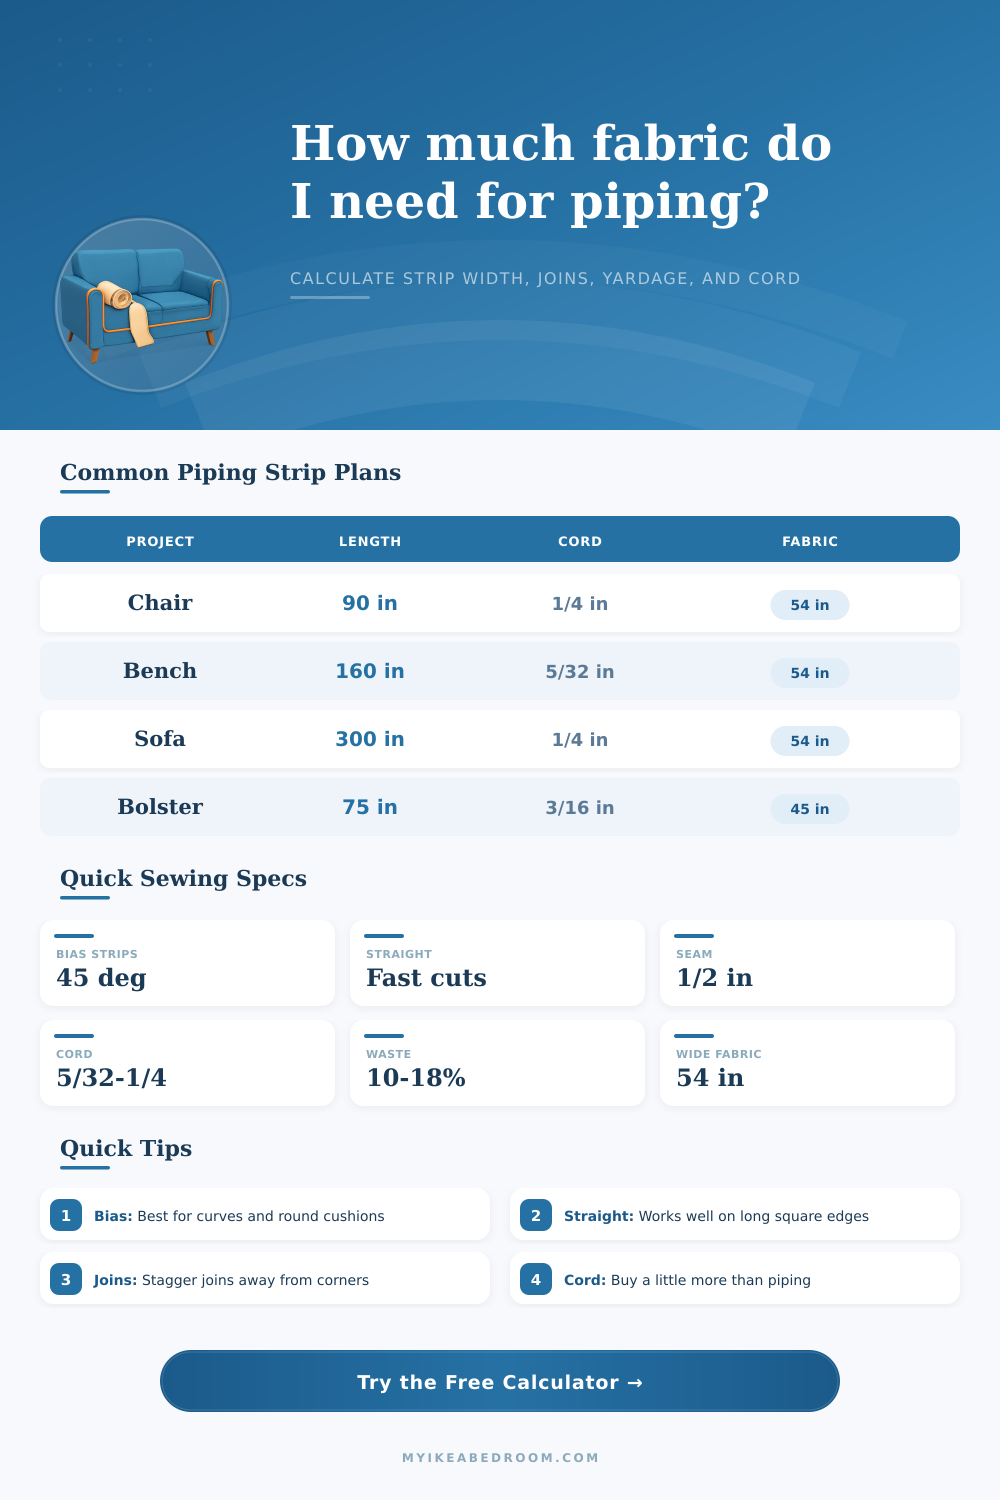
Upholstery piping, welt cord, bias strip, and straight strip planner
Piping Fabric Strip Yardage Calculator
Estimate total piping length, recommended cut strip width, strip count, join count, fabric yardage or meters, and cord length for cushions, bench seats, sofa cushions, dining seats, bolsters, ottomans, and boxed upholstery projects.
The calculator treats strip width as the actual cut width, then compares it with a recommended width from cord diameter, seam allowance, and fabric handling ease.
| Project type | Good grain choice | Typical cord | Planning note |
|---|---|---|---|
| Boxed seat cushion | Straight or cross grain | 5/32 to 1/4 in | Works well when corners are squared and softly clipped. |
| Wing chair cushion | Bias grain | 3/16 to 1/4 in | Bias helps piping sit neatly around front curves. |
| Sofa cushion set | Cross grain or bias | 1/4 in | Keep joins away from the front center of each cushion. |
| Bolster ends | Bias grain | 1/8 to 3/16 in | Round ends need stretch to avoid ripples. |
| Slipcover skirt welt | Straight grain | 5/32 in | Long straight runs can use efficient strips. |
| Cord diameter | Common seam allowance | Starter strip width | Use case |
|---|---|---|---|
| 1/8 in | 3/8 in | 7/8 to 1 in | Pillows, light cushions, and delicate edges. |
| 5/32 in | 1/2 in | 1 1/8 to 1 1/4 in | Dining seats, slipcovers, and small upholstery. |
| 3/16 in | 1/2 in | 1 1/4 to 1 3/8 in | Bench cushions, chairs, and boxed seats. |
| 1/4 in | 1/2 in | 1 3/8 to 1 1/2 in | Sofa cushions, ottomans, and heavier upholstery. |
| 3/8 in | 5/8 in | 1 3/4 to 2 in | Large decorative welt and chunky cushions. |
| Fabric width | 1 1/4 in strips | 1 1/2 in strips | Practical note |
|---|---|---|---|
| 45 in fabric | 36 strips per 45 in yard | 30 strips per 45 in yard | Narrow goods need more yardage for the same length. |
| 54 in fabric | 43 strips per 54 in yard | 36 strips per 54 in yard | Common upholstery width for cushions and welt. |
| 58 in fabric | 46 strips per 58 in yard | 38 strips per 58 in yard | Check usable width after selvage trimming. |
| 60 in fabric | 48 strips per 60 in yard | 40 strips per 60 in yard | Wide fabric can reduce joins on straight runs. |
| Project preset | Starting perimeter | Typical strip plan | Cutting check |
|---|---|---|---|
| Wing chair cushion | 85 to 100 in | Bias strips, 1 3/8 in wide | Place a join on the back edge, not the front curve. |
| Bench cushion | 135 to 180 in | Straight strips, 1 1/4 in wide | Long straight runs are efficient on cross grain. |
| Three sofa cushions | 250 to 340 in total | Bias or cross grain, 1 1/2 in wide | Cut extra cord so every cushion has tails. |
| Dining chair seats | 55 to 70 in each | Straight strips, 1 1/8 in wide | Small cushions add many start and stop tails. |
| Bolster end pair | 60 to 90 in total | Bias strips, 1 1/4 in wide | Bias prevents puckers around the circles. |
The details: Piping seems easy. On project scale, it’s a nice edge defining a piece, or securing a cushion in place.
On closer inspection, it’s a snug row of fabric enclosing something else (cord), leaving little room for error. Go too narrow, and the cord bulge up through the stitching, throwing off finished look. Too wide, and you’ve wasted fabric and get puffy hems that won’t roll over. To nail this equation, you can’t just guess. You’re going to want to bring your geometry skills to the table. Thankfullly, this online calculator does math for you. Knowing how those numbers work will help prevent miscalculations; before cutting fabric.
How to Make Piping
Usually the first decision is grain direction. Grain direction determines your fabric usage. Fabric come in two directions: the straight grain and the bias (diagonal) grain. Straight grain is efficient to cut because there is little waste, as the strips are parallel to the selvage edge. It is great for making cushion covers for square items like dining chairs or long, straight edges like benches.
But here’s the catch, if you turn the strip to make a rounded corner, straight grain will resist. You’ll end up with puckers or lots of clipping which weaken the structure. That’s where bias cutting comes into play. If you cut fabric at a diagonal (forty five degree) angle, then the strip itself naturaly has some stretchiness to it. So, if you pipe along a curve, the piping wrap nicely around the corners without any distortion.
Here’s the obvious downside; you’re using more yardage since you’re cutting diagonally across the bolt. So, you go through fabric quicker different than straight cuts.
The second variable is width of the strip. Once you decide on the grain, this becomes the critical variable. It’s a practical decision that depends off the seam allowance you want, plus the thickness of the welting cord. The calculator will compare what you want to cut with the recommended width that follow normal practice. A frequent error is when you use a narrow strip with a thick cord. That doesn’t work in the math. How can fabric fold over onto itself to wrap around the cord if there isn’t enough fabric on both sides of the cord? Plus, there should be space to stitch all those layer together. The thinner the fabric compared to the cord thickness, the flatter and limper the piping, not crisp and well-defined.
A second area where intuition fails is waste allowance. Novices figure out exactly how much fabric their cushion will take up and then leave a tiny amount of leeway to allow for any possible mistake. The fact is, there are tail ends at both sides that must be stitched into corner seams. There are also joins where one strip has run out and the next starts. If you’re using diagonal joins, which are always used because they’re stronger and bulkier than a straight butt joint, you has several inches of waste on each. And if you’re working with bias strips or fabric that can’t be mismatched (like big florals or stripes), you’ll need more waste. You cannot simply patch together mismatched motifs. The reference table show how various projects require varying amounts of cutting loss and join overlap allowance.
Finally, there is the cord. It should of been bought separately from the fabric. Always get just a little extra (a few inches) more than what you’ll need for the actual piping. It will break if it’s too short or if it’s too tight on a corner. Make sure to match your cord diameter to your strip width so the piping sits flush against the cushion without protruding awkwardly.
Aim for precision, not perfection. Checking your measurements prevents you from having to unsew a seam or waste expensive upholstery fabric. With some math and planning, a heap of dangling strips transforms into a neat finish piece that tames the whole thing.