Pergola Slat Spacing Calculator
Estimate slat count, actual gap, sun shade projection, coverage percentage, end reveal, and spacing score from span length, slat width, desired shade, sun angle, reveal, slat angle, and units.
Choose a starting layout, then adjust the span, shade target, sun angle, reveal, slat count, and slat angle for the bay you are actually building.
Current layout readout
Current summary: Calculate to compare actual shade coverage against the target.
Auto count uses the shade projection of one slat at the selected slat angle and sun angle. Manual count keeps your entered slat number and recalculates the real gap.
The score rewards a close shade match, positive buildable gaps, balanced end reveal, and slat spacing that is not too wide for a pergola roof.
| Pergola use | Typical shade target | Common slat gap | Layout note |
|---|---|---|---|
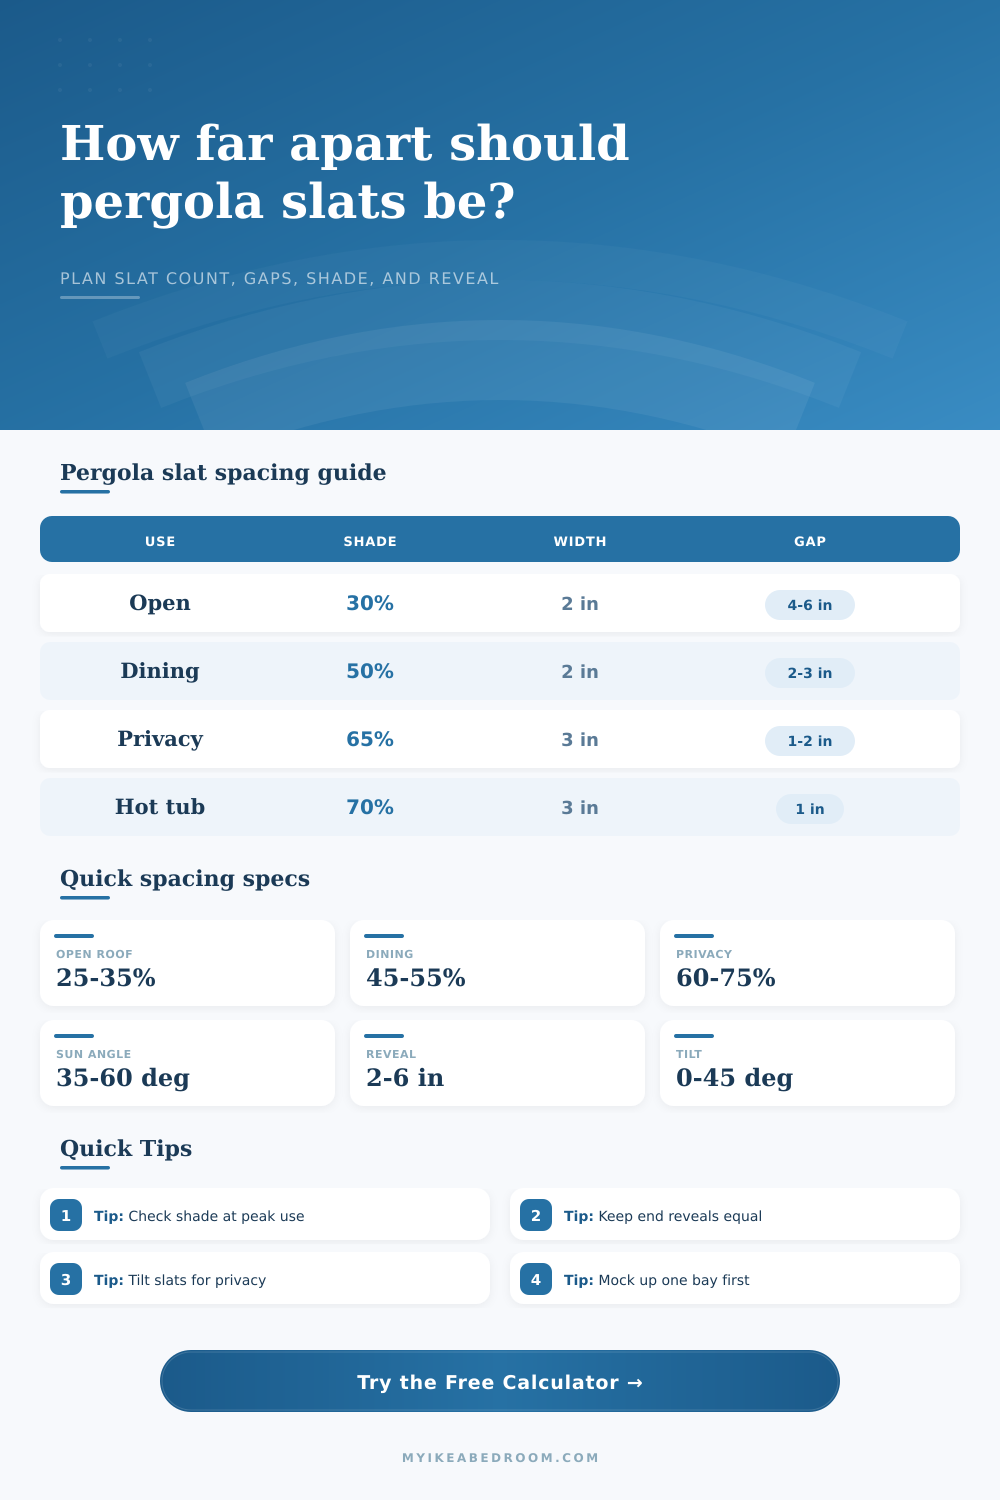
| Open pergola roof | 25% to 35% shade | 4 to 7 in | Prioritizes light, air, and an open overhead look. |
| General patio cover | 40% to 55% shade | 2 to 4 in | Balanced spacing for seating without a closed roof feel. |
| Dining pergola | 50% to 60% shade | 1.5 to 3 in | Useful when shade matters during predictable meal times. |
| Privacy slat screen | 60% to 75% shade | 0.5 to 2 in | Usually pairs closer spacing with a 30 to 45 degree tilt. |
| Hot-tub pergola | 65% to 80% shade | 0.5 to 1.5 in | High privacy and low-glare layouts need more slats. |
| Slat angle | Best use | Shade behavior | Spacing note |
|---|---|---|---|
| Flat slats | Classic open pergola roofs | Shade is close to the board width at high sun. | Needs tighter gaps for high shade targets. |
| 15 degree tilt | Soft shade with minimal screen effect | Adds a small low-sun shadow projection. | Works well for 40% to 50% shade layouts. |
| 30 degree tilt | Balanced patio shade | Improves afternoon shade without closing the roof. | Often the most forgiving angled option. |
| 45 degree tilt | Privacy and glare control | Creates a stronger directional shadow. | Confirm the viewing side before fixing slats. |
| 60 degree tilt | Screen-like side exposure | Projects more shade but leaves less overhead openness. | Best checked with a mockup section. |
| Material | Typical slat width | Gap tolerance | Planning note |
|---|---|---|---|
| Cedar | 1.5 to 3.5 in | Moderate gaps | Lightweight and stable enough for many patio pergolas. |
| Pressure-treated pine | 1.5 to 5.5 in | Wider gaps | Allow for movement and check straightness before layout. |
| Aluminum | 1 to 4 in | Tight gaps | Consistent profiles make repeated spacing easier. |
| Composite | 2 to 5.5 in | Moderate gaps | Check manufacturer span limits and thermal movement. |
| Hardwood | 1.5 to 3 in | Tight to moderate | Dense boards can look refined with narrower reveal lines. |
| Project | Span and slat | Shade target | Typical result |
|---|---|---|---|
| Narrow balcony cover | 5 ft span, 1.5 in slat | 45% to 55% | Usually 15 to 20 slim slats with small reveal. |
| Dining pergola | 10 ft span, 2 in slat | 50% to 60% | Often lands near 22 to 30 slats depending on angle. |
| Open roof bay | 12 ft span, 2 in slat | 25% to 35% | Fewer slats and larger 4 to 7 in gaps. |
| Hot-tub pergola | 8 ft span, 3 in slat | 65% to 80% | Close spacing and angled slats improve privacy. |
| Walkway pergola | 6 ft span, 2 in slat | 35% to 50% | Moderate shade works well over narrow paths. |
Mock up one bay: Clamp three or four slats at the calculated gap and check the shade at the exact hour you plan to use the pergola.
Keep reveal intentional: Equal end reveals make the roof look planned; change the count if the final gap feels forced or too small.
A pergola isn’t just shade; it’s either shade or a way to shape sunlight (which are two very different things). And while most folks select their lumber then figure out what the gaps should of be, it’s actualy the reverse: it’s all about the gap. It’s far more important to consider the math before picking up a drill than what type of wood to use.
Want a shady spot but don’t want to make your patio feel like a dark closet? That’s where geometry comes in. This page’s calculator do all the hard trigonometry work for you, but knowing how the numbers relate will help you avoid typical layout mistakes. So it’s not about the number of boards blocking the sky; it’s also about their width and how close together they is placed.
Why the Gap Matters More Than the Wood
In summer, when the sun is up high, the shadows are short, so you want narrower boards (or more of them) to prevent UV rays from penetrating. But in winter, when the sun is low and shadows long, even if they’re spread far apart. They’ll still keep out the sun. That matters a lot. A lot of homeowner put up flat slats and think they’ll have consistent shade throughout the year, but no. The length of the shadows changes by season and even by day.
That’s why this tool asks for a particular sun angle: you’re asking what the light looks like on July 15 at two o’clock in the afternoon. Ignore that variable, and you’re making guesses based off an average day that simply doesn’t exist. The slat angle make all the difference. Most folks find 30 degrees to be the sweet spot: enough shade without blocking out view of the sky, yet still letting air circulate between boards.
Unfortunately, tilt means less space for each slat, so you’ll need to consider tilt carefully when sketching out the number of slats to fit your span. Since a tilted board is smaller than its nominal length, most people miss it when they draw rough plans, so what seems like full coverage in their initial drawing becomes an overhang of too little shade. To account for this, the calculator project the actual shadow created by tilting the slat; not just the physical width of the board.
The more subtle aspect is the material itself. Humidity causes cedar and pine to expand and contract with changing seasons. They will move relative to one another, sometimes even touching each other if spaced too closely at build time. Because aluminum doesn’t behave this way, you can leave much smaller spaces, which appear cleaner and more moddern. Composite materials hover in between, but all still has their own thermal characteristics. The table on the page breaks out those allowances, to avoid making a gap that’s too large for your material to sustain.
What is the aesthetic detail that makes a pro job look like a pro job? End reveals. To the naked eye, the roof looks balanced and intentional because there’s an equal amount of space on both ends of the slat run. It matters, even if it is small. Ruin that symmetry by forcing another slat into place just to close a gap and you’ve ruined everything. The calculator give you a spacing score that rewards clean proportions and penalizes forced layouts. Find out how many slats fit your span naturaly; then stick with that number regardless of whether it means slightly wider gaps than you had planned.
Take an extra hour to mock-up one of the bays first before committing to the entire roof. Nail three of the boards in place with clamps at the gap you figured and then go sit in the space during peak sun time. Until you actualy see how the light is falling on your own floor, visual estimates are really unreliable. After that, however, you’ll know what it looks like as a point of reference and numbers become more than abstract data… they look like a plan. The tool speeds this process but your eyes will know if it’s feeling right or not.