Nailhead Trim Spacing Calculator
Plan individual upholstery nailheads across straight runs, headboard borders, chair backs, ottoman aprons, and framed panels with adjusted center spacing, visible gaps, rows, corners, and overage.
Start from a common upholstery layout, then change the measured route, head size, target gap, row count, corner holds, and waste buffer.
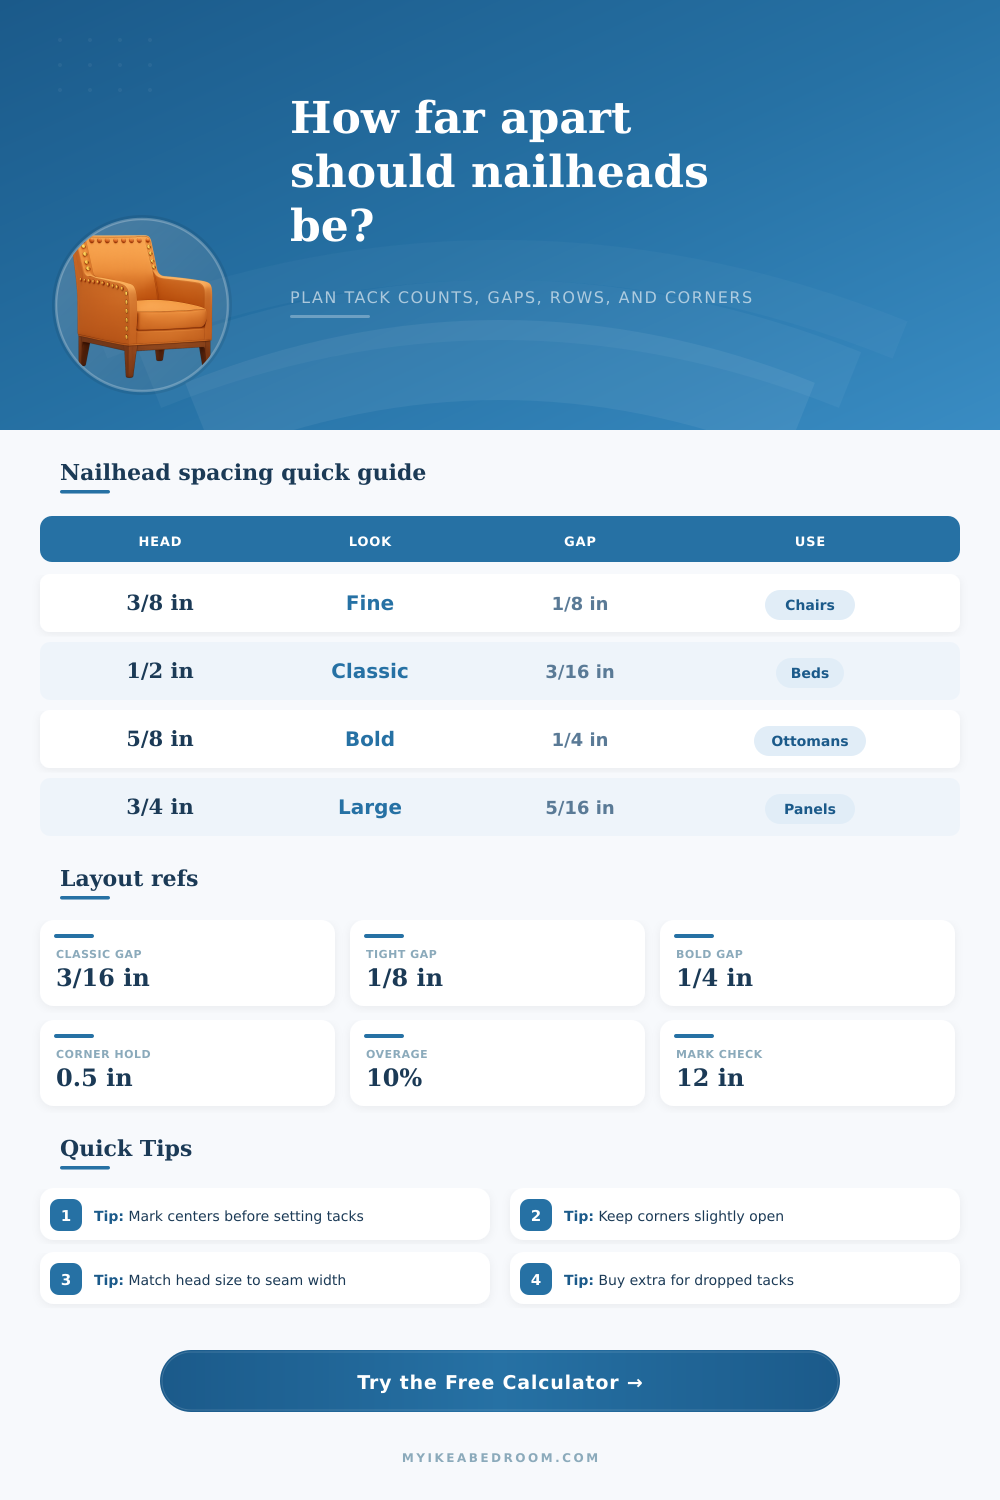
| Head size | Typical center spacing | Visible gap range | Best furniture use |
|---|---|---|---|
| 3/8 in mini dome | 1/2 to 5/8 in | 1/8 to 1/4 in | Chair backs, small stools, tight curves |
| 7/16 in low dome | 5/8 to 11/16 in | 3/16 to 1/4 in | Dining chairs, framed fabric panels |
| 1/2 in classic dome | 5/8 to 3/4 in | 1/8 to 1/4 in | Headboards, benches, ottoman lids |
| 5/8 in large dome | 13/16 to 7/8 in | 3/16 to 1/4 in | Ottoman aprons, bold panel borders |
| 3/4 in statement nail | 1 to 1-1/8 in | 1/4 to 3/8 in | Oversized trim, modern upholstered frames |
| Usable run | Nails per row | Actual center spacing | Actual visible gap |
|---|---|---|---|
| 36 in | 53 | 0.692 in | 0.192 in |
| 60 in | 89 | 0.682 in | 0.182 in |
| 72 in | 106 | 0.686 in | 0.186 in |
| 96 in | 142 | 0.681 in | 0.181 in |
| 144 in | 213 | 0.679 in | 0.179 in |
| Detail | Common allowance | Why it matters | Calculator field |
|---|---|---|---|
| Straight seam start | 1/2 in center inset | Prevents the first dome from hanging off the upholstery edge | Start inset |
| Square fabric corner | 1/4 to 3/8 in hold | Keeps heads from colliding at the turn | Corner hold |
| Rounded ottoman corner | 1/2 to 3/4 in hold | Leaves room to fan spacing around radius curves | Corner hold |
| Welt cord edge | 5/8 in row offset | Moves tacks away from raised cord or seam bulk | Row gap or inset |
| Double row border | 5/8 to 1 in row gap | Sets band width and avoids overlapping head skirts | Row center gap |
| Project | Route type | Typical run | Spacing note |
|---|---|---|---|
| Queen upholstered headboard | Three-sided panel | 145 to 170 in | 1/2 in heads with even top-corner holds |
| Dining chair inside back | Three-sided panel | 42 to 56 in | Mini or 7/16 in heads keep scale tidy |
| Ottoman base apron | Closed rectangle | 120 to 190 in | Use larger corner holds on rounded corners |
| Storage bench lid | Closed rectangle | 130 to 180 in | Double-check hinge side clearance before marking |
| Upholstered mirror frame | Closed rectangle | 140 to 210 in | Use exact-count mode when corners must align visually |
Gap: 1/16 to 1/8 in
Best on small chairs, vanity stools, and narrow upholstery strips where the line should read continuous.
Gap: 1/8 to 1/4 in
The most forgiving range for headboards, benches, and panels because small fit changes are hard to see.
Gap: 1/4 to 3/8 in
Works with 5/8 and 3/4 in heads where each nailhead is meant to stand apart visually.
Use: repeat repairs
Choose this when replacing missing tacks or matching an existing row with a fixed number of centers.
Keep the corner honest: Mark the first and last nailhead centers on every straight section before filling the span. If the final adjusted gap is outside your preferred look, change the corner hold by 1/8 inch before changing every mark.
Check scale before committing: Tape five to seven nailheads along the actual fabric edge and view the piece from normal room distance. A 1/2 inch head can look refined on a headboard but crowded on a narrow chair rail.
When you’re half way around that headboard, and realize that somewhere along the line your nailhead space got wonky, you might panic. And it started out so innocently, just a little bit off, maybe a 1/4 inch too far over on one side… But from across the room it all look lopsided.
Rhythm is what makes upholstery trim work. Use the calculator above to plot out where you want the trim to be placed. Simply measure out your route. It will tell you how many tacks is required and how much you’ll see between them. You won’t have any more regrets halfway through the project.
How to Space Nailheads Evenly
Lots of new guy count every single nail head, running their fingers back and forth in a straight line, but this is an invitation to err. Little measurement errors add up fast, and before long a nice neat line will be all jacked up at the corner. Define the overall rhythm and don’t chase individual spots along the way.
How much exposed fabric do you want between the domes? Showing about an eighth to a quarter inch is classic, leaving just a little bit of upholstery exposed. That little strip divides a nice clean border from a crowded mess. The tool lays out those ratios for you, so you know how many tack you need for your run.
The point is that the inputs matter more than the final count because they reflect the physical reality of the furnitures piece. So when it asks you for the trim route length, you’re not counting along the outside of the fabric. You’re counting along the centerline (where the nail heads will be). If you count too wide, the first tack might hang off the edge and the last one might crowd the seam.
That’s why there are inset fields at each end, which take care of geometry for you. They make sure the pattern has room at the edges but doesn’t waste any space.
Most layouts fall apart in corners. A straight math equation don’t work well around a tight turn. The fabric will all bunch up, and the welting cord adds bulk. Tacking directly into the point of a corner makes everything look cramped, or it would of caused the upholstery to pucker. To offset that, the calculator lets you specify how much corner hold.
Corner hold is the empty space you leave on either side of a turn. It not only allows room for folds in the fabric but also gives your eyes somewhere to rest. By leaving this pause, the remainder of the line appear tighter by comparison.
The end result depends a lot on scale. While a 1/2 inch dome makes a big statement atop a king-size headboard, that same dome would be overpowering on the back of a dainty dining chair. Check out the reference tables; these illustrate which head sizes goes best with particular gaps. For tight spaces such as fine lines, mini-domes is great. Statement nails want some breathing room (otherwise you can see them as a string of beads). Avoiding visual clutter comes from making sure that the head diameter matches the size of the piece.
Also keep in mind human error. Marking center points doesn’t mean fabric won’t shift or that tacks won’t bend. A nail might hit a screw in the frame or a stud. An overage percentage isn’t bad planning, it’s insurance against installation madness. Most upholsterers plan on adding ten percent more to their count. That way you have spares that match. There is no reason to pause mid-project looking for replacement hardware.
These prep work steps are what make the most dramatic difference between having a pro do it and trying it yourself. If you know how many boards you need and where to space them before you start the installation, there is no guessing during the install. You have marked your lines in confidence because the math checked out. Knowing your inset, gap, and corner allowance allows for the actual nailing to be mechanical not stressful. The end result is a consistent border, not one that looks like it was guessed or wobbles around. It’s neat and crisp and looks solid instead of estimated.