🪟 Muntin Spacing Calculator
Lay out balanced window grids with equal lite openings, centerline marks, muntin strip lengths, and waste allowance for interior or exterior grids.
| Layout Item | Formula | What It Means | Use It For |
|---|---|---|---|
| Clear layout width | Opening - 2 x edge reveal | Usable grid width inside the frame | All horizontal spacing |
| Lite width | (Clear width - bars x face) / lites | Visible glass width between bars | Balanced openings |
| First vertical center | Edge + lite + face / 2 | First internal muntin mark from left | Left-to-right marking |
| Next vertical center | Previous + lite + face | Repeating centerline distance | Remaining vertical marks |
| First horizontal center | Edge + lite + face / 2 | First internal muntin mark from top | Top-to-bottom marking |
| Method | Vertical Pieces | Horizontal Pieces | Best Use |
|---|---|---|---|
| Vertical continuous | Full clear height | Short segments between vertical bars | Tall windows and narrow sashes |
| Horizontal continuous | Short segments between horizontal bars | Full clear width | Wide windows and transoms |
| Full-length notched | Full clear height | Full clear width | Shop-built grids with half-lap joints |
| Individual segments | Lite-height segments | Lite-width segments | Applied tape or trim around each lite |
| Lites Across x Down | Total Lites | Internal Bars | Style Notes |
|---|---|---|---|
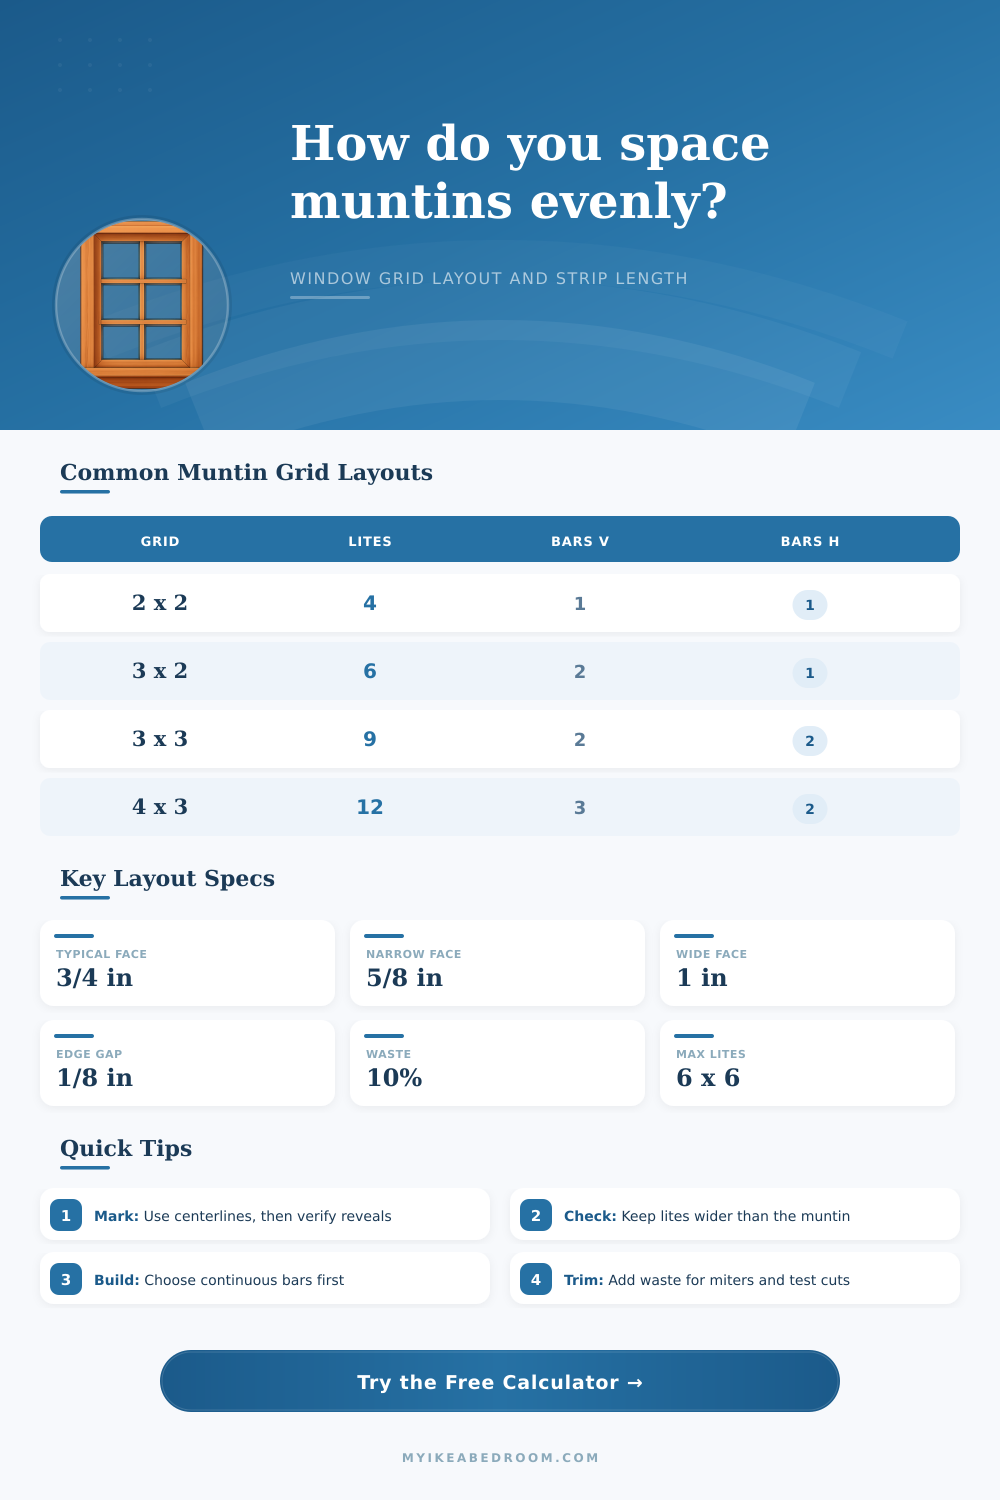
| 2 x 2 | 4 openings | 1 vertical, 1 horizontal | Simple cottage or cabinet door grid |
| 2 x 3 | 6 openings | 1 vertical, 2 horizontal | Good for narrow bedroom windows |
| 3 x 3 | 9 openings | 2 vertical, 2 horizontal | Balanced classic square pattern |
| 3 x 4 | 12 openings | 2 vertical, 3 horizontal | Taller divided-lite appearance |
| 4 x 3 | 12 openings | 3 vertical, 2 horizontal | Wide sash or picture window grid |
| 6 x 4 | 24 openings | 5 vertical, 3 horizontal | Large decorative wall-window layout |
| Muntin Face | Minimum Lite | Typical Reveal | Layout Character |
|---|---|---|---|
| 1/2" | 3" to 4" | 1/16" to 1/8" | Light, modern, low visual weight |
| 5/8" | 4" to 5" | 1/8" | Good for small sashes and cabinet glass |
| 3/4" | 5" to 6" | 1/8" | Traditional balanced window grids |
| 7/8" | 6" to 7" | 1/8" to 3/16" | Stronger presence without feeling heavy |
| 1" | 7" to 8" | 3/16" | Doors, large windows, exterior grilles |
While the cuts don’t always make all difference between a deliberate window grid and a do-it-yourself faux pas, rhythm does. If you’ve ever been in a beautifully restored house, you might not have known why muntins seemed balanced, but you stood in front of them and knew that they were. Contrast that with what is on the other end of that coin, the new construction window whose vertical bars seems to float just a bit to the left or right, or the top lite was squashed as compared to the bottom one? Nope, those aren’t manufacturing accidents. Those are layout blunders.
After plugging in the rough opening dimensions into the calculator above, the math has already been done for you so you don’t have to mentally do arithmetic when your brain is tired after a long shop day. First of all, most folks begin by doing the grid count. They look at a piece of paper and think three-by-three pattern looks good. So they say, I’m going to do a three-by-three. Except when they get to their actual window, which is a typical rectangular sash, they discover they can’t make a three-by-three grid because a three-by-three require nine equal squares, and that’s soon impossible. Instead, you wind up with really narrow (squarish) lites up high and really big stretched-out lites down low. That pulls the eye right away.
How to Plan Your Window Grid Layout
What you should of do instead is to think back from real size of opening. Don’t take the rough dimensions of the frame; take clear glass area within the stops. Why? Because those muntins are positioned either on the interior stop or directly on the glass itself, not the exterior brick mold. Any mistake in measurement at this stage gets compounded in everything that follows.
Another factor that matters more then most people realize is width of the muntin bar across its face. In a big window, you’ll hardly notice if the bar’s only half an inch; no matter how straight you cut it, it will just dissapears and make the whole grid seem flimsy. But put a full-inch bar in a small sash and it dominate, giving what ought to be delicate divisions between panes the feeling of heavy bars in a jail cell. This is laid out clearly in the reference table on the page, which pairs minimum lite sizes with their matching face widths.
To keep things looking light, you typically want the muntin to be narrower than glass opening. So once your lite opening falls to less than four inches while keeping a three-quarter-inch muntin bar, the window begin to get cluttered. It is a small thing but it makes a difference when assessing the overall effect.
But after you get a sense of your proportions, the next step (assembling it)… Will dictate purchasing quantities as well. For instance, continuous vertical bars is cleanest and easiest to install on tall windows with fewer joints showing along the sightline. Long horizontal continuous strips makes most sense for wide transoms: vertical joints would break up the view flow. Most high-end restorations use notched grids (precise in the shop), no end joints shows at all. The calculator takes those decisions into account and figures the strip lengths (including added length for coping corner or miter cuts).
Don’t forget waste allowance isn’t simply for error. It’s also for kerf loss and for ensuring that your saw fence is set correctly so none of that good stuff gets hacked away.
The physical layout of the grid is best done by marking centerlines. It’s easiest to think of it as measuring from the center of the muntin profile instead off the edge of one bar to the next. That way any error doesn’t add up over time. An eighth of an inch off each time will accumulate into more than that at the end where the final bar won’t fit. Even though there may be some slight variation in bar width because of manufacturing tolerances, centerline marking make the whole grid stay symmetrical. Snap a line for the center of each horizontal and vertical position and make your strips symmetric about those marks.
Take an extra ten minutes and test out your layout in tape or on paper. It’s much easier to adjust tape muntins when you feel that the rhythm isn’t right. You won’t have that luxury once the saw blade sinks into the stock.
Visual balance is as important as mathematical accuracy. A window grid should softly lead your eye from one side of the pane to the other, not stopping at odd proportions or lopsided spacings. Don’t fight poor math; get it right on the drawing board, then installation will be easy: fitting a piece here and another there. Actualy, you need to make sure all furnitures are moved out of way first.