Milk Paint Mixing Calculator
Size a fresh milk paint batch from project area or powder on hand, including water ratio, bonding additive, pigment tint, waste buffer, and batch containers.
Milk paint batch results
| Mix profile | Water per 1 cup powder | Typical coverage | Best use |
|---|---|---|---|
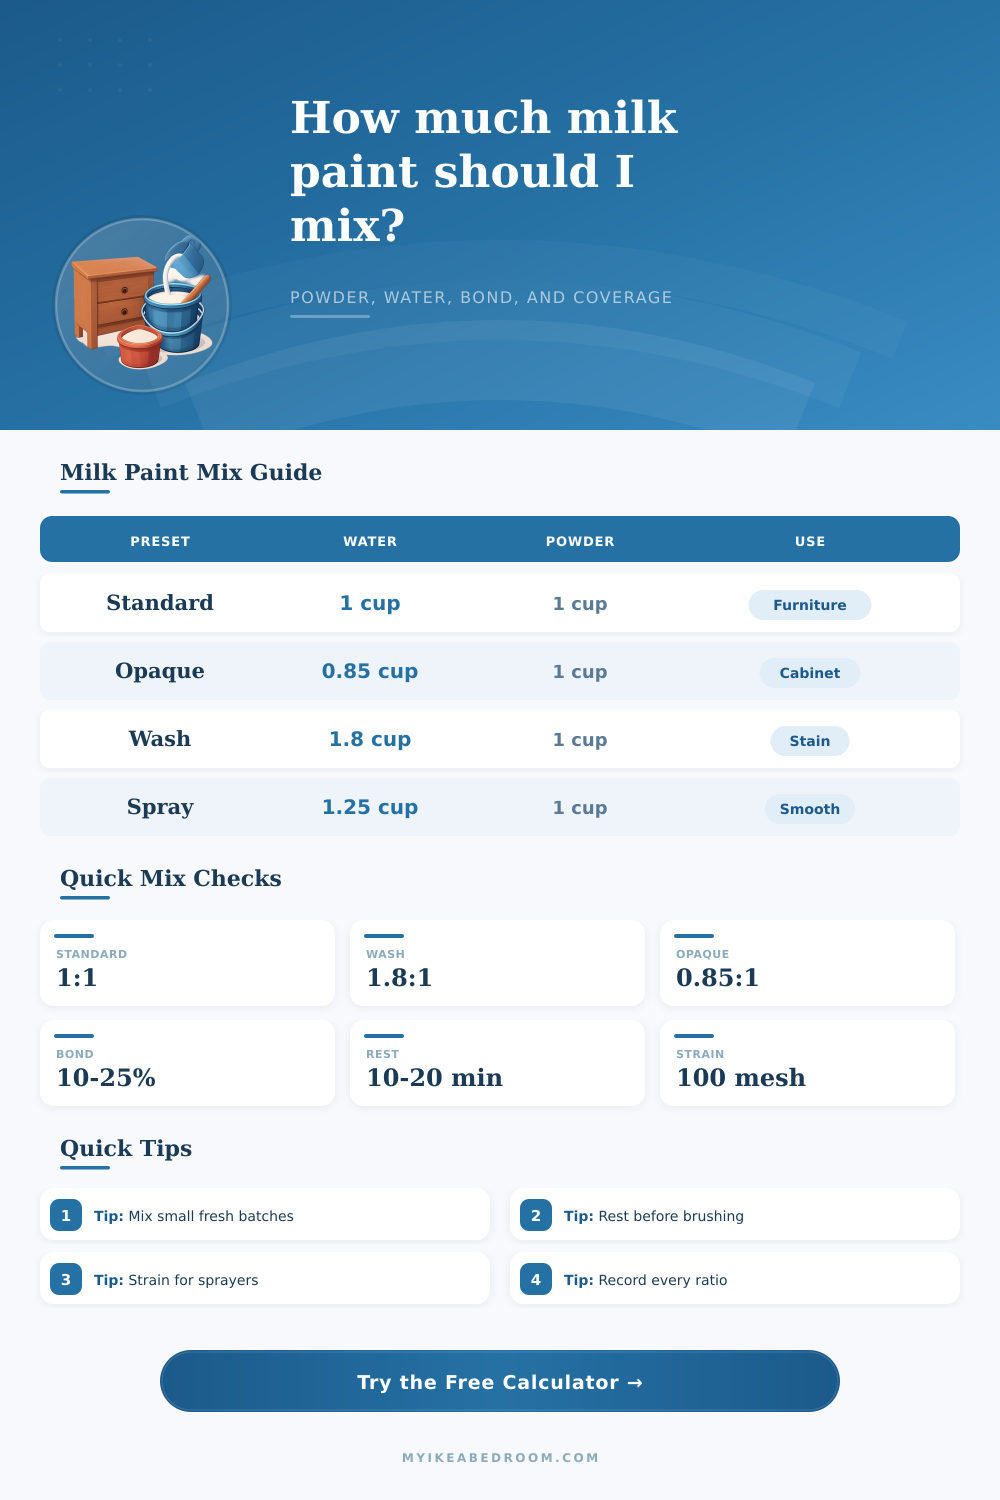
| Standard 1:1 furniture mix | 1.00 cup | 85 sq ft per quart | Dressers, tables, frames, and general furniture coats. |
| Smooth brush mix | 1.10 cups | 92 sq ft per quart | Brush work where a slightly longer open time helps. |
| Thick opaque coat | 0.85 cup | 70 sq ft per quart | High-color coats over contrast or cabinet panels. |
| Thin stain wash | 1.80 cups | 130 sq ft per quart | Visible grain, washed color, and layered aged finishes. |
| Chippy dry coat | 0.95 cup | 78 sq ft per quart | Low-bond decorative coats over resist or old finish. |
| Bonded slick-surface coat | 1.00 cup | 82 sq ft per quart | Laminate, varnished furniture, glossy trim, and vanities. |
| Sprayer-strained thin mix | 1.25 cups | 105 sq ft per quart | Fine finish spraying after full dissolving and straining. |
| Lime-look wall wash | 2.10 cups | 150 sq ft per quart | Subtle wall panels, beadboard, or soft translucent passes. |
| Small touch-up batch | 1.05 cups | 88 sq ft per quart | Repairs, sample chips, and small drawer fronts. |
| Surface profile | Coverage factor | When to use it | Mix note |
|---|---|---|---|
| Sealed, primed, or previously painted | 108% | Less suction and easier spreading. | Bond may still be needed on glossy finishes. |
| Raw wood furniture | 100% | Typical sanded wood furniture. | Good default for dressers, tables, chairs, and shelves. |
| Open-grain or sanded pine/oak | 88% | Porous wood drinks the first coat. | Add buffer or plan a thinner first coat. |
| Slick laminate, varnish, or glossy finish | 92% | Adhesion prep changes coverage and flow. | Use bonding additive and avoid over-thinning. |
| Flat wall panel or beadboard | 115% | Large flat panels with steady brushing. | Thin wash profiles can cover more but look translucent. |
| Prepared batch | Approx volume | Standard powder | Standard water |
|---|---|---|---|
| Sample cup | 1/2 cup | 0.30 cup | 0.30 cup |
| Touch-up jar | 1 cup | 0.60 cup | 0.60 cup |
| Pint work cup | 2 cups | 1.19 cups | 1.19 cups |
| Quart pail | 4 cups | 2.38 cups | 2.38 cups |
| Half-gallon pail | 8 cups | 4.76 cups | 4.76 cups |
| Adjustment | Typical range | What it changes | Practical note |
|---|---|---|---|
| Bonding additive | 10-25% of mixed paint | Adhesion on slick surfaces. | Use less for distressing and more for glossy old finishes. |
| Dry pigment tint | 1-8% of powder | Color strength and opacity. | Blend into dry powder first to prevent streaks. |
| Extra water after rest | 1 tsp at a time | Flow, brush drag, and transparency. | Milk paint thickens while powders hydrate. |
| Working batch age | Same day preferred | Consistency and odor control. | Mix fresh batches instead of storing large leftovers. |
So, what do you start out with? You start with a dresser and some milk paint powder. And maybe… you have no idea how much water to use.
Too little, and the stuff washes right off. Too much, and it’s all goopy before you even get another stroke down. It’s kind of intuitive, the ratio that makes for a good finish vs a sloppy one… but it still take some practice. Because milk paint is simply a pigment suspended in water and calcium carbonate, which is a type of chalk, it behave according to its consistency.
How to Mix Milk Paint
For typical furniture work, most first-timers uses what is called a one-to-one, by volume mixture, which yields an opacity that lets the paint flow easily over your brush. But if you’re painting a slick surface like laminate cabinets, or are attempting a see-through wash effect on something such as beadboard, the one-to-one ratio will not serve. More water creates translucency; less water achieve opacity.
Once you enter your desired finish and type of project, the calculator does the rest, eliminating guesswork when estimating how much powder will cover an area. It also takes into account things most other formula don’t, such as how much raw surfaces soak up and extra amount needed for touch-ups.
Raw wood is a hungry beast when it comes to absorbing paint, sometimes demanding a bigger batch size or a heavier initial coat. Sealed surface do not take as much per square foot, but they do require a bonding agent or they may not stick well and will start to peel. All this gets factored in at once so you can get a sense of how one change affect everything else.
Many people gets confused by the bonding percentage. The milk paint will bond chemically to porous finishes giving them an aged durability. It doesn’t bond to non-porous finishes such as laminate or varnish; it just flakes off the top of them. You can add a bonding agent and make it stick better while still maintaining the look. But, if you are going for a distressed, chippy look, you don’t want the bond; instead, keep the bond set at zero because you need that natural failure point. It’s all about making the paint stay where you want it to stay, and fall off where you want it to fall off.
Opacity: Dry pigment makes the powder take up more space before adding water, which make tinting more complex. A 5% tint load isn’t exactly 5% since each particle of pigment have its own weight. So the final volume differs a bit more then anticipated. You want to blend the colorant with the powder thoroughy so that it doesn’t clump in the finished product. It’s far more difficult to mix wet paint than dry powders to correct color problems. Use the reference table as a guide to what to expect on coverage/opacity, adjusting for your needs before preparing the batch.
Measuring isn’t everything… timing’s important too. The milk paint will keep hydrating once mixed and will thicken up over time. So what seems like the right consistency at the start might have felt heavy by the time you reach the back of the dresser. Letting it rest 10-20 minutes gives all the solids time to absorb and allows the air bubbles to dissipate. Then just give it another splash or two of water if necessary. This is a key to good application. If you’re rushing, you’ll see streaks and an uneven texture which won’t come out completly with sanding.
Last, account for waste. There’s always some spilled paint on the floor; there’s always slightly more used around edges versus flat surfaces. Furniture usually gets about a ten percent buffer for waste, while intricate details can require up to twenty percent more paint material. If you run out of your mix you’ll have to mix another batch, which is never as good in terms of viscosity or color. Far better to have excess paint than to cut off the project because of an unpainted drawer front.
Measure your materials accurately and account for these mistakes, and what was once a risky experiment becomes a reliable method. The ratio are right, so the finish is right.