Island lighting span, pendant spacing, and drop planner
Linear Suspension Length for Island Calculator
Calculate a proportional fixture span, shade-to-shade spacing, end clearance, counter drop, sightline clearance, beam coverage, and fixture count suitability for kitchen islands and dining islands.
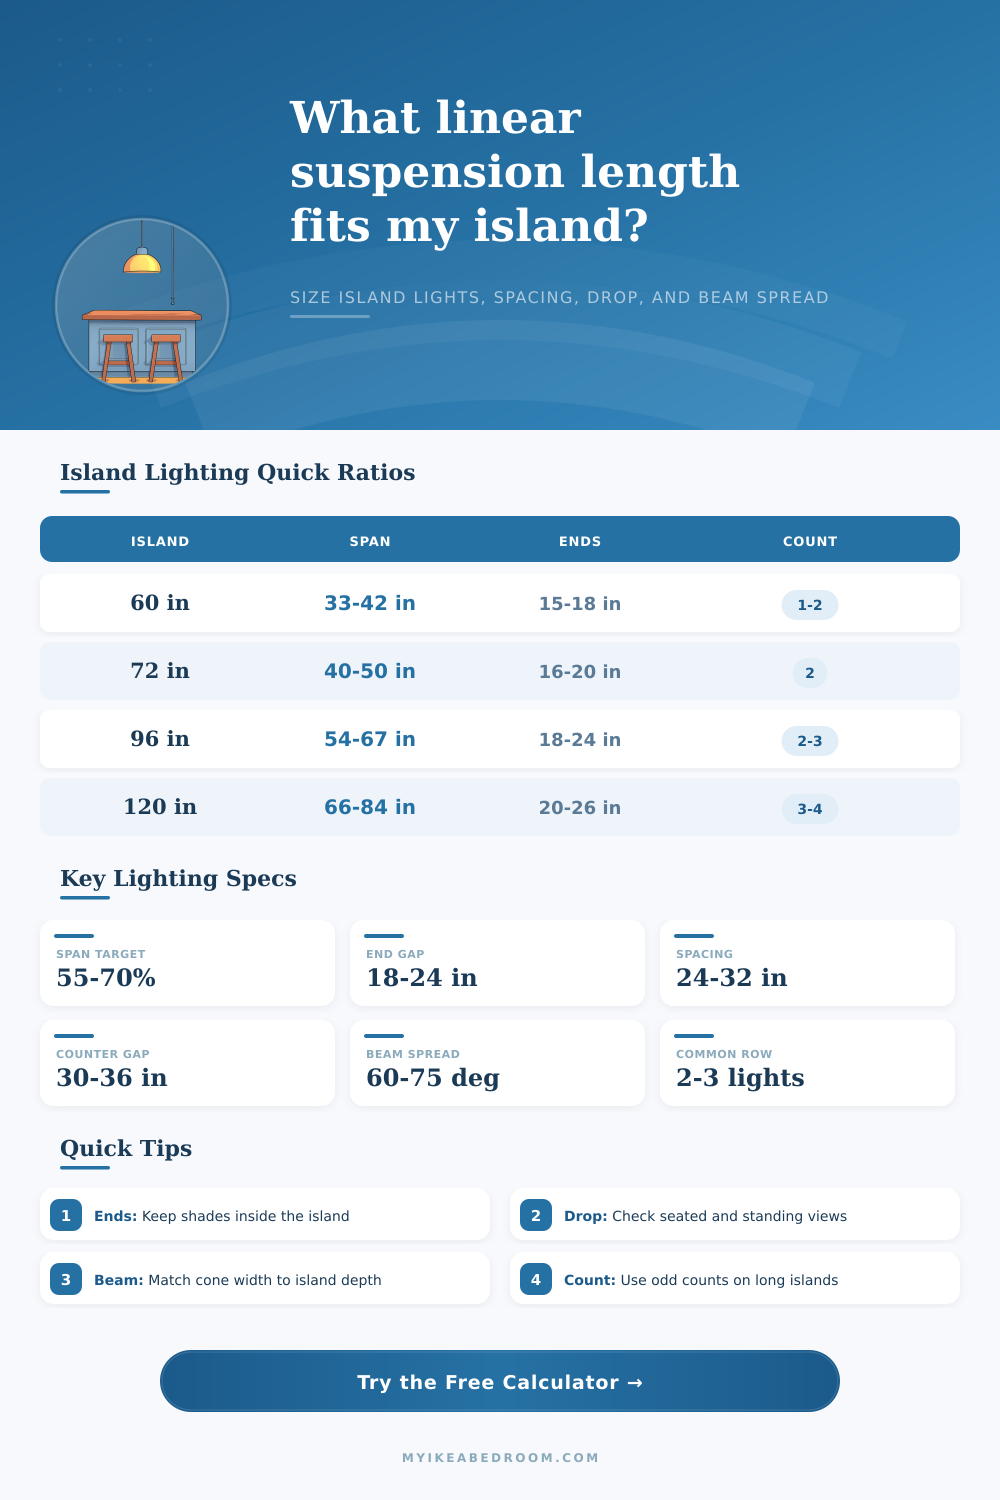
The live checks compare your fixture row against common design targets: 55% to 70% visual length, 18 in to 24 in end clearance, 30 in to 36 in counter clearance, and beam coverage near the island depth.
| Island length | Recommended fixture span | Typical count | End clearance target |
|---|---|---|---|
| 48 to 60 in compact island | 26 to 40 in visual span | 1 linear bar or 1 large pendant | 12 to 18 in per side |
| 66 to 78 in small kitchen island | 38 to 52 in visual span | 2 pendants or 1 linear bar | 16 to 20 in per side |
| 84 to 102 in full kitchen island | 48 to 70 in visual span | 2 large or 3 slim pendants | 18 to 24 in per side |
| 108 to 126 in long dining island | 62 to 88 in visual span | 3 pendants or multi-light linear | 20 to 28 in per side |
| Ceiling height | Common suspension drop | Bottom above counter | Planning note |
|---|---|---|---|
| 90 to 96 in ceiling | 24 to 30 in drop | 30 to 36 in clearance | Use compact shades or a slim linear bar. |
| 97 to 108 in ceiling | 30 to 38 in drop | 31 to 42 in clearance | Adjust cord length to keep the shade below the ceiling plane. |
| 109 to 120 in ceiling | 38 to 48 in drop | 34 to 46 in clearance | Longer drops help the island feel connected to the light. |
| Sloped or vaulted ceiling | varies by canopy | keep bottoms level | Use the lowest shade bottom as the sightline check. |
| Shade or bar size | Best island depth | Center spacing guide | Use case |
|---|---|---|---|
| 8 to 10 in slim shade | 24 to 32 in depth | 20 to 26 in centers | Narrow galley islands and small kitchens. |
| 11 to 14 in standard shade | 30 to 38 in depth | 24 to 32 in centers | Most two-pendant kitchen islands. |
| 15 to 20 in wide shade | 38 to 48 in depth | 30 to 40 in centers | Breakfast islands and deep dining counters. |
| 36 to 72 in linear bar | 30 to 44 in depth | single fixture body | Clean sightlines and centered task lighting. |
| Beam spread | Light cone at 32 in counter clearance | Best island depth | Interpretation |
|---|---|---|---|
| 35° narrow beam | about 20 in diameter | 24 to 30 in | Accent light; may leave dark counter edges. |
| 50° medium beam | about 30 in diameter | 30 to 36 in | Focused task light over prep zones. |
| 65° wide beam | about 41 in diameter | 36 to 44 in | Balanced coverage for most kitchen islands. |
| 80° very wide beam | about 54 in diameter | 42 to 54 in | Broad ambient light with more spill beyond the top. |
Lighting kitchen islands is tricky because they demand two opposing things at once. They need bright light to chop veggies safely. They also needs soft light to make dinner prep feel like an occasion instead of just a chore. Usually it’s a matter of trial & error with some white knuckles as you’re still on the ladder.
With the linear suspension length calculator above, you can plug in your own numbers and let math work itself out (instead of trying to figure out all the spacing rules and factors). It changes what was a visual challenge into a set of manageable variables.
How to Light Your Kitchen Island
The second variable people get wrong is span. For example, they might think they need whole length of their countertop covered with the light. But doing that results in a dark perimeter and glare. Typically, we’re aiming for about fifty-five to seventy percent of the length of the island. Why? That allows the fixture(s) to be visually contained within footprint of the counter, without overpowering the space by making the end(s) feel too busy. Believe it or not, that breathing room’s important, as it frames the work zone without overwhelming it. The calculator knows the ideal span based off your own island length (you don’t have to eyeball it off the drywall).
The spacing follows the rules of proportion over precision: Two pendants spaced twenty-four to thirty-two inches apart, center-to-center, won’t appear to be twins sitting side by side in the same chair. Three fixtures? Odd numbers creates nice symmetry (which is why three fixtures usually look better on a long island than two), as long as you keep the middle fixture centered. And that’s how the tool knows when to tell you if you’re too close together with fixtures or have left space too empty. It is a little thing, but it is one of the differences between DIY blunders and a pro job done right.
Safety meets beauty: How far down does it go? The standard answer here is to hang them about 30-36 inches from the top of your countertop. That’s high enough to clear your head when standing and provides sightlines over the island (if you’re going with seating). If your ceilings are high, then long drops will keep that ratio, and lower ceilings mean you’ll need to go with slimmer bars or fixtures so they don’t hit peoples’ heads. To be sure, the calculator considers both your counter depth and ceiling height, and shows that your desired drop will place bottom of your shade above eye-level for sitting customers. It’s a quick clearance check, but mess up and what was supposed to be a gorgeous light becomes a no-no.
The secret ingredient is beam spread. If it’s too narrow, the beam will create hot spots that blind you; if it’s too wide, it won’t adequately illuminate the prep area and washes out the contrast. Sixty- to seventy-five degrees is ideal for most standard kitchen islands (it corresponds to width of the island). Check if your shade reaches the back edge of the cooktop or sink by checking the diameter of the light cone it casts on the counter. This is what the tool does for you. It’s not simply about where you hang the bulb; it’s also about casting your pool of light where your hands are going to be.
The world doesn’t work according to plan. Cabinets move. Ceilings slant. Islands gets built slightly narrower than planned on the blueprints. It is a cliché to say you should of measured twice. The calculator allows you to try out different scenarios without purchasing hardware until you’re ready. Switch between small, narrow island for a tiny apartment vs. Switch to a big, wide island for a dining room to learn how depth, length, and light work together. There is no single magic answer; it’s more about learning what works well in relation to other things.
There are certain details about kitchens that feel right, but not until they’re done. The math won’t be on your mind as you cook. All you’ll notice is that the room seems bigger and the food looks better. Proportion and proper spacing creates an atmosphere that helps daily life instead of requiring attention. When the light falls where it should and the fixtures sits comfortabley in their bounds, the island transforms from an obstacle to a destination.
The calculator will help you get there… Without the stress.