Lighting Beam Angle Calculator
Estimate beam diameter, projected coverage, center intensity, target alignment, and fixture spacing for track heads, recessed spots, task lights, art lighting, shelf accents, wall wash layouts, and outdoor uplights.
Start with a common lighting layout, then adjust height, target distance, beam angle, tilt, output, surface angle, overlap, and task or accent mode.
--
Tilt compared with target angle.
--
Current beam versus desired diameter.
--
Intensity range for selected lighting mode.
--
Fixture count and overlap spacing.
| Beam angle | At 4 ft throw | At 8 ft throw | At 12 ft throw |
|---|---|---|---|
| 15 deg pin spot | 1.1 ft | 2.1 ft | 3.2 ft |
| 24 deg narrow spot | 1.7 ft | 3.4 ft | 5.1 ft |
| 36 deg medium spot | 2.6 ft | 5.2 ft | 7.8 ft |
| 60 deg wide flood | 4.6 ft | 9.2 ft | 13.9 ft |
| Layout | Beam range | Overlap range | Planning note |
|---|---|---|---|
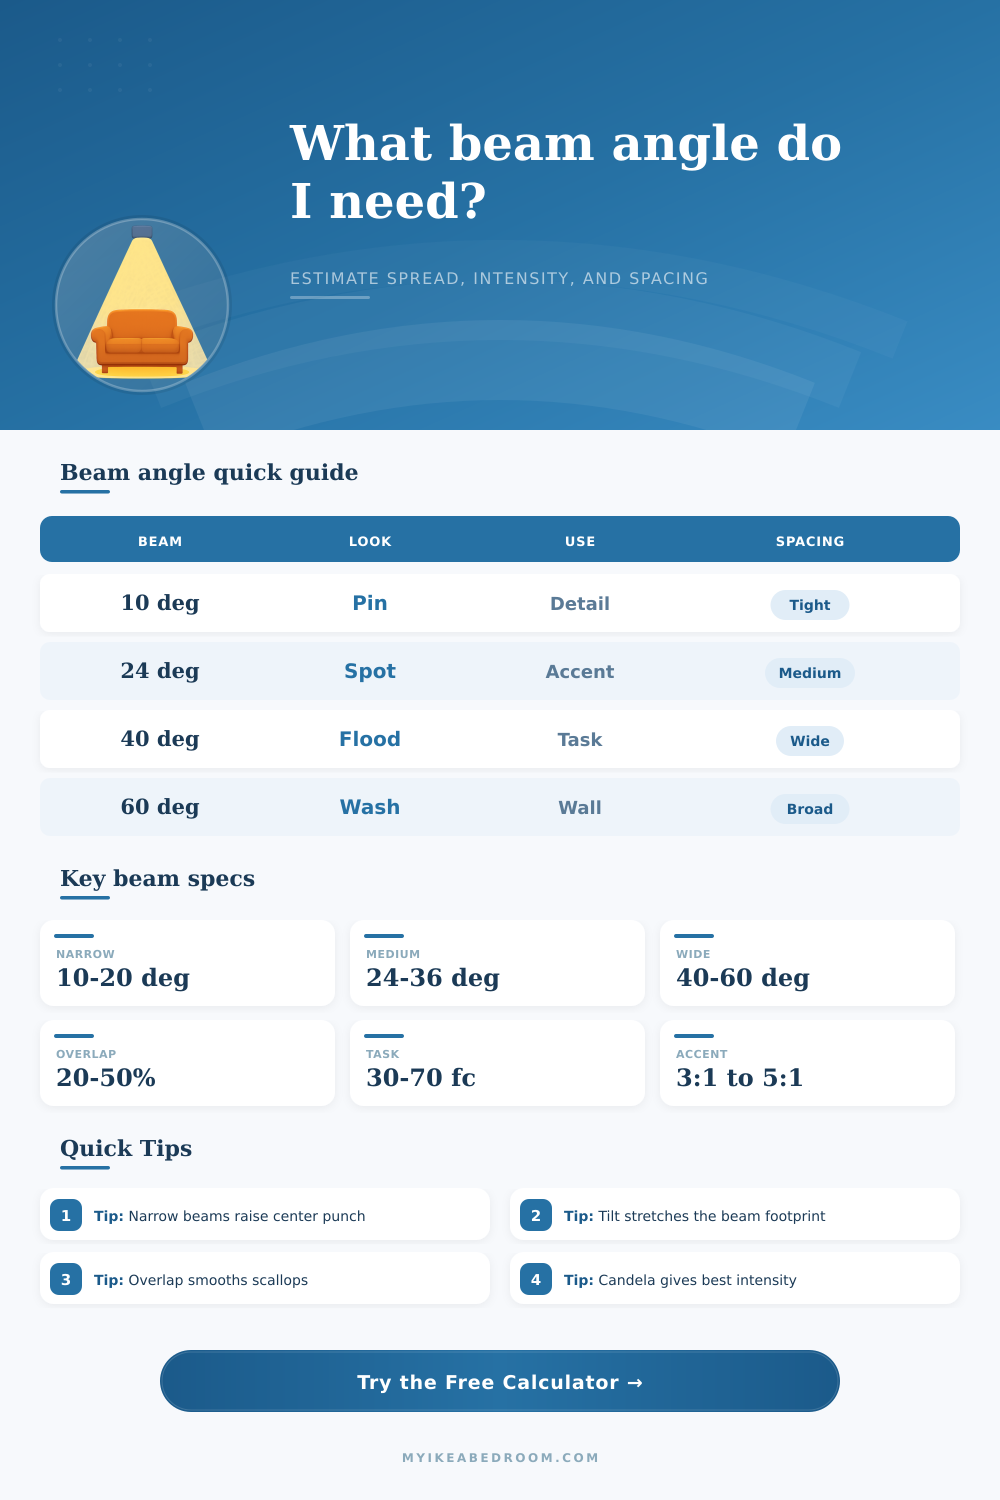
| Art accent | 15 to 36 deg | 10 to 25% | Match beam to art width and avoid frame glare. |
| Desk task beam | 35 to 60 deg | 30 to 50% | Use a wider beam to reduce harsh edges. |
| Wall wash row | 45 to 70 deg | 40 to 60% | Overlap heavily for smoother vertical light. |
| Shelf display | 20 to 40 deg | 15 to 35% | Keep center punch without spilling outside shelves. |
| Mode | Low band | Useful band | Watch for |
|---|---|---|---|
| Accent or display | 10 fc | 30 to 150 fc | Too much contrast or reflective glare. |
| Task surface | 30 fc | 50 to 100 fc | Sharp shadow edges and uneven coverage. |
| Wall wash | 5 fc | 10 to 50 fc | Scallops from spacing wider than beam. |
| Ambient pool | 3 fc | 5 to 25 fc | Hot center spot with dim edges. |
Geometry tip: Beam diameter grows with throw distance, so doubling the distance roughly doubles the spot size while reducing center intensity quickly.
Overlap tip: For art and task layouts, start around 25% to 40% overlap; for wall washing, use closer spacing so beams blend before the eye sees scallops.
A beam angle is teh measurement of how wide an beam of light spreads from the light fixture to the surface. Beam angle is essential to understand because the beam angle will determine how much of the areas will be covered by the light. If the beam angle is too narrow, a small circle of light will illuminate the area.
However, if the beam angle is too wide, the light will illuminate a large area but may not be strong enough for the task. Many people make mistakes with beam angle choices without considering the distance between the light fixture and the surface. Mounting height is another critical factor in lighting.
How Beam Angle, Mounting Height and Tilt Change Lighting
The mounting height will determine the amount that the beam of light will spread out before it reach the surface. A fixture mounted eight feet above the ground will produce a smaller beam of light than a fixture mounted twelve feet above the ground. The higher the mounting height, the more the beam will spread.
To calculate the size of the light pool created by the fixture, the mounting height and the beam angle has to be entered into a calculator to obtain the measurement of the light pool. Tilt is another factor that will change the shape of the light. Most people will not point their fixtures straight down at the surface they are lighting.
By tilting the fixture, the beam of light will change from a circle to an ellipse. An ellipse covers a different area than a circle do. The lighting calculator accounts for the tilt of the fixture by measuring and comparing the angle of the fixture to the angle of the surface it illuminate.
When the fixture is tilted, the beam of light will stretch out on the surface it illuminates. The output of the light fixture include lumens and center beam candela. The lumen measurement is the total amount of light that the fixture emits.
The center beam candela is the measurement of the light concentration in the center of the beam. A fixture with a wide beam angle will contain many lumens but will have a low center beam candela value. A fixture with a narrow beam angle will have fewer lumens but will have a high center beam candela value.
Both of these have to be taken into consideration to determine how much light will reach the target surface. Surface angle is a variable that will change the way the light spread. Light fixtures will not always be shining down on horizontal surfaces.
Depending on the surface angle, the beam of light will change. The angle of incidence of the light hitting the surface will change the brightness of the light and the coverage of the beam. The lighting calculator takes into consideration the angle of the surface by changing the footprint of the light.
The footprint is the area that the light cover. Overlap is the measurement of how much light from two different fixtures intersect with one another. If the fixtures dont overlap much, there will be scallop-shaped areas on the surfaces illuminate by the fixtures.
Too much overlap will result in a uniform wash of light flooding the area covered by the fixtures. The amount of overlap will determine the lighting mode desired for the space. Using a lighting fixture calculator will help people determine the distance between the fixtures to achieve the desired overlap.
Common mistakes includes using beam angle without considering mounting height. People will find that the size of the light pool is either too small or too large for the area of interest, despite having picked a good beam angle. The other mistake is that people will tilt the fixtures and not understand why the light is appearing differently on the surface.
People will pick light fixtures according to the lumen values of the fixtures. They will find the light to be too bright or too dim at the center of the beam. The color of the walls and the reflectivity of the materials in the lighting area will change the appearance of the beams of light.
Dark walls will produce a dim light compared to a bright white wall. The white color of the walls will reflect the beams of light, making them appear brighter than they would be on a dark color wall. The color of the walls in the lighting area will have to be considered when installing the lights.
People will want to consider the color of the wall because it will change the intensity that the beams of light will appear within the room. When planning the lighting for an area, people can follow a few steps. First, determine the lighting mode to be used.
Lighting modes can be accent lighting, task lighting, wall wash lighting, or ambient lighting. Then, enter the mounting height of the fixture and the distance from the fixture to the target surface into the lighting calculator. Next, enter the beam angle of the fixture to be installed.
Tilt and the angle of the target surface can then be entered into the lighting calculator. Finally, look at the projected diameters of the beam of light and the center intensity of each fixture to determine whether the number entered into the lighting calculator are correct for the lighting mode that has been chosen. If not, the user can adjust the beam angle of the fixtures or change the number of the fixtures.