Cut length, zone count, and reserve-aware strip load planning
LED Strip Wattage Calculator
Estimate peak strip watts, typical operating watts, current draw, and a smarter design target for headboards, shelves, wardrobe rails, tray ceilings, and media-wall accent runs.
Each preset changes strip family, density, zones, feed method, and reserve so a short under-bed glow does not receive the same wattage plan as a long RGBW ceiling cove.
Full breakdown
Detailed cut, feed, and reserve math appears here after calculation.
| Family | Full load | Cut step | Typical use |
|---|---|---|---|
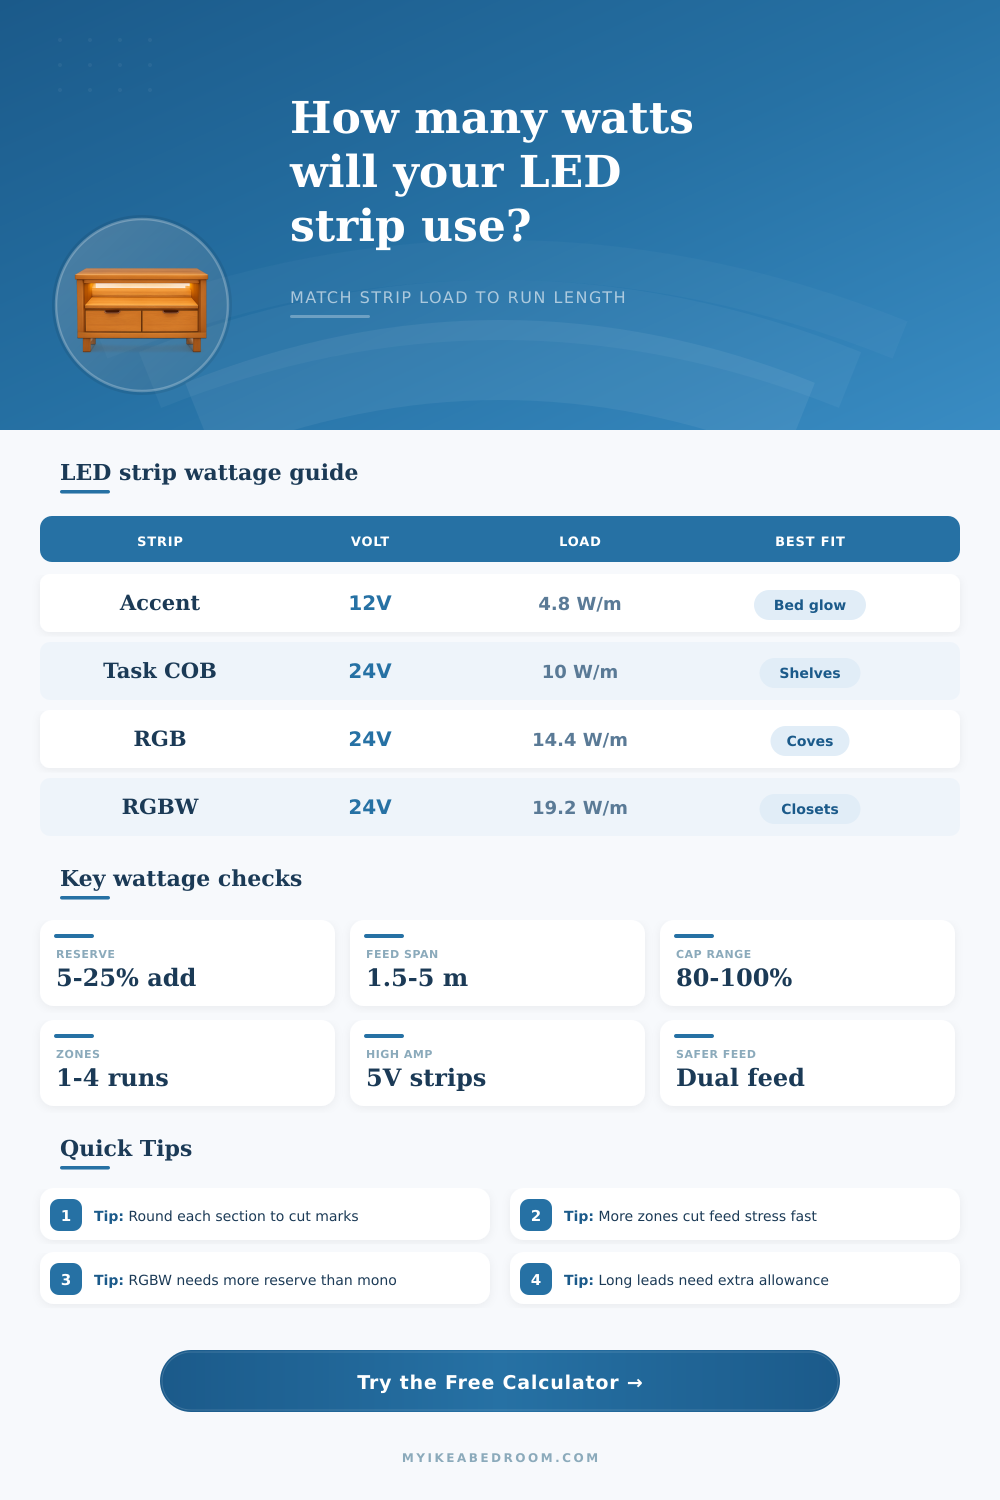
| 12V accent tape | 4.8 W/m | 5 cm | Headboards and toe-kick glow |
| 12V high-density tape | 9.6 W/m | 2.5 cm | Short task or shelf lighting |
| 24V COB strip | 10 W/m | 5 cm | Continuous diffuser channels |
| 24V tunable white | 12 W/m | 10 cm | Wardrobes and adjustable task light |
| 24V RGB strip | 14.4 W/m | 10 cm | Media walls and coves |
| 24V RGBW strip | 19.2 W/m | 10 cm | Closets needing white plus color |
| 5V addressable strip | 18 W/m | 1 LED | Animated effects and scenes |
| Feed style | Comfortable segment | Best for | Watch item |
|---|---|---|---|
| Single-end feed | Shortest | Small accent runs | Voltage drop builds fastest |
| Dual-end feed | About 1.8x easier | Long shelves and mirrors | More connectors to manage |
| Center feed | Split the run | Balanced wardrobe rails | Hide the center entry neatly |
| Inject every 5 m | Longer coves | 24V perimeter lighting | Extra lead allowance matters |
| Inject every 2.5 m | Highest support | RGBW and pixels | Most wiring complexity |
| Strip type | 5 m watts | Native voltage amps | Typical feed note |
|---|---|---|---|
| 12V accent tape | 24 W | 2.0 A at 12V | Usually fine on short furniture runs |
| 12V high-density tape | 48 W | 4.0 A at 12V | Often benefits from shorter feed sections |
| 24V COB strip | 50 W | 2.1 A at 24V | Friendly load for shelves and channels |
| 24V tunable white | 60 W | 2.5 A at 24V | Two channels need a little more reserve |
| 24V RGB strip | 72 W | 3.0 A at 24V | Color scenes raise controller overhead |
| 24V RGBW strip | 96 W | 4.0 A at 24V | Warm recesses need extra design room |
| 5V addressable strip | 90 W | 18.0 A at 5V | Injection becomes critical very quickly |
| Layout | Installed length | Peak strip load | Planning note |
|---|---|---|---|
| Headboard accent | 8 ft | 12-15 W | One short zone keeps feed stress low |
| Under-bed guide glow | 12 ft | 17-20 W | Low density is enough for wayfinding |
| Wardrobe task rail | 14 ft | 40-50 W | 24V task strips reduce current nicely |
| Mirror frame | 16 ft | 48-60 W | Zone splitting avoids dim corners |
| Tray ceiling cove | 28 ft | 120-165 W | Injection or center feeds become normal |
| RGBW closet perimeter | 24 ft | 130-150 W | Reserve and cooling matter more here |
When you install LED strips, you must consider the total wattage of the installation to ensure that the LED strips will even light up. If you dont plan for the total wattage of an installation, one end of the LED strip may be bright while the other end of the LED strip is dim. This occurs due to wattage math and voltage drop.
To properly install LED strips, you must have an understanding of the load that the LED strips will take. Although many people will consider the length of the LED strip times the watts per meter of the strip, this isnt enough to calculate the total wattage correctly. People must also consider the wattage lost due to rounding at the cut points of the LED strips, the power draw of the controller, and the voltage drop at the leads of the LED strips.
How to Plan Power and Wiring for LED Strips
Even if the LED strip take up 14 feet in a wardrobe, for example, the total wattage will be more higher than the simple calculation of length times wattage per meter. The actual wattage of the installation must compensate for the rounding of the LED strip to the nearest cut point. Furthermore, smart controllers will draw power from the LED strip.
Additionally, if you install the LED strips within a cabinet, the heat that builds up from the LED strips will cause the LED strips to derate, meaning they will not be as bright as they could potentially be. Because 12-volt LED strips will draw more current than 24-volt LED strips, the driver and injection points for the installation must be able to handle the increased current from the 12-volt system. The type of LED strip also determines the amount of power the strips will use.
Low-output accent LED strip will use 4.8 watts per meter of length and are suitable for lighting areas that require soft lighting. Brighter COB LED strips will use 9 to 10 watts per meter of length and are often used on shelves. RGB LED strips will use 14 watts per meter of length.
RGBW LED strips will use 19 watts per meter of length because there are more color channels. Pixel LED strips will use the most power because they require 5-volt systems to work properly. Additionally, if LED strips are 12 volts, they will be used for shorter distances than 24-volt LED strips because 24-volt systems will use half the amps of 12-volt systems.
You can also split the LED strips into zones so that the voltage drop does not occur along one LED strip. As the voltage drops from the power feed of the LED strip lights, the powered length of the LED strip will eventually become dim. By using multiple zones of LED strips, you will reduce the number of LED strips that is powered on one side of the installation.
Furthermore, you can also use dual-end feeds and center feeds of LED strips for similar reasons. The controllers for the LED strips will draw some of the power used by the LED strips. RGBW and pixel LED strip controllers will draw between 3 and 6 watts.
Additionally, if you mount the LED strips within an enclosure that becomes very hot during operation, the wattage will be derated to accommodate the heat of the installation. Heat will build up in recessed areas where LED strips are mounted in fabric diffusers because the heat cannot escape the installation. This derating of LED strips will reduce the light output of the LED strips by up to 10 percent.
You can include a power reserve into your calculations. If you plan on using the LED strips at 70% brightness, you must size the driver for the wattage at peak brightness to allow for the 15% power reserve that is needed for connectors, heat, and potential future changes to the LED strip installation. Additionally, if you are installing LED strips into perimeter coves, you must install injection points every few meter.
If you do not include injection points for pixel LED strips, the pixel LED strips will dim along the length of the shelf. Furthermore, you must consider the current draw of the LED strips when selecting the wire gauge for the installation because the wattage calculation does not account for the actual current that the LED strips will draw. By understanding the type of LED strip, the voltage of the system, and how the LED strips will be fed, you can determine the best way to install them into your desired area.
If you want pixel LED strips with animation features, you will need to include injection points and a powerful driver. If your area requires soft lighting, you can use accent LED strips with low watts. If you need bright task lighting, you can use COB LED strips.
By mapping each of these features of the LED strip installation, you can determine the load that the installation will create and the reality of the installation. By planning for the peak load, you will ensure that the LED strips will remain bright to the far end of the installation and that they will function properly over time.