Lawn Edging Pin Quantity Calculator
Estimate how many landscape pins, U-pins, spiral stakes, or anchor pegs are needed for a lawn edging run using real spacing, curves, corners, joins, soil hold, waste buffer, and pack size.
Load a realistic edging layout, then adjust length, material, pin spacing, soil hold, joins, corners, and pack size to match the border you measured.
Pin plan preview
Formula: line pins + curve load + soil hold + material support + join pins + corner pins + buffer.
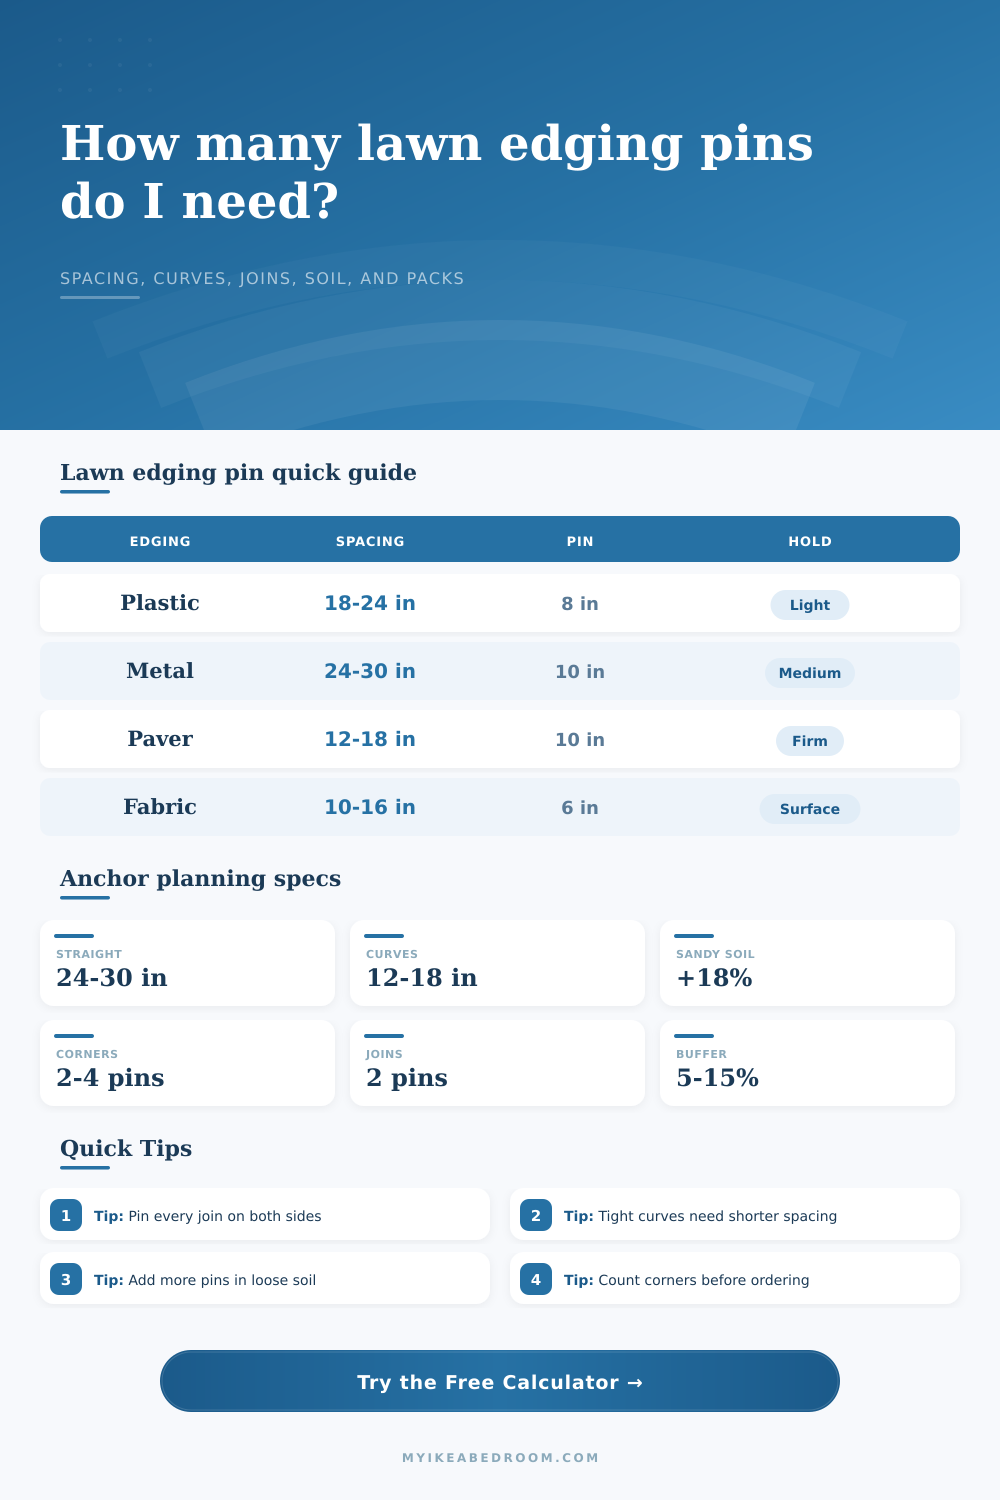
Use closer spacing for flexible edging, tight curves, paver restraints, slopes, sandy soil, or places where a mower wheel can nudge the border.
Flat-pack plastic roll
Pin behavior: light, flexible, and similar to modular home pieces that need many small fasteners.
Best spacing: 18 to 24 in on straight runs; 12 to 18 in through curves.
Use when: the border shape changes often or wraps planting beds.
Metal strip edging
Pin behavior: rigid like a steel shelf rail, so fewer anchors carry more line stability.
Best spacing: 24 to 30 in on straight runs; closer at clipped corners.
Use when: a crisp mowing edge matters more than flexibility.
Composite board edge
Pin behavior: bends gradually, like a long panel that needs support while it relaxes.
Best spacing: 16 to 22 in, with paired pins at board splices.
Use when: curves are broad and the edging face is taller.
Paver restraint rail
Pin behavior: works like a load-bearing bracket resisting sideways pressure.
Best spacing: 12 to 18 in, especially near turns and cut pavers.
Use when: the edge holds pavers, gravel, or compacted aggregate.
| Edging material | Typical pin type | Straight spacing | Curve spacing | Join rule |
|---|---|---|---|---|
| Flexible plastic roll edging | 8 in U-pin or spiral peg | 18 to 24 in | 12 to 18 in | 2 pins per splice |
| Steel or aluminum strip edging | 10 in landscape spike | 24 to 30 in | 18 to 24 in | 2 pins per connector |
| Composite bender board | 10 in stake or U-pin | 16 to 22 in | 12 to 16 in | 3 pins per board join |
| Paver edge restraint | 10 in non-bending spike | 12 to 18 in | 10 to 14 in | 2 pins at each cut end |
| Timber or sleeper border | 12 in landscape spike | 24 to 36 in | 18 to 24 in | 4 pins at butt joints |
| Landscape fabric staple edge | 6 in sod staple | 10 to 16 in | 8 to 12 in | Overlap gets 2 staples |
| Site condition | Multiplier | Why it changes pin count | Practical spacing note |
|---|---|---|---|
| Firm compacted loam | 1.00 | Good grip around the pin legs | Use the normal material range |
| Average garden soil | 1.08 | Minor movement from watering and mowing | Add a few anchors on exposed ends |
| Wet clay or frost-heave soil | 1.12 | Seasonal movement can lift shallow pins | Use longer pins where possible |
| Sandy or loose fill | 1.18 | Less side friction against pin legs | Shorten spacing by roughly one step |
| Slope, bank, or mower pressure | 1.25 | Lateral load tries to push edging downhill | Alternate sides or use a double row |
| Layout type | Curve multiplier | Extra pin trigger | Use this for |
|---|---|---|---|
| Mostly straight run | 1.00 | No curve load | Driveway, fence, or path borders |
| Gentle sweeping curves | 1.08 | Soft bend control | Front walk and lawn beds |
| Mixed straight and curved sections | 1.14 | Several bend transitions | Typical garden perimeter |
| Tight curves or serpentine bed | 1.24 | High spring-back force | Narrow decorative beds |
| Circle, ring, or small radius | 1.32 | Continuous radius control | Tree rings and round beds |
| Irregular island border | 1.20 | Multiple inside and outside bends | Mulch islands and feature beds |
| Pin pack | Useful for | Approx straight coverage at 18 in | Approx straight coverage at 24 in | Metric coverage range |
|---|---|---|---|---|
| 20 pins | Small tree ring or short repair | 28.5 ft | 38 ft | 8.7 to 11.6 m |
| 25 pins | Small front bed | 36 ft | 48 ft | 11.0 to 14.6 m |
| 50 pins | Medium border or patio edge | 73.5 ft | 98 ft | 22.4 to 29.9 m |
| 100 pins | Long boundary or multi-bed project | 148.5 ft | 198 ft | 45.3 to 60.4 m |
| Project | Measured edging run | Typical material | Estimated pins | Likely pack |
|---|---|---|---|---|
| Single tree ring | 13 ft | Flexible plastic | 16 to 22 pins | 20 or 25 pack |
| Small front bed | 32 ft | Plastic or composite | 31 to 42 pins | 50 pack |
| Paver walkway side | 48 ft | Paver restraint | 48 to 65 pins | 100 pack |
| Mulch island border | 74 ft | Composite board | 70 to 92 pins | 100 pack |
| Long driveway edge | 110 ft | Metal strip | 76 to 104 pins | 100 or 2 x 50 |
Measure the installed curve, not the straight chord. A garden hose or rope following the bed outline gives a better run length than measuring corner-to-corner across a curve.
Treat joins and corners as separate loads. Line spacing controls the long run, but splices, ends, and corners need their own pins because they are the first places edging lifts or twists.
The most expensive error with lawn edging is not purchasing the correct materials, it’s underestimating your pin requirements. Do you have enough pins to anchor an edge against soil expansion, root systems, or a mowing machine wheel? An unanchored edge look nice for maybe a week before it’s a tripping hazard. The software figures that out for you, such as how many pins you need based off how steep the curve is and the total run. You don’t have to guess coefficients. Saves you from having to guess what you’ll need, and then ordering more hardware.
The variables are: first, the layout geometry. Straight lines needs fewer pins than curves. Second, gentle sweeps generate lateral tension from material’s effort to straighten out when pressured. That translates to direct tension on anchors. The calculator adds a curve multiplier to account for spring-back tension. Landscapers do, too; they tighten up the pin spacing according to shape, since the material resists.
How Many Pins You Need for Lawn Edging
Each time the mower go over it, your pins has to stand their ground. The condition of your soil has at least as much to do with it as the shape: In sand, where there’s not much friction against a U-pin or any stake, an anchor must be deeper (rather than wider) to hold. Slopes and loose fill require tighter spacing. They create side loads that pull the edging downhill, and gravity also pulls it out.
An eighteen percent increase in pins is a tiny difference in anchoring density between a straight or wavy border. (And if you’re in sandy conditions, 18 percent adds up.) The strength of your restraint system comes down to material choice. Rigid metal strips only require occasional anchors, but flexible composite boards or plastic rolls behaves more like tensioned cables, needing continuous support.
Why do restraints for pavers need a pin every foot or two, versus every three feet in a timber border (and even then: up to six feet apart if the soil is very solid)? Mixing the rules by using different spacings between materials will invite failure at the weakest link. Stress concentrates at joins and corners but doesn’t get distributed. No matter how you space things along a row, each outside corner or splice require its own anchor. Otherwise, when the ground move during every freeze-thaw cycle, the whole section will rise off this weakness.
The tool distinguishes between those point loads and line loads, so that your corner pin isn’t counted as normal spacing. That’s where people forget about them, so it becomes a run-to-the-supply-in-mid-project mistake. Landscape pins break, bend, and get lost, so plan to have some wiggle room. The math always says I’ll order just enough, but it’s never quite enough by halfway through. For harder than expected ground, extra curve control points, and bent pins, give yourself a 10% safety margin. If you don’t plan ahead, you’ll react to the shortage.
To turn a temporary wavy line into a permanent one, get the pin count right. Spend more time enjoying your clean lines, not fixing them.