Lambrequin Size Calculator
Calculate a lambrequin face width, finished drop, shaped lower edge, side returns, board area, face fabric, lining, pattern repeat, seams, and cut allowances for window treatments.
Start with a typical window treatment layout, then adjust exact dimensions for your track, wall projection, bottom shape, and fabric repeat.
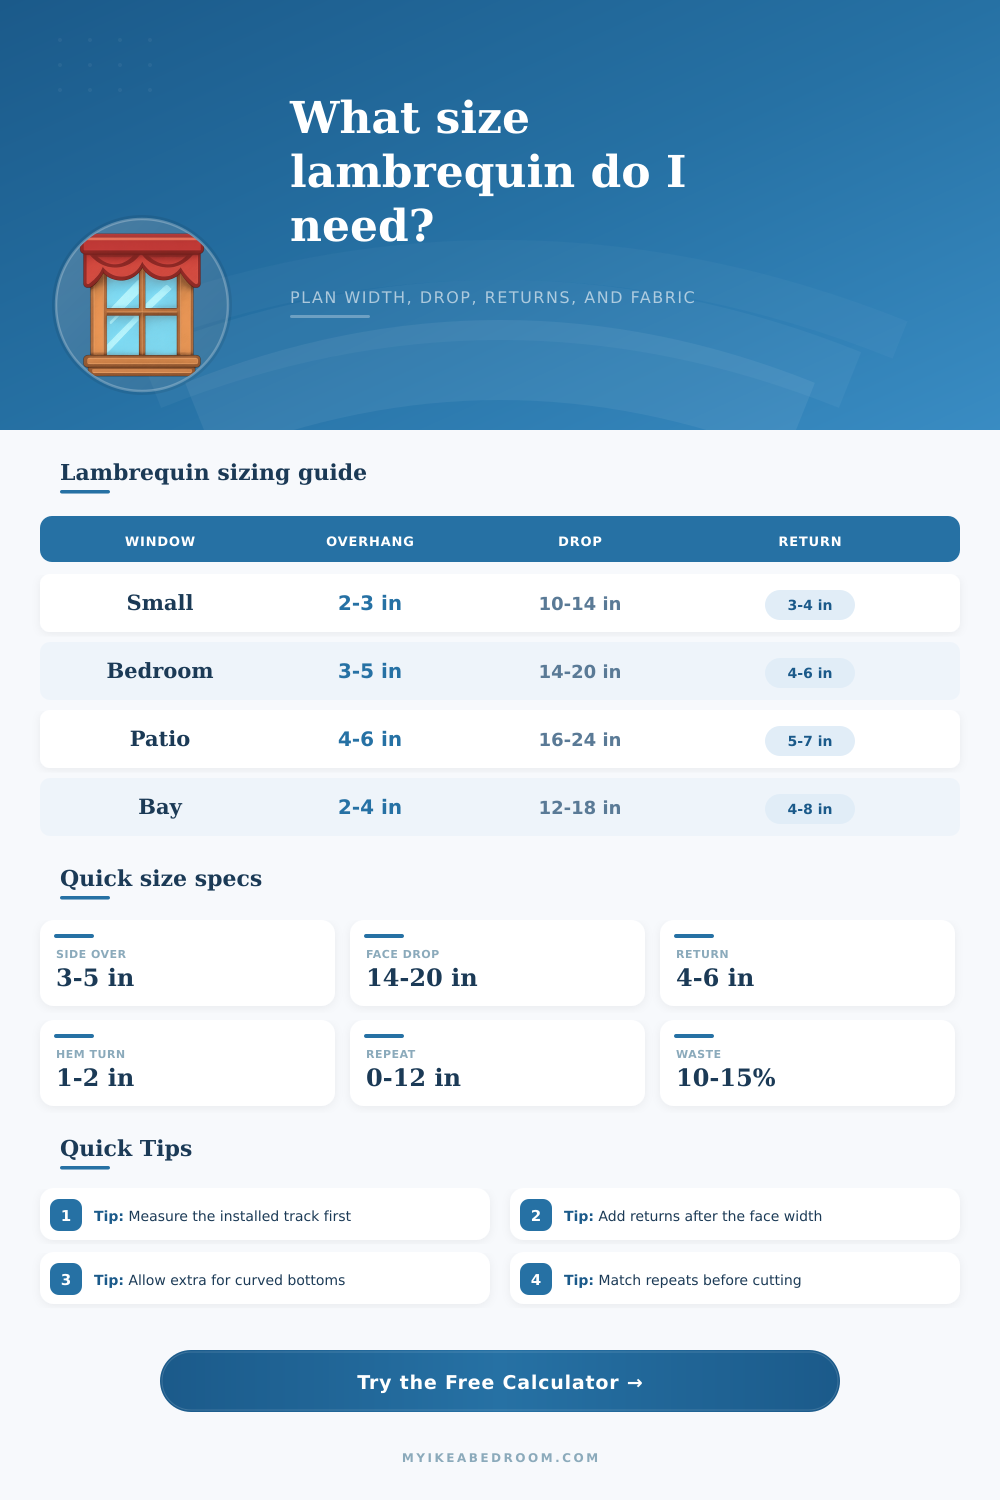
| Window scale | Opening width | Typical face drop | Best use |
|---|---|---|---|
| Small bedroom | 28 to 40 in | 10 to 14 in | Short straight lambrequin or slim blind cover. |
| Standard bedroom | 40 to 60 in | 14 to 18 in | Balanced face depth over curtains or shade track. |
| Wide living room | 60 to 96 in | 16 to 22 in | Often needs joined board or multiple fabric widths. |
| Patio door | 72 to 108 in | 18 to 24 in | Deeper face hides taller track and curtain stack. |
| Bay window | Varies by panel | 12 to 18 in | Use sections so each angled panel can be fitted. |
| Shape | Area factor | Edge factor | Allowance focus |
|---|---|---|---|
| Straight | 1.00 | 1.00 | Measure width and drop directly. |
| Scalloped | 0.55 extra | 1.18 | Add extra cutting length for curved lower edge. |
| Single arch | 0.50 extra | 1.12 | Center drop drives fabric height and lining shape. |
| Stepped | 0.70 extra | 1.08 | More square corners, less curve allowance. |
| Pointed | 0.50 extra | 1.10 | Extra center drop but simple angled edges. |
| Fabric setup | Usable width | Planning method | Common adjustment |
|---|---|---|---|
| Plain 54 in fabric | 52 to 54 in | Face width divided by usable width | Add normal hems and 10% buffer. |
| Railroaded fabric | 54 in height | Long width can run across the face | Check fabric direction before cutting. |
| Large repeat fabric | Varies | Add one repeat for each matched section | Use 15% to 20% waste allowance. |
| Contrast lining | Usually 54 in | Same face size without outer wrap | Keep lining slightly smaller than face fabric. |
| Padded upholstery | 54 in | Wrap top, bottom, sides, and returns | Add thicker wrap and corner relief cuts. |
| Scenario | Finished face | Return depth | Likely fabric need |
|---|---|---|---|
| Single bedroom window | 44 to 58 in | 3 to 5 in | About 1 to 1.5 yd if not patterned. |
| Pair of narrow windows | 72 to 90 in | 4 to 6 in | Often 2 widths or a joined face. |
| Living room picture window | 84 to 120 in | 5 to 7 in | Plan joins and pattern matching carefully. |
| Bay window | 3 panels | 4 to 8 in | Section cuts usually matter more than yard total. |
| Door track cover | 80 to 110 in | 5 to 8 in | Deep returns help hide curtain stack and track. |
Use the hardware width, not only the glass. A lambrequin usually covers the full track, blind headrail, brackets, and side stack.
Check the return against projection. The return depth should exceed hardware projection plus the clearance you want behind the face.
Shape changes fabric need. Scallops and arches add lower-edge length even when the finished face width stays the same.
Round after repeat and waste. Add hems, seams, returns, repeats, and buffer before rounding yardage for cutting.
You’ve tried to cover your curtain track before. Maybe once or twice. And it always looked kind of unfinished: you can see the track on one side; the drop doesn’t even reach down far enough to conceal the brackets; and the bottom edge curl inward because you didn’t measure for the thickness of the board. It’s all so annoying.
You must first understand that lambrequins are really about geometry, not decor. Lambrequins is three dimensional shapes which you construct as frames, then upholster. That makes a difference in how you measure, because if you only take the width measurement of the glass piece, you will fail. If you measure from hardware, including the stacked up curtains that exist on either side. You’ll have success. You put in your particular set of restrictions, and voilà (the calculator (above) does the rest).
How to Measure for Perfect Valances
It spares you from guessing how a scallop-edged cut versus a straight one impact your fabric yield. People tend to think only about the drop, also known as the face drop. This is the vertical dimension from the top rail down to the bottom-most part of the design. It is what catches your eye, but it’s just one piece of the picture.
The trick is typically in the returns, those side flap that extend past the front to join window or wall frame. Returns has to be big enough to cover the blind mechanisms and their track brackets, but not so large as to appear heavy-handed, or block access to curtain-open-and-close action. Four to six inches deep is normal return depth for most residential windows. Tracks deeper than this mean that more fabric will need to span across them then you might imagine.
In general, decorator cloth comes in lengths of 54 inches. Of course, you won’t have 54 inches of usable material left. You have to trim off the selvage (about an inch), then add seam allowances and hemming. That’s where the tool adds a bit of wiggle room in the form of a waste buffer. Typically it’s between ten and fifteen percent, depending on vertical repeats in your pattern. Projects with a lot of pattern matching are when things can gets expensive really quickly. If the fabric you’re using features a dozen-inch repeat, then each seam requires that additional length to line the pattern back up. In other words, you are paying for increments of height as well as width.
To break it down: The calculator will tell you exactly how much face and lining yardage you’ll need. Then it rounds those amounts up into practical purchasing increments such as half or quarter yards.
The other variable that affects how it looks at the end is what kind of board you use. MDF or plywood are going to be stiffer so you have a bit more freedom with long faces but is a bit harder to carve out arcs and scallops. A lighter weight foam board is easy to carve up and is light and less bulky for the frame. However, because it’s light it may sag under its own weight unless supported internally. The calculator takes into account normal board sizes and tells you roughly how many you’re looking at to buy. It also gives you an idea of where any seams will occur which is nice as a planning aid. For example, if your window doesn’t fit across one piece, you will know how many boards to attach before covering them with fabric. Seamless faces look better. Knowing ahead of time if you’d have to cover one or two sheets width wise would of saved you from a seam right in the middle of your scallop… not so good.
Accuracy matters. It doesn’t matter how well you stretch a tape measure across uneven trim. Don’t measure the window opening. Measure the width of the piece of hardware at its widest point. If you’re covering the side stack, include that. Then check distance from the wall to make sure there’s enough depth on the return for any brackets that may project out. A little thing, but it will show up when that hardware shows through and messes with the illusion.
With those accurate inputs, all of this falls into place mathematically. Guessing turns into planning. And because of that, the fabric lay smooth across the frame without buckling and exposing the inner workings of the mechanism below. The result is a tailored, clean finish where the treatment looks like it was built into the structure from the start rather than added later.