Kitchen Counter Workspace Calculator
Estimate usable counter workspace after sink, cooktop, appliance, and small-appliance deductions, then check continuous prep length, landing zones, square feet, square inches, and metric equivalents.
Pick a layout close to your room, then adjust the lengths, depth, cutouts, landing zones, and target prep run to match the finished plan.
| Layout preset | Typical total length | Typical depth | Workspace note |
|---|---|---|---|
| Compact galley | 12 to 16 ft | 24 to 26 in | Protect one long clear side from small appliances. |
| One-wall studio | 8 to 12 ft | 24 to 26 in | Major openings can remove a large share of usable counter. |
| L-shaped kitchen | 14 to 20 ft | 24 to 26 in | Corner space helps staging but may not count as one clear prep run. |
| U-shaped kitchen | 18 to 28 ft | 24 to 26 in | Usually strong landing zones if the sink and cooktop are separated. |
| Island kitchen | 16 to 30 ft | 26 to 42 in | Island depth can add square footage without improving wall landing zones. |
| Fixture or task | Minimum landing | Comfort landing | Calculator check |
|---|---|---|---|
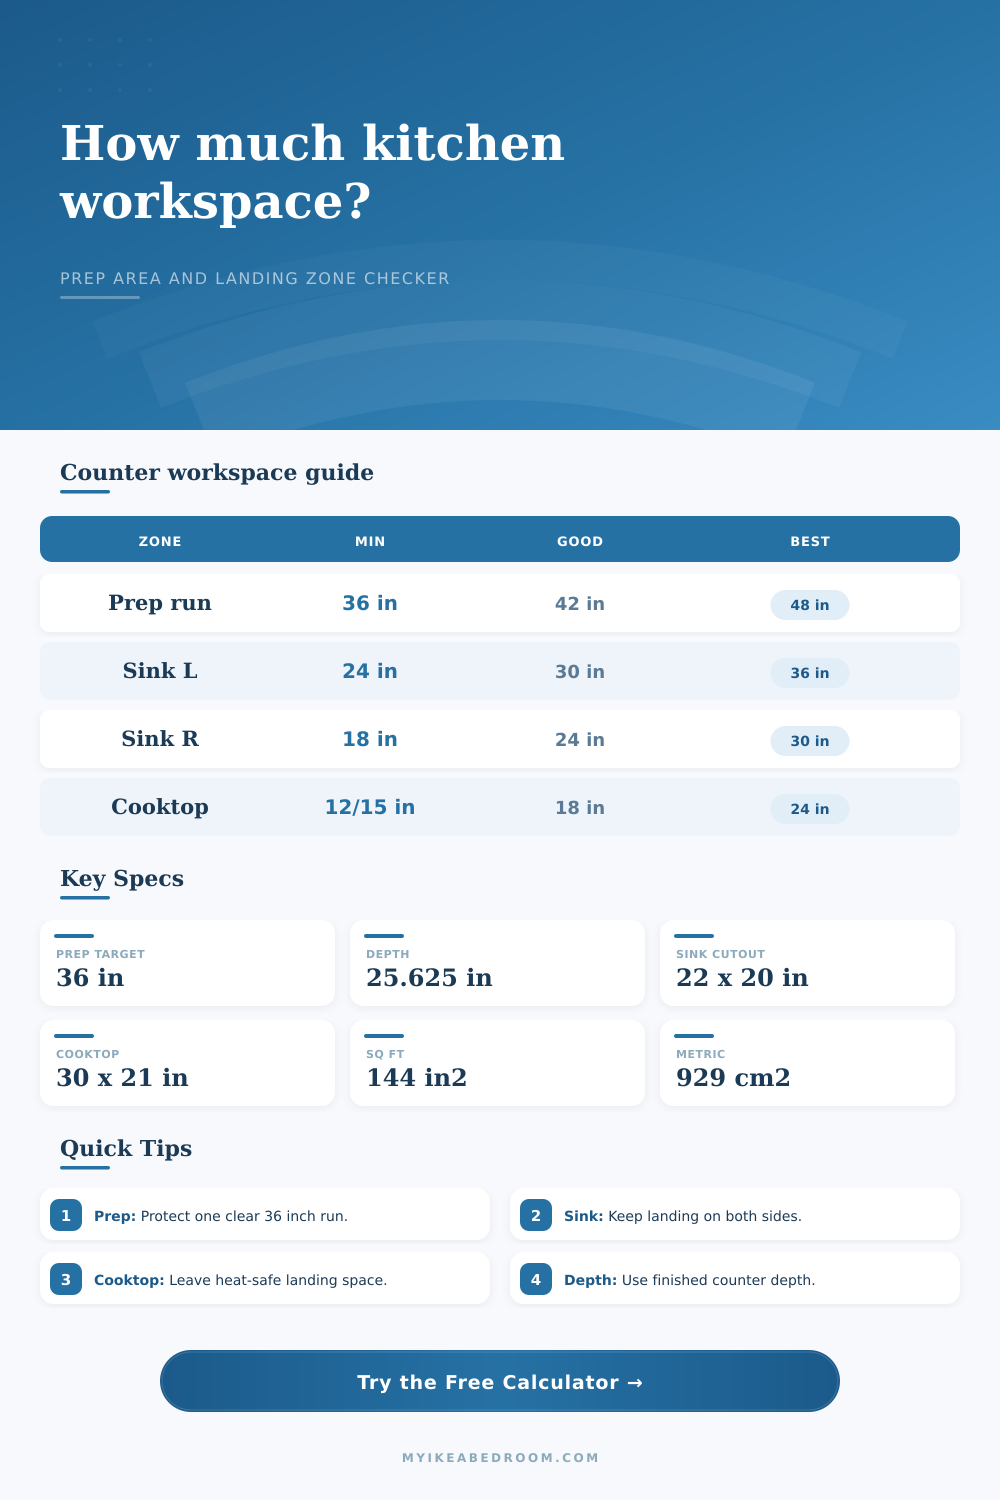
| Primary prep area | 36 in clear run | 42 to 48 in | Compares longest clear prep run to the target field. |
| Sink left side | 24 in | 30 in or more | Counts against the combined landing score. |
| Sink right side | 18 in | 24 in or more | Smaller side can still work if the other side is strong. |
| Cooktop sides | 12 in and 15 in | 18 to 24 in | Checks both sides for hot pan staging. |
| Appliance opening | Width deducted | Landing nearby | Deducts the opening width times counter depth. |
| Deduction item | Common size | Area deducted | Planning note |
|---|---|---|---|
| Single sink cutout | 22 x 20 in | 440 in2 | Deducts surface that cannot be used as flat prep space. |
| Large sink cutout | 30 x 20 in | 600 in2 | Wide bowls need stronger landing on at least one side. |
| Cooktop cutout | 30 x 21 in | 630 in2 | Landing zones matter more than raw square footage here. |
| Range opening | 30 x depth | Varies | Use appliance opening width for full-depth gaps. |
| Small appliances | 18 x depth | Varies | Deduct always-parked appliances from daily workspace. |
| Result band | Usable workspace | Prep zone | Likely experience |
|---|---|---|---|
| Tight | Under 10 sq ft | Under 36 in | Works best with appliance storage and a movable board. |
| Compact | 10 to 16 sq ft | 36 to 42 in | Good for one cook when landing zones are protected. |
| Comfortable | 16 to 24 sq ft | 42 to 48 in | Supports daily cooking with better staging flexibility. |
| Generous | 24 sq ft or more | 48 in or more | Better for batch prep, baking, and two-person workflows. |
Keep one counter clear: A single uninterrupted 36 inch or longer zone is usually more useful than the same area split into short fragments.
Deduct parked appliances: Coffee makers, mixers, dish racks, and microwaves can quietly remove several square feet from daily prep space.
Separate landing from prep: Sink and cooktop landing zones are safety and staging space; they should not be the only cutting area.
Measure finished dimensions: Use installed counter depth and finished wall-to-edge lengths, especially around fillers, panels, and appliance gaps.
Have you ever measured your kitchen floor? Many times over? But did you calculate usable amount once stove and sink is accounted for?
A common mistake are assuming all counter length is usable workspace. Fact: Permanent items such as coffee makers (shown below) takes up valuable space that can’t also serves as mixing and chopping surfaces. Appliance gaps and other fixture further limit usable space. Knowing the distinction between gross length vs. Net prep area will tell you if a kitchen’s great for cooking or simply photo-ready.
Why You Need Clear Counter Space
By entering your fixture sizes (or counter dimensions), this calculator do the math for you, eliminating guesswork with conversions. It subtracts your appliances’ permanent openings from the rest of the counter’s available surface area. Then, it consider the physical footprint of your sink, cooktop, etc to give you a clean picture of how much usable space you’re really working with:
Where do you prepare food? How can you maximize your counter space? Most designers suggests striving for at least thirty-six inches of uninterrupted clear counter space, preferably located next to the sink (where you’ll be unloading dishes). When your longest clear stretch is less than that, you’ll probably start feeling cramped each time you attempt to prep a meal.
The reason that thirty-six-inch number is so common is that it allow for plenty of real estate to spread out a cutting board, set down a bowl, and maintain a safe area for your knife hand. Aside from the primary prep area itself landing zones are equally critical. When you remove a dish from the dishwasher (or take a hot pan off the heat) you’ll need to set it down somewhere safe, preferably somewhere flat where drips won’t fall on floor.
The tool tests your layout against minimums for this kind of safety buffer. A minimum of eighteen inches on one side of the sink and twenty-four inches on the other are a decent baseline. Depending on how many people you cook for, you may want those figures upped further. The calculator breaks down these spaces for you. This helps you determine whether your plan allow enough space for safe staging or if you are in danger of running short.
Know Your Depth: It matters more than you think. That standard 25 1/2-inch-deep counter, plus its front overhang, isn’t a full 24 inches wide, meaning less of that surface area can be used if you have shallow cabinets or a thin stone slab. You’ll enter the finished depth into the tool. The tool then calculates the square footage to match the actual workable surface.
You can even change all measurements to metric, which is useful if you’re ordering from abroad or using European-style cabinetry. A lot of moddern modular systems are built in centimeters, for example, but you may have old house plans still drawn out in inches. Unless you convert those units, there will be waste and gaps.
Counter Space Appliances also takes up lots of counter space. There is a blender. There is a toaster. There is a dish rack. Three pieces that don’t sound like much… until you see how much counter space each occupies (almost three feet!). When those things live permanently on your countertop, you’re not taking into account what could be used as actual workspace.
Use the calculator to subtract the length of these objects to get a clearer picture of what it is like to work in your space on a day-to-day basis. Never having enough counter space to spread out is such an annoying way to feel, yet without realizing this, you’d think everything was fine because there’s nothing on the counter!
Look at the workspace that’s left. How does it measure up different than the length of the cooking line? Ten-square feet may seem generous in a kitchen that’s laid out as a single straight, unbroken run. It may also seem cluttered in a kitchen that’s divided into three shorter runs broken up by appliances. You can see how various kitchen layouts (such as U-shaped vs. Galley) will affect those calculations in the reference tables on the page.
An island may increase the overall square footage but it won’t increase the wall areas where you stand while cooking. The path between fridge to stove to sink is at the core of good kitchen design. It is not just about maximizing the square footage, but also about maintaining the flow.
The calculator lets you see exactly where your space breaks down, and thus helps you intentionally choose how you want to place fixtures and where to park appliances. In doing so, you wind up with a kitchen where every square inch serves a purpose (making it feel larger then it is).
When you focus on that clear, continuous run of counter space, the whole cooking process becomes smoother. It’s not just about having room; it’s about having the right kind of room.