Interfacing Yardage Calculator
Estimate interfacing yards and meters from garment pieces, repeated cut counts, bolt width, layout efficiency, grain direction, shrinkage allowance, seam allowance, and waste buffer.
Interfacing yardage results
Detailed breakdown
| Layout check | Result | What it means | Planning note |
|---|---|---|---|
| Main pieces | 0 | Waiting | Run the calculator |
| Bolt width | Area per yard | Metric area | Common use |
|---|---|---|---|
| 20 in narrow bolt | 720 sq in | 0.465 sq m | Collars, cuffs, plackets, small facings, waistbands, and lightweight fusible rolls. |
| 36 in standard bolt | 1,296 sq in | 0.836 sq m | Most garment facings, jacket fronts, coat hems, dress support, and general home sewing. |
| 45 in wide bolt | 1,620 sq in | 1.045 sq m | Bag panels, foam stabilizer, large home decor strips, wide fronts, and fewer joins. |
| Usable-width check | Measure first | Selvage varies | Curled fusible edges, paper backing, and damaged selvages can reduce the width that actually fits pieces. |
| Grain setting | Typical efficiency | Best suited pieces | Yardage behavior |
|---|---|---|---|
| Lengthwise grain required | 82% to 90% | Collars, lapels, front facings, waistbands, plackets, structured cuffs. | Pieces stay aligned with the bolt, so gaps between shaped pieces matter more. |
| Crosswise allowed | 86% to 94% | Short facings, stable non-directional fusibles, pocket stays, small tabs. | Rotating some pieces can reduce the cut length on the bolt. |
| Either direction allowed | 90% to 96% | Nonwoven sew-in pieces, test squares, bag pocket panels, hidden supports. | Usually produces the tightest nesting when stretch and hand do not matter. |
| Bias or curved support | 74% to 84% | Curved necklines, roll lines, shaped armholes, bias stabilizing strips. | Diagonal placement takes extra area even when the actual piece looks small. |
| Directional face or one-way layout | 70% to 80% | Nap, visible canvas, directional texture, printed backing, one-way stretch control. | Mirrored pieces may not nest well, so the waste allowance should be higher. |
| Interfacing type | Default shrink | Default efficiency | Planning use |
|---|---|---|---|
| Light fusible woven | 2% | 92% | Blouses, dress facings, collars, cuffs, light waistbands, and small home sewing supports. |
| Medium fusible woven | 4% | 90% | Shirts, jackets, pants waistbands, plackets, pocket openings, and general garment structure. |
| Heavy fusible support | 5% | 84% | Coats, structured collars, bag tops, shaped hems, and pieces where pressing may shrink the backing. |
| Stretch knit fusible | 3% | 88% | Knit garments, shoulder stays, hems, necklines, and pieces that must keep controlled stretch. |
| Hair canvas or chest canvas | 2% | 78% | Tailoring fronts, lapel roll lines, chest pieces, collar stands, and sew-in support zones. |
| Foam stabilizer | 1% | 82% | Bags, organizers, tablet sleeves, structured panels, and projects with wide rectangular pieces. |
| Project | Typical pieces | Likely bolt width | Allowance note |
|---|---|---|---|
| Button shirt | Collar, stand, cuffs, front plackets, pocket top | 20 in or 36 in | Small pieces nest well, but plackets and cuffs need straight grain. |
| Tailored jacket | Fronts, facings, lapels, hems, pocket welts | 36 in | Use a stricter efficiency for shaped fronts and roll-line placement. |
| Pants or skirt | Waistband, fly shield, pocket stays, hems | 20 in or 36 in | Long waistband strips can dominate yardage if cut lengthwise. |
| Structured tote | Front, back, gussets, handles, pocket panels | 36 in or 45 in | Wide bolts reduce joins for bag panels and foam stabilizer. |
| Dress bodice | Neck facing, armhole facing, waist stay, button bands | 20 in or 36 in | Curves and mirror pairs need extra waste compared with rectangles. |
| Home decor strip work | Pillow closure, flange, curtain headers, tie backs | 36 in or 45 in | Strip length can exceed piece area, so enter it separately. |
When you’re at the fabric store holding up your pattern pieces, all pinned together (oh good, finally!) and still vaguely picturing in your mind what sort of shirt you want it to be, there’s something about that moment that makes you panic. You know you have main cloth. You know you have the thread. Then you pick up the interfacing… and holy crap, where did all this math come from? Because interfacing is not like fabric. It is rarely cut in one long continuous shape. It’s an arrangement of small rectangles, strips, and other scrap that need to line up on grain lines that won’t cooperate.
Most sewists either overbuy, scared of being short, or underbuy, because they figure a yard must be enough for a yard of flat surface. What they don’t realize is that’s how they get themselves. This calculator figure the geometry for them, so that they don’t have to imagine every piece of space between a collar and a cuff in their heads.
How to Calculate the Right Amount of Interfacing
The thing with the app is knowing what it’s telling you. If you put in measurements of your primary items, it isn’t measuring how much fabric your seams need; it’s measuring the envelope of fabric those things will use up when laid flat on a limited-width piece of material. A thirty-six inch bolt of interfacing sounds like plenty, except that in order for your pocket to be straight and your collar to run along grain, there’s no space left between them. And then nothing else will fit: it’s all space wasted.
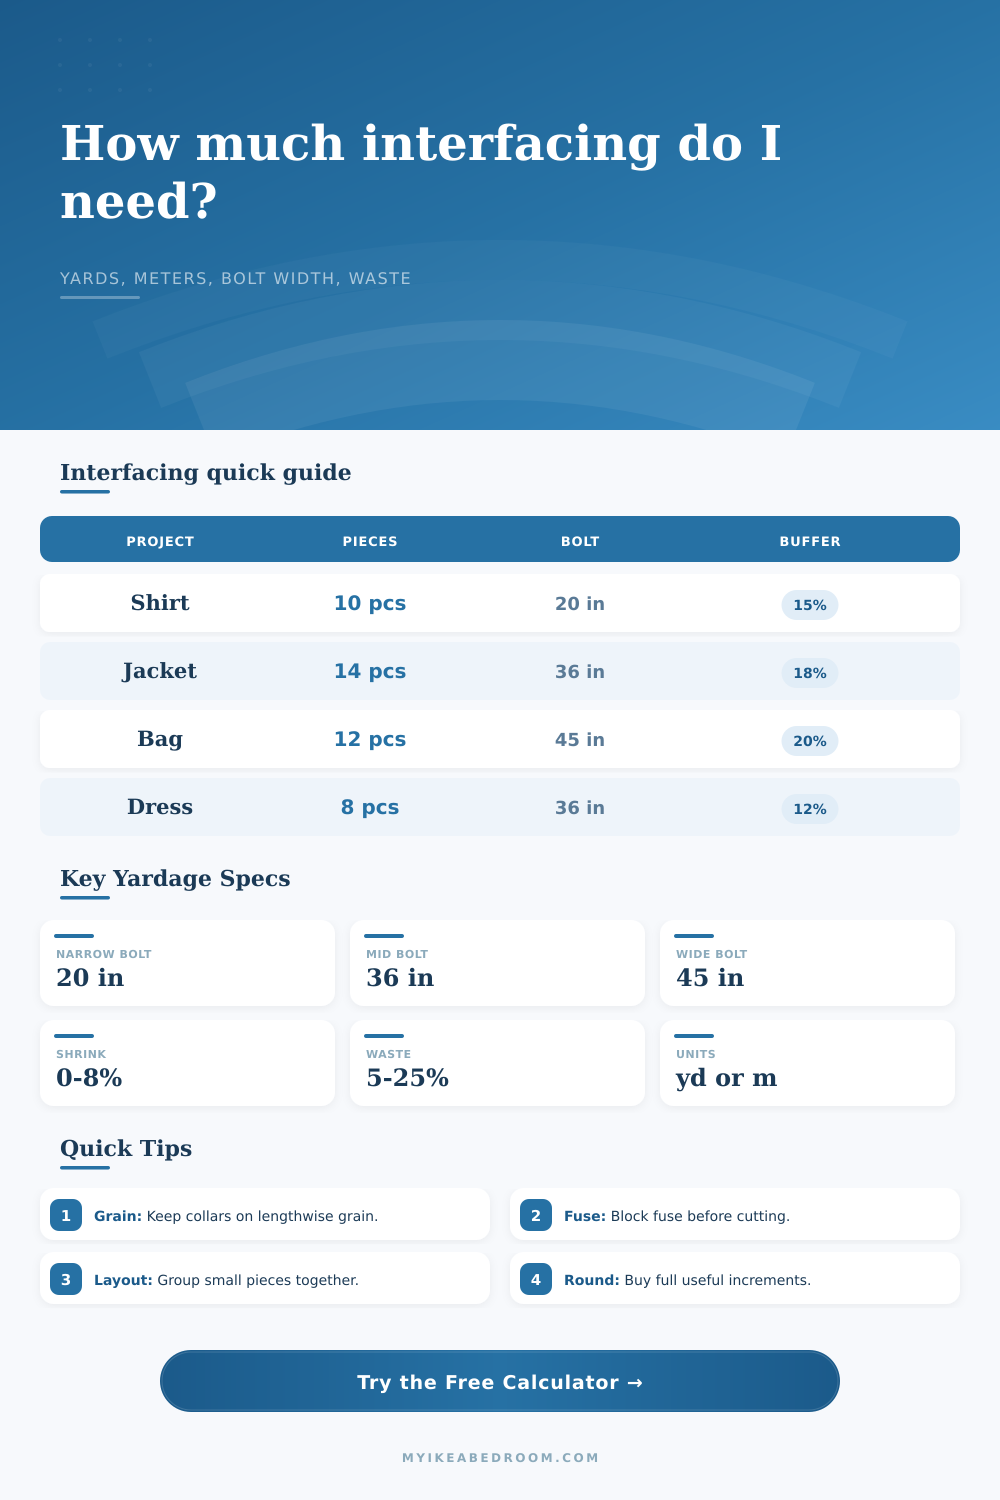
The chart on the page explain all of this very clearly. It shows why a twenty-inch narrow bolt (often better for collars and cuffs) can work well since you’re forced to cut the pieces out so they follow the grain. In contrast, with a wider forty-five inch bolt, you might nest pieces together in a bad way that ruins strength of the whole.
Grain direction is a quiet budget buster. If you need all of your pieces laid out with lengthwise grain (which is common when you’re matching a pattern) then you become much less efficient. When you can’t twist the grain without ruining the whole piece, like rotating a cuff to fit it into the negative area beside a lapel, it affect your layout greatly. This is why you may find that you use more fabric for a simple button-down shirt than a knit top, they appear to be the same size in square footage but the structured items creates more empty space between each other along the bolt. That empty space costs you linear.
Another issue (which also sounds theoretical) is the fact that certain fusibles tend to shrink as soon as they encounter steam. Woven fusibles in particular does this. With the tool, you can program in a shrinkage adjustment, typically four percent for regular fusing. That doesn’t sound like much, but that’s an inch or two less length on a long front coat. Don’t do this or you’ll end up with shrunken interfacing against a longer fabric shell. This is bad because you get ripples and bubbles that won’t press out. Better to order a bit more than to find yourself short at iron time.
The waste buffers aren’t reserved for error. They’re reserved for cutting, which is an exercise in reality. You’ll miss a line. You’ll fuse a test square and then it’s gone. You’ll cut a piece with a curl on one edge making its selvage useless. Fifteen to twenty percent is not pessimistic; it’s realistic. That’s the buffer the tool adds after doing the layout math, so the final yardage you see in calculation accounts for the inherent chaos of the cutting table.
You also need to remember the strips. These are the items that use length but gets measured by area (waistbands, bag handles, plackets, etc.). Sure, a tiny waistband may take up only a small number of square inches, but if it’s twenty inches long, it means you need a piece of fabric that’s twenty inches long on the bolt, even if that piece is very narrow. This is where the strip planning field works in the calculator. It isolates linear from area, so math doesn’t underestimate the amount of roll you will need.
Ultimately, whether it’s a big or small project, purchasing interfacing isn’t so much about how much you use as it is about how interfacing is arranged. It’s like trying to fit a jigsaw puzzle inside of a rectangular box. You can only do this if the puzzle pieces are still facing the right way. The math does work; however, it takes true inputs. Respect the grain. Take the steam shrinkage into consideration. Factor in some unavoidable waste. The outcome should of been perfect for your needs.
It is nothing more and nothing less. And there’s nothing better in sewing than knowing you have just enough interfacing to complete the task. There are no wasted rolls taking up space in the back of the closet and no guilty feelings either.