Gutter Slope Calculator
Plan the drop from high point to outlet, convert pitch into grade angle, check fascia clearance, and estimate hanger marks for straight or split gutter runs.
| Slope target | Drop per foot | Grade percent | Drop over 30 ft |
|---|---|---|---|
| 1/8 in per 10 ft | 0.0104 in/ft | 0.104% | 0.375 in |
| 1/4 in per 10 ft | 0.0208 in/ft | 0.208% | 0.750 in |
| 3/8 in per 10 ft | 0.0313 in/ft | 0.313% | 1.125 in |
| 1/2 in per 10 ft | 0.0417 in/ft | 0.417% | 1.500 in |
| Water path | 1/8 in per 10 ft | 1/4 in per 10 ft | 1/2 in per 10 ft |
|---|---|---|---|
| 10 ft | 0.125 in | 0.250 in | 0.500 in |
| 20 ft | 0.250 in | 0.500 in | 1.000 in |
| 30 ft | 0.375 in | 0.750 in | 1.500 in |
| 40 ft | 0.500 in | 1.000 in | 2.000 in |
| 50 ft | 0.625 in | 1.250 in | 2.500 in |
| Support condition | Common spacing | Metric spacing | Planning note |
|---|---|---|---|
| Standard aluminum K-style | 24-36 in | 61-91 cm | Closer spacing keeps the chalk line straighter. |
| Vinyl or warm-climate PVC | 18-24 in | 46-61 cm | Shorter spacing helps limit heat-related sag. |
| Steel, copper, or snow region | 18-24 in | 46-61 cm | Use dense supports where ice or wet leaves add load. |
| Outlet and corners | Within 12 in | Within 30 cm | Place hangers near outlets, miters, and end caps. |
| Layout type | Longest water path | Typical use | Drop formula |
|---|---|---|---|
| Single outlet at one end | Total run | Short straight eave | Run ft × pitch / 10 |
| High center, outlets at ends | Half run | Long straight fascia | Run ft / 2 × pitch / 10 |
| Center outlet, high ends | Half run | Hidden central leader | Run ft / 2 × pitch / 10 |
| Four-outlet split run | Quarter run | Very long eave or parapet | Run ft / 4 × pitch / 10 |
Calculations give layout geometry for planning. Final slope, downspout sizing, snow-load supports, and drainage connections should match local code and the specific gutter system.
When selecting a gutter color, homeowners tend to focus on aesthetics, forgetting about gravity. The effectiveness of a system depend entirely on gravity. Even a beautiful copper-lined system designed to complement your home’s appearance can end up being little more than a decorative bathtub for rainwater if the slope isn’t correct.
Not only does standing water not look good. It cause problems with rust, encourages mosquito breeding, and increases dead weight during winter snowfalls.
Why Gutters Need the Right Slope
With the calculator above, you don’t have to guess which spots require low points. It take care of the geometry for you. People’s biggest mistake is thinking they can just have their gutters sloped from one side of house to the next. It is great if it’s a little porch roof. It is terrible when it’s a long ranch style eave.
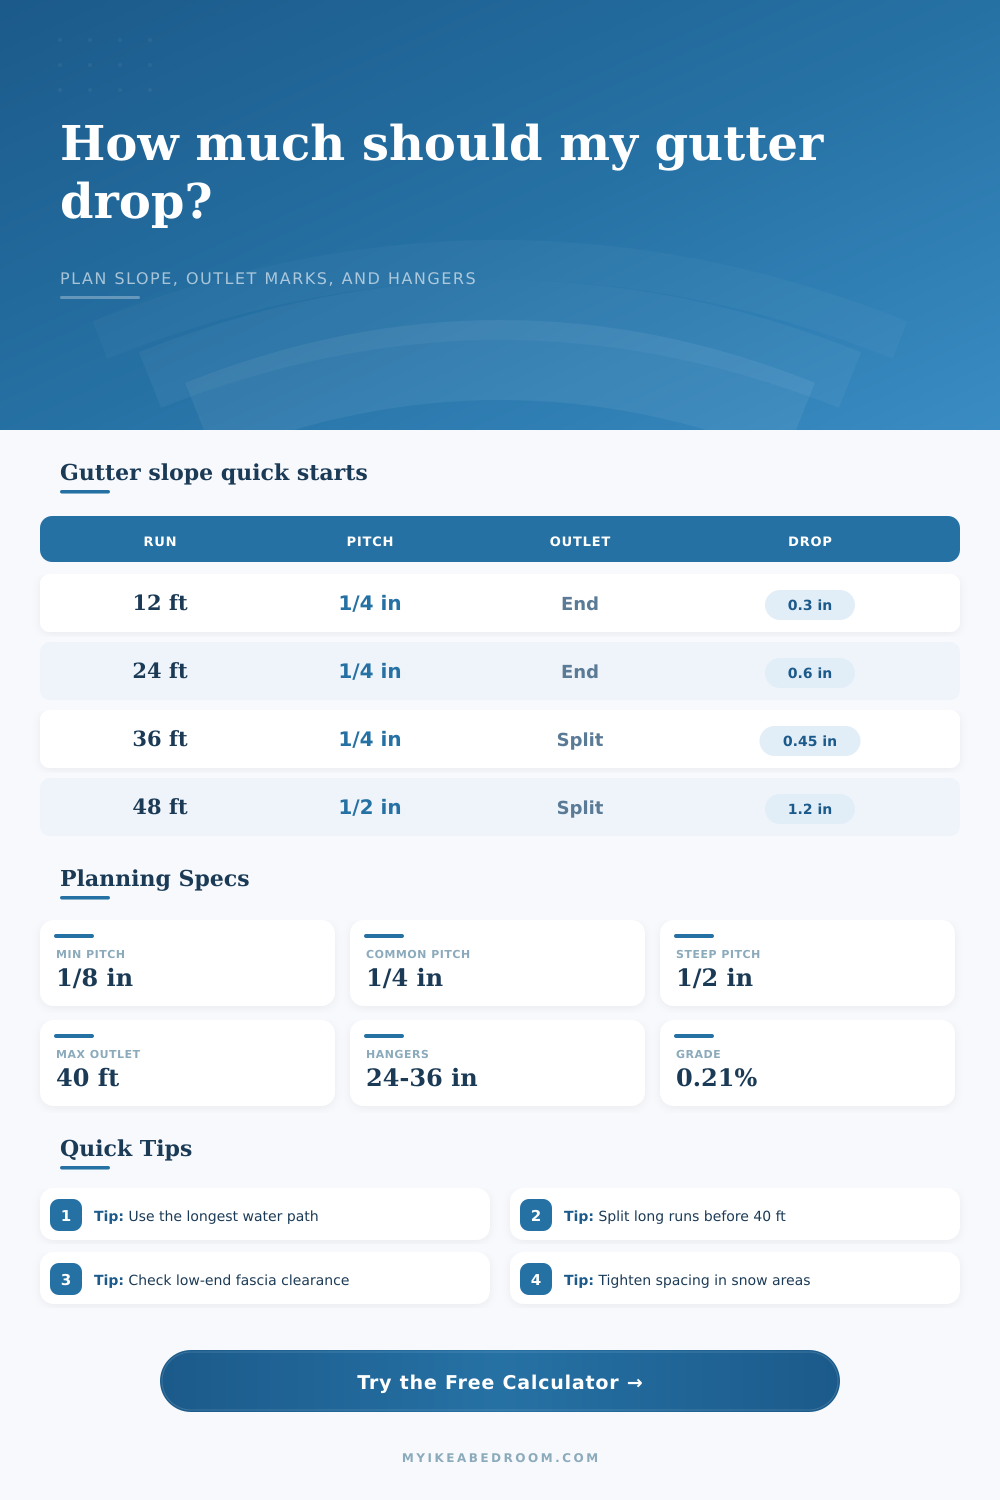
If your run is too long, then forcing everything into one outlet will give you this huge drop at one end and almost no drop at the other. If the run becomes too long, use the calculator to divide it up. Put a high point in the middle and an outlet at either end, even multiple outlets in the middle. This completely alters the math. You are only calculating the fall halfway rather than all the way down. This keeps the slope gentle enough for a straight view but still steep enough to drain.
Instead of talking about pitch in degrees, it’s typically described in inches per ten feet. For example, the residential sweet spot is a quarter-inch drop for every ten feet. That’s about 0.2 percent grade, imperceptible to the naked eye but enough to get water flowing toward a downspout. You may want to increase this (perhaps to half an inch per ten feet) if your house experience extreme summer weather like major thunderstorms or lots of falling leaves.
The tool will turn fractions into angle grades and real-world drop distances. This helps you check that the slope you want is possible based off the size of your fascia board.
The other thing to remember is that different metals also has different expansion properties when they heat up. Steel less so and aluminum a lot. Vinyl is a whole different animal because it’s flexible and all that flexing can also cause problems with pooling water between hanger locations if you are too generous with your spacing (say for example you had a very long run of aluminum and spaced your hangers out wide enough in hot weather that the gutter expand between hangers causing them to sag). Using the calculator you’ll be able to estimate how many hangers you will need given whatever spacing interval you choose.
Remember tighter isn’t just about support… It’s about keeping everything nice and tight and true from the chalk line you snapped prior to installation. The act of physically setting that reference line connects all of the math. Once you have marked a level line along your whole fascia, you measure down from that line at each outlet location and high point. Without consistent measurements or guessing, you lose the calculated slope before even hanging your first bracket.
The drop value lets you know by exactly how much your lowest point (outlet) needs to be below your highest point. In short distances it may only be a fraction of an inch. That little bit makes the difference between a flooded basement or not.
Whether you hire a professional or do it yourself, it’s a good idea to split long runs well before they reach the forty-foot mark because long runs make it more likely that water will overflow in heavy rain. The tool comes with a set of reference tables outlining those limits, illustrating the buildup of drop along the distance. By referencing them, you can verify that what you’ve done match accepted standards.
And if your own calculations put the low end below what your wall offers in terms of clearance, typically it’s simpler and less expensive to add another outlet than it would of to dig deeper and/or saw away more siding to make room for runoff. At the end of the day, gutters are all about taking water off your home’s foundation as well as possible. The outlets provide direction, the hangers maintain the shape of the channel, and the slope makes things happen. Balance those three things and you’ll avoid the little headaches that become huge repair bills down the road. Do the math well upfront for the geometry so that you don’t have to make corrections when the next storm blows through.