Grommet Spacing for Curtain Calculator
Plan the number of grommets per curtain panel, first and last center marks, actual center spacing, rod coverage, fullness, returns, overlap, and total hardware before marking or cutting fabric.
Load a common curtain layout, then edit the rod width, panel count, fullness, grommet size, and spacing limits for your window.
| Fabric type | Suggested spacing | Fullness range | Why it works |
|---|---|---|---|
| Sheer or voile | 5 to 6 in | 2.2x to 2.8x | Closer marks keep soft fabric from sagging between rings. |
| Linen blend | 6 to 7 in | 1.8x to 2.2x | Medium spacing gives relaxed folds without crowding the rod. |
| Cotton drapery | 6.5 to 7.5 in | 1.8x to 2.1x | Stable woven panels hold regular wave depth. |
| Blackout lined | 7 to 8 in | 1.7x to 2.0x | Heavier cloth usually needs fewer, wider folds. |
| Velvet or canvas | 7.5 to 9 in | 1.5x to 1.9x | Extra space reduces bulk and improves sliding. |
| Grommet outer diameter | Minimum edge center | Comfortable edge center | Minimum heading depth |
|---|---|---|---|
| 1.5 in small rim | 1.25 in | 2 to 2.5 in | 2.75 in |
| 2.0 in medium rim | 1.5 in | 2.5 to 3 in | 3.25 in |
| 2.38 in large rim | 1.75 in | 3 to 3.5 in | 3.75 in |
| 3.0 in oversized rim | 2.25 in | 3.5 to 4.5 in | 4.5 in |
| Rod coverage | Panels | Fullness | Flat width per panel |
|---|---|---|---|
| 60 in bedroom rod | 2 | 2.0x | 60 in each |
| 84 in patio rod | 2 | 1.8x | 76 in each |
| 120 in wall run | 4 | 2.0x | 60 in each |
| 36 in closet cover | 1 | 1.8x | 65 in total |
| Step | Mark | Formula | Check |
|---|---|---|---|
| 1 | Left edge center | Edge offset | Outer rim clears side hem |
| 2 | Interior centers | Add actual spacing | Keep marks square to the top |
| 3 | Right edge center | Panel width minus edge | Last mark mirrors first mark |
| 4 | Cut line height | Top minus heading center | Rod has enough clearance |
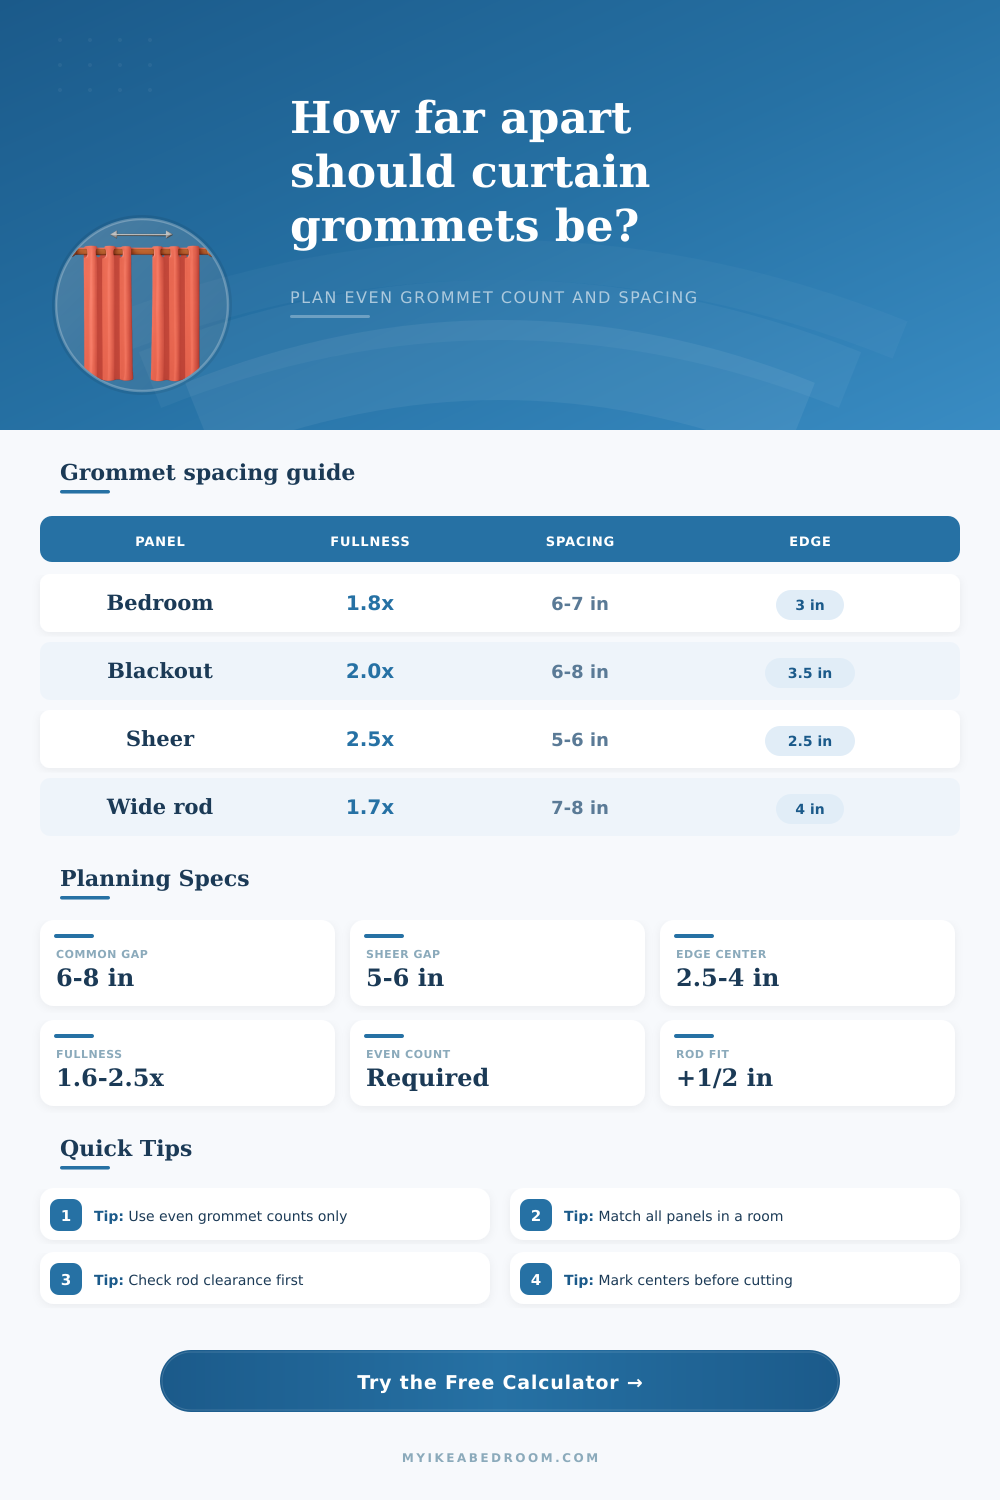
Keep the count even: Use an even number of grommets on every panel so both side edges return toward the wall instead of facing into the room.
Test before cutting: Tape the center marks along one panel and fold it on a rod or dowel to confirm the wave depth, stack, and edge return.
I know what you’re thinking. Grommet curtains are nothing but fabric with holes. You won’t realize it until you attempt to hang them and see that the spacing is out by half an inch, so the folds don’t line up evenly. It’s all in the geometry. Nothing to do with the color, nothing to do with the weight of the fabric. Line up center marks correctly and you get a proper stack, full opening drapes that show frame of your window evenly.
To begin most folks will grab a tape measure, stick it on their rod, then guess at how many grommets they’ll need. Instead of trial and error with a drill bit, the calculator above will figure the rest for you. Just input your rod span and fullness you want. The calculator do the math for you. Where the rubber meets the road is understanding what all those numbers are telling you.
How to Hang Grommet Curtains Correctly
First there’s whole concept of the edge offset. How far is it from center of your first grommet to side hem? Too little here means if you close the curtain, the metal ring could actualy be sitting on top of fold line. Ouch! It will be a hard crease that won’t ever go away. Three inches is a nice standard offset that allows the fabric to breathe and come back to wall nicely.
The fullness ratio is how much fabric you use relative to window width. Most linen blends looks best at roughly a two times ratio (meaning they create a nice generous wave but don’t make too much bulk on the rod). Blackout fabrics tend to be heavier so may prefer a lower ratio; more like one point seven, whereas sheer fabrics may require higher ratios of up to two point five to appear soft. The tool use this to adjust the panel width. If you neglect the fullness, your curtains will pile up like an accordion when drawn aside, or hang flat and lifeless.
By the way, how big are these grommets? More important than you’d think: The standard size is two and a third inches in diameter (with a corresponding rim). To avoid rips when they’re pulled taut, allow plenty of wiggle room at fabric’s edge from that rim. Follow the calculator’s instructions to space six and a half inches between marks on cotton curtains. Do not budge. Any smaller, the drape will appear stiff and overcrowded. Any larger, the fabric will pucker between the rings into a sloppy trough you can’t smooth out with an iron.
People always forget the middle. When you have two panels that meet exactly edge to edge, there’s some sort of space between them, and light will spill through that opening. If you add just two extra inches (of overlap) it looks so much better and ensures privacy. That little bit of increase in fabric width is what the tool factors in. It sounds like such a small thing, but that two inch buffer is what makes the whole window treatment feel thought out instead of slapped together.
You should of checked this first. And lastly….always draw your centers before punching your holes. Draw them out with a ruler and a fine point marker. Check for symmetry. 3 inches from the left edge of the fabric is the center of the first grommet…so three inches from the right edge of the fabric is the center of the last grommet. All of the gaps between the holes should be the same. Evenness is not negotiable. You can’t correct for uneven spacings after punching holes!
Measure slowly, trust the math and let the fabric help you do the heavy lifting. The result will be a naturaly flow as your curtains fall into place with soft, even folds that make a room feel finished. It is a small detail, but it does so much for the overall look.