Grab Bar Length Calculator
Plan a practical grab bar length from fixture type, wall span, user reach, mounting height, stud spacing, fixture position, and usable side or back wall clearance.
1Layout Presets
Use a real starting point, then adjust the wall span, fixture position, clearance, and reach for the exact room.
2Measurements
Imperial mode uses inches for wall, reach, height, clearance, and stud spacing.
Recommended Layout
3Fast Spec Grid
4Fixture Length Reference
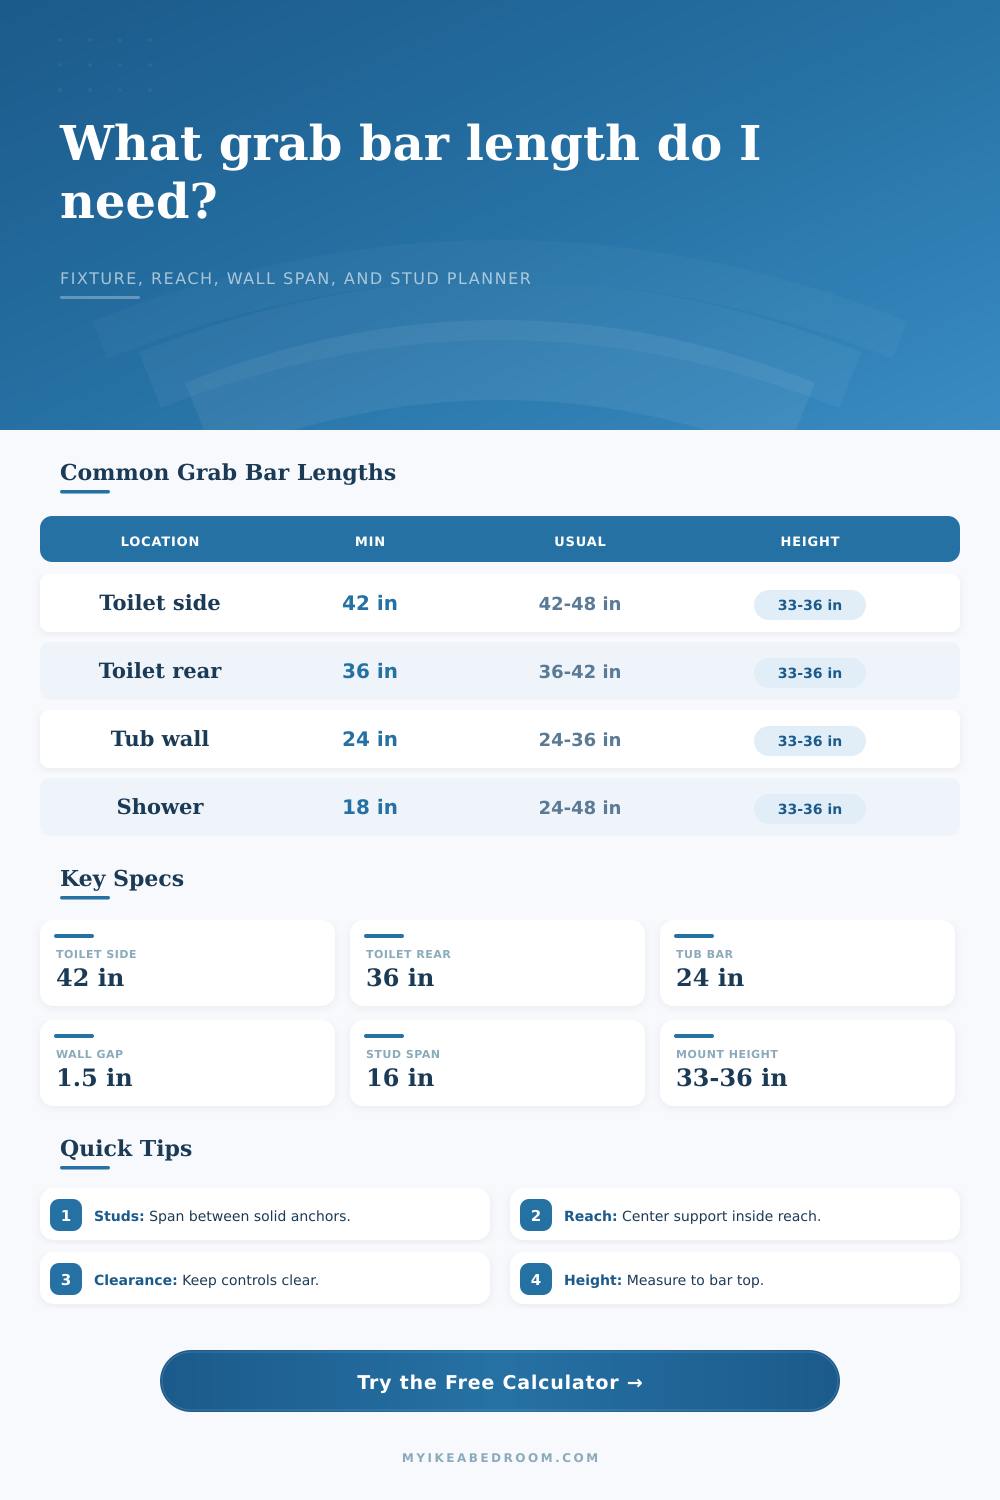
| Fixture zone | Baseline length | Placement cue | Calculator use |
|---|---|---|---|
| Toilet side wall | 42 inches | Usually begins near the rear wall and extends forward past the bowl | Enter rear offset as back clearance and bowl centerline as fixture position |
| Toilet rear wall | 36 inches | Often centered around the toilet centerline with more length to the open side | Enter available wall behind the toilet and the toilet centerline from the side wall |
| Tub back wall | 24 to 36 inches | Back wall bars often avoid controls and land within the bathing reach zone | Use obstruction allowance for spouts, valves, shelves, or glass panels |
| Shower side wall | 36 to 48 inches | Roll-in layouts often benefit from coverage toward the entry | Use side clearance for the open entry, fixed glass, or door swing zone |
| Vertical entry bar | 18 to 24 inches | Helpful at a threshold or beside a seat where a standing grip is needed | Use mounting height as the top point and reach as the target grip zone |
5Reach and Height Table
| User situation | Reach range | Height cue | Length choice |
|---|---|---|---|
| Seated toilet transfer | 24 to 34 inches | Top of grip near 33 to 36 inches | Favor 42 inches when the wall and studs allow it |
| Tub entry balance | 20 to 30 inches | One high grip and one lower tub-rim support may be reviewed | Favor 18 to 24 inches on short end walls |
| Roll-in shower movement | 30 to 44 inches | Keep controls and accessories from blocking the gripping surface | Favor the longest clear wall length near the entry |
| Bedside standing assist | 22 to 36 inches | Set height to the user and transfer path instead of bathroom rules | Favor 24 to 36 inches with solid structural backing |
6Stud and Anchor Planning
| Stud spacing | Useful stock lengths | Studs crossed | Planning note |
|---|---|---|---|
| 12 inches on center | 24, 36, 48 inches | 3 to 5 framing lines | Gives flexible plate positions for short walls and alcove ends |
| 16 inches on center | 16, 32, 48 inches | 2 to 4 framing lines | A 32 or 48 inch bar may align better than a 36 inch bar |
| 24 inches on center | 24, 48 inches | 2 to 3 framing lines | Blocking or rated anchors may be needed for 36 or 42 inch lengths |
| Continuous blocking | 18 to 60 inches | Flexible backing | Best when the ideal support zone does not land on stud centers |
7Common Layout Examples
| Room condition | Wall span | Fixture position | Likely length |
|---|---|---|---|
| Compact toilet side wall with trim at front | 54 to 60 inches | Bowl center 18 inches from side wall | 42 inches if rear offset can stay near 12 inches |
| Rear toilet wall with tank and open side | 48 to 60 inches | Centerline 16 to 18 inches from side wall | 36 inches, shifted toward the open side |
| Standard 60 inch tub back wall | 54 to 60 inches after trim | Controls near one end | 24 to 36 inches, clear of controls |
| Open shower with fixed glass panel | 42 to 60 inches | Entry at one side | 36 to 48 inches, ending near entry |
8Planning Tips
The calculator estimates a useful stock length, but the final installation should land fasteners in studs, blocking, masonry, or a rated anchor system that matches the wall.
Leave room around ends, controls, shelves, shower doors, trim, and tub rims so the full gripping surface remains usable instead of becoming a decorative rail.
Consider grab bars to be structural safety gear, not decorative hardware. Most people purchase them like they would a towel: by choosing a generic size based off the shelf. Often times this method backfire; the bar is either too short (meaning you don’t get any help) or too long (meaning it won’t fit between studs or it covers up another fixture). The difference can sometimes be mere inches between safe and unsafe.
Think of the wall as a sort of map, where’s solid backing? Where is empty space? Use the calculator above. Our calculator does all the math for you. It takes into account factors like stud spacing and wall span. It makes drawing layout of your bathroom simple. It lets you know if your standard forty-two inch bar are going to fit into your specific layout.
How to Choose the Right Grab Bar Size
The key stuff comes before using the calculator. You need to be able to measure how much usable span you have on the wall and where studs is located. The studs become your anchor points. If you don’t nail the bar into the studs, weight of the shower head and other pressure can cause it to pull away from the wall.
Most houses is built with sixteen inch studs. A thirty-two or forty-eight inch bar will often line up with a frame member. A thirty-six inch bar would then sit between studs. In this situation, you’d either want to block it off or nail it into the studs really well.
A second variable is reach. At first glance, it sounds obvious: How far do I want the grab bar? To use reach, enter the maximum distance you can comfortabley reach to find something to grab. Why does that matter? You’re sitting on the toilet or in the shower and suddenly you need help. A grab bar isn’t going to do much good if you can’t actualy reach it. So, ideally, you should of be able to stretch out and reach the middle of the grab bar from your seat in the shower or on the toilet. Reach will show you exactly how your reach compare with the recommended grab bar length. It also alerts you to situations when the grab bar exceed your natural reach. That way, when you do need to stand up, the grab bar is there to give you some help.
In reality a lot of installs fail at clearance. Maybe your long clear wall has fixtures interrupting it. Window trim, light switches, towel rings can all interfere with surface. They interrupt the gripping surface. With the planning tool, you can subtract these areas. Now you have a length you can actualy use instead of an ideal maximum length. Treat those little things like permanent barriers. Moving them later is seldom worth it. Better to have a shorter bar with no interruptions, an awkwardly gripping longer bar isn’t any good.
The other important thing that most people gets wrong is height. Typically, you want the top of the grip to be roughly thirty-three to thirty-six inches above the ground. That’s for most people. For most adult-sized sofa, anyways. That puts your wrist in a neutral position. If you mount the bar too high, it’s gonna stress out your shoulders. If you put it too low, you can’t create as much force when you lift. This is all part of the bar mounting logic on the calculator. So you can get it lined up based off how your body mechanics are. You’re not following some rule book, you’re trying to figure out what’s right for your body.
How does that impact your design? The page includes reference tables showing how these variables affect each room. For example, you will need a longer bar on a toilet side wall than one on a tub end wall. Why? Because the transfer move differently in these spaces. Bars on side walls help stabilize user’s standing weight. This means they needs to be longer to provide enough support. Bars on tubs frequently bear vertical pushing forces. So they can typically be shorter. Knowing this helps you avoid over-engineering a simple tub install and not providing enough support for a more complicated toilet transfer.
It’s all about making a solid transfer point. A point that takes into account the physics of leverage, one that takes into account what your house is actualy framed with. After you’ve established where your studs are and their individual clearances, the proper length of bar is evident. It is almost never the initial bar you pluck off the peg at the store. But it is nearly always the one that holds you upright.