Floor Tile Calculator
Estimate floor tile count, box count, cut and waste area, grout line length, border band impact, doorway cuts, layout angle, pattern complexity, and underlayment allowance for a room floor.
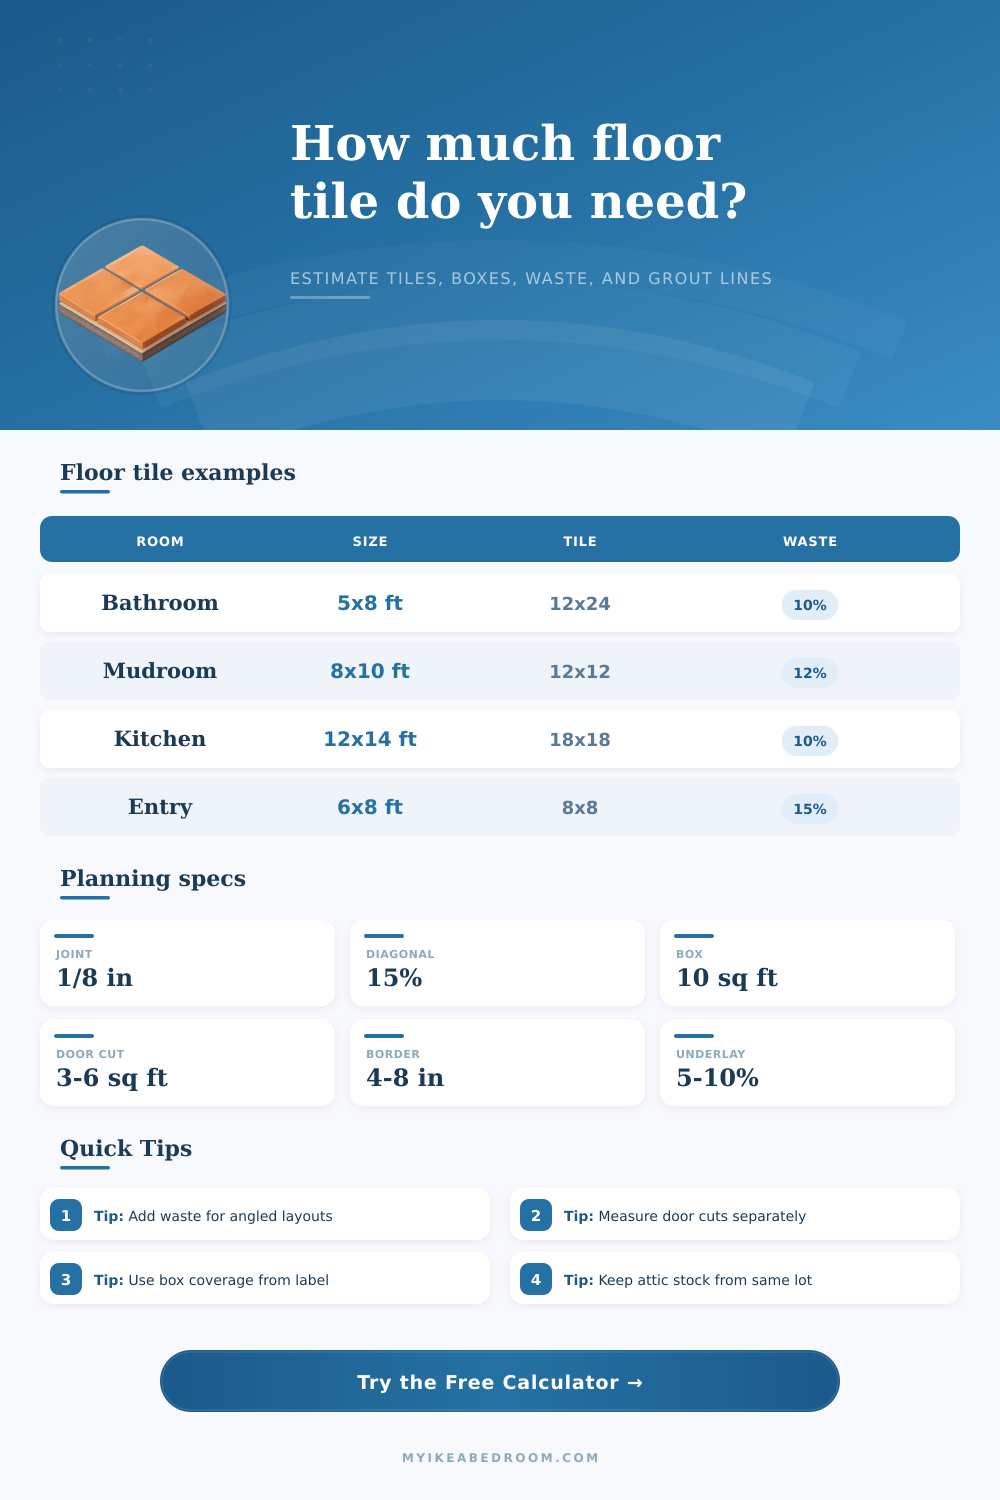
Choose a room type to load realistic dimensions, tile size, joint width, layout angle, border band, doorway cuts, waste, box coverage, pattern, and underlayment allowance.
5% to 10%
Lowest cut count when walls are square.
8% to 12%
End cuts repeat every other row.
12% to 18%
Angled perimeter cuts increase waste.
15% to 20%
Small cut pieces and doorways need buffer.
| Tile format | Nominal size | Area each | Typical floor use |
|---|---|---|---|
| Small ceramic square | 8 in × 8 in | 0.44 sq ft | Powder rooms, entries, and small patterned floors |
| Standard square | 12 in × 12 in | 1.00 sq ft | Bathrooms, mudrooms, laundry rooms, and utility floors |
| Large square | 18 in × 18 in | 2.25 sq ft | Kitchens and open rooms with fewer grout lines |
| Large rectangle | 12 in × 24 in | 2.00 sq ft | Modern bathrooms, hallways, and straight plank-style fields |
| Porcelain plank | 6 in × 36 in | 1.50 sq ft | Wood-look floor patterns and herringbone-look layouts |
| Floor condition | Suggested waste | Cut difficulty | Calculator inputs to watch |
|---|---|---|---|
| Open rectangular room | 5% to 8% | Low | Room length, width, and tile size |
| Typical bath or laundry | 10% to 12% | Medium | Doorway cuts and border band width |
| Diagonal floor | 12% to 18% | High | Layout angle and perimeter length |
| Herringbone-look planks | 15% to 20% | High | Pattern type, doorway cuts, and tile length |
| Joint size | Decimal input | Metric input | Common floor use |
|---|---|---|---|
| 1/16 in | 0.0625 | 1.6 mm | Rectified porcelain with very consistent sizing |
| 1/8 in | 0.125 | 3.2 mm | Most ceramic and porcelain floor tile |
| 3/16 in | 0.1875 | 4.8 mm | Slightly varied tile or rustic finish |
| 1/4 in | 0.25 | 6.4 mm | Quarry tile, handmade looks, or wider joints |
| Item | What to enter | Common range | Result impact |
|---|---|---|---|
| Tile box coverage | Coverage printed on carton | 8 to 16 sq ft | Controls box count rounding |
| Doorway cut | Width by cut depth | 2 to 6 sq ft | Adds cut area and complexity |
| Border band | Perimeter band width | 3 to 8 in | Separates border area from field tile area |
| Underlayment allowance | Extra percent over room area | 5% to 10% | Estimates membrane or panel coverage |
Separate field from border: If the room has a framed edge, enter the border band width so the calculator can show how much floor area is perimeter band versus center field.
Count doorways before waste: Doorway notches, thresholds, and cabinet returns can turn full tiles into cut pieces, so measure the average cut width and depth before choosing the waste percent.
Calculating the correct amounts of floor tile is an important task because calculating the correct amount of floor tile will prevent you from wasting money on purchasing excess tile and will prevent you from running out of the materials that you need for your project. Many individuals may attempt to calculate the required amount of flooring by measuring the area of the flooring that is to be completed and guessing how many box of tile are required to complete such a project. However, the best way of calculating the necessary amount of floor tile for a project is to use the calculator that is provided for such a task.
To use the calculator effective, several specific measurement must be entered into the calculator. You must enter the length and width of the room into the calculator because these measurements will allow the calculator to mathematically compute the total area of the floor that is to be tiled. The dimensions of the tiles that will be used for the project must also be entered into the calculator, as the area that is covered by each individual tile can have a significant impact upon the total number of tiles that is required for the project.
How to Calculate How Many Floor Tiles You Need
The width of the grout joints that will be used for the project must be entered into the calculator, as the width of the grout joints will impact the number of tiles that are allowed to be placed into the area. Additionally, the calculator must enter the layout angle that will be used for the project and the type of pattern that will be formed using the floor tiles, as these factors will impact how many tiles will have to be cut to form the project. Finally, the number of doorways that will be included within the area to be tiled and the size of those doorways must be entered into the calculator.
The allowance for waste is another important factor that must be considered when calculating the amount of floor tile that will be required for a project. Allowances for waste for tile that is cut during the laying of the tiles must be entered into the calculator, and there are range options for the percentage of waste that will be allowed. For most projects, 5% waste is all that will be needed.
However, projects that incorporate complex tiling patterns, such as herringbone patterns, will require a waste percentage of 20%. Such a percentage is used for herringbone patterns as cutting these type of tiles will result in numerous offcuts of tile that cannot be utilized again. Additionally, a pattern-specific waste factor is included in the calculator, as some patterns, like running bond flooring, require more waste than other types of flooring pattern.
The calculator provides three main piece of information that can be used for ordering the floor tiles that will be completed for the project. The count of the number of floor tiles that are required for the project is provided, along with the number of boxes of those floor tiles that must be purchased to complete the project. Finally, the calculator calculates the separate area of the project that is to be allotted for waste.
In addition to these main outputs from the calculator, the calculator provides additional information that is helpful for those who are completing the tiling project. The calculator can determine the length of the grout lines that will be required for the project. Additionally, the calculator can provide the breakdown of the project of the area that will be tiled with border bands of tile versus the area that will be tiled with the main type of floor tile.
Finally, the calculator provides the allowance for the underlayment of the floor to ensure that there will be enough of the underlayment material to allow for the underlayment to be even out along the floor. A number of different tiling patterns can be used for the project, and each type of tiling pattern will have a significant impact upon the number of tiles that will be required for the project. Patterns like a straight-tiled grid pattern will require less floor tile than diagonal or herringbone tiling patterns.
A herringbone tiling pattern will require the most floor tiles for the project due to the amount of offcuts that will result from cutting the floor tiles according to these specifications. Additionally, projects that include doorways will require extra tiles to be purchased for those doorways. A single doorway may require relatively small amount of extra floor tiles, but a project with many doorways will require more floor tiles.
Additionally, underlayment material will require extra purchases of that underlayment material. For most projects, 5% to 10% of the underlayment material will need to be purchased in excess of the amount that will cover the area to be tiled with the floor tiles. Another number of tables and grids provided on the calculator will assist individuals in making decision for their projects.
These tables provide information regarding the formats of the most common floor tiles, as well as the ranges of waste that is created with different types of tiling projects. This information can help individuals to make a decision regarding the type of tiling and floor pattern that they would like for their project. These tables can help to determine the type of tiling pattern that will create the fewest number of cuts for the floor tiles, and, thus, ensure that the individual receives the correct number of boxes of floor tiles from which to select their tiles, as well as the correct amount of material for their project.