Floor Runner Overlap Calculator
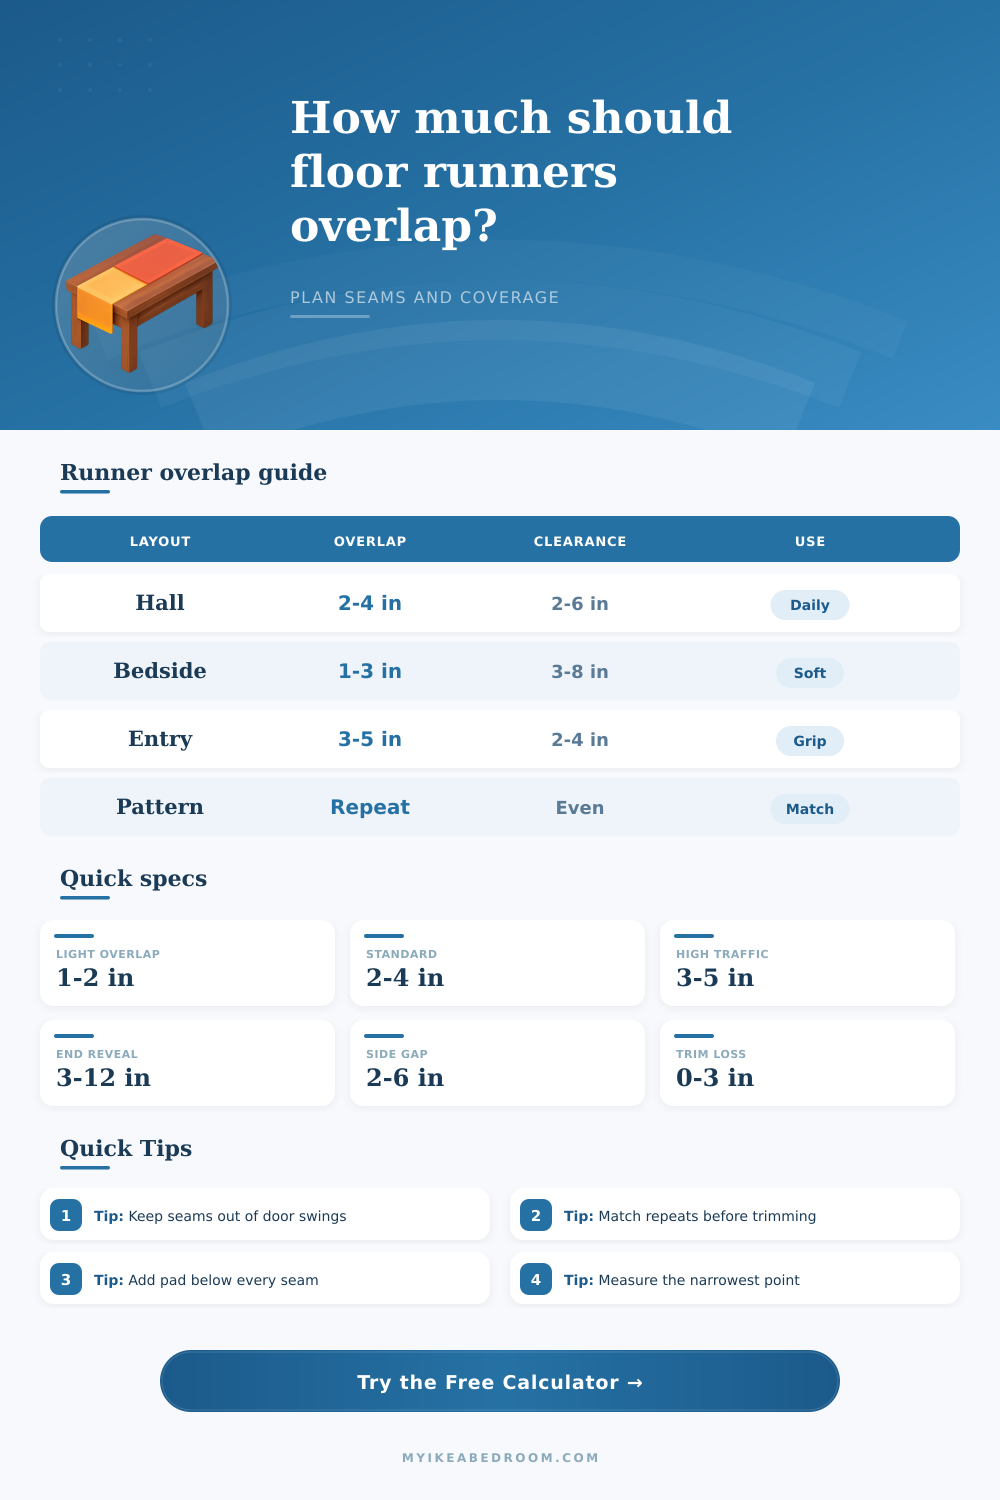
Plan how multiple floor runners overlap in a hallway, bedroom aisle, entry path, galley kitchen, or landing so the finished run, seam locations, end reveal, and side clearances stay intentional.
Choose a common layout, then tune the run length, runner size, seam style, trimming allowance, pattern repeat, and clearances for your floor.
Balanced hallway overlap
The starting layout uses two standard runners with a small overlap and even floor reveal at both ends.
Fit signal: Ready to test on the floor with painter tape.
Seam note: Place the seam where feet land flat, not at a threshold, pivot point, or chair path.
| Nominal runner | Typical actual length | Useful pair coverage with 3 in overlap | Best room use |
|---|---|---|---|
| 2 ft x 6 ft | 72 in | 11 ft 9 in | Small entry, closet aisle, short bedside path |
| 2 ft 6 in x 8 ft | 96 in | 15 ft 9 in | Galley kitchen, compact apartment hall |
| 2 ft 6 in x 10 ft | 120 in | 19 ft 9 in | Standard hall, bedroom-to-bath path |
| 3 ft x 12 ft | 144 in | 23 ft 9 in | Wide hall, studio aisle, open-plan walkway |
| 3 ft x 14 ft | 168 in | 27 ft 9 in | Long straight hall with few thresholds |
| Seam condition | Suggested overlap | Pad approach | Watch point |
|---|---|---|---|
| Low traffic decorative | 1 to 2 in | Pad under both pieces, trimmed back from edge | Can show a ridge if pile is thick |
| Normal hallway | 2 to 4 in | Continuous pad or two pads meeting below seam | Keep seam away from the first step from a doorway |
| Entry or mudroom | 3 to 5 in | Grip pad plus rug tape rated for floor finish | Moisture and shoes can lift corners |
| Landing or turn | 3 to 6 in | Pad each direction separately | Do not create a raised pivot point |
| Pattern match | One repeat or adjusted repeat | Dry fit before cutting or taping | Repeat length may force extra overlap |
| Location | End reveal each end | Side floor showing each side | Why it matters |
|---|---|---|---|
| Apartment hallway | 4 to 8 in | 3 to 6 in | Looks centered and clears wall trim irregularities |
| Bedside path | 6 to 12 in | 4 to 10 in | Keeps runner away from bed feet and nightstands |
| Entry path | 3 to 6 in | 2 to 5 in | Leaves door swing and threshold visible |
| Galley kitchen | 4 to 10 in | 2 to 4 in | Avoids cabinet toe-kick bunching |
| Wide studio aisle | 8 to 18 in | 6 to 12 in | Prevents the runner from looking undersized |
| Measured path | Runner plan | Total seam overlap | Finished runner coverage |
|---|---|---|---|
| 15 ft kitchen aisle | Two 8 ft runners | 6 to 12 in | 15 ft to 15 ft 6 in after overlap |
| 18 ft hallway | Two 10 ft runners | 12 to 18 in | 18 ft 6 in to 19 ft after trimming |
| 22 ft studio path | Two 12 ft runners | 18 to 24 in | 22 ft after planned end reveal |
| 28 ft long hall | Three 10 ft runners | 18 to 24 in | 28 ft to 28 ft 6 in after trimming |
| 34 ft corridor | Three 12 ft runners | 18 to 30 in | 33 ft 6 in to 34 ft 6 in depending trim |
Butt seam
Overlap: 0 in
Flattest look, but easiest to separate unless the runners are secured below.
Light overlap
Overlap: 1 to 2 in
Good for decorative paths where the seam is not under frequent footfall.
Standard overlap
Overlap: 2 to 4 in
Balanced choice for most flat woven hallway and bedroom runners.
Pattern overlap
Overlap: Repeat based
May use extra length so the border, stripe, or motif lines up cleanly.
Dry fit before securing: Mark the planned end reveal and every overlap seam with painter tape, then walk the path normally. If a seam lands under a pivot, chair wheel, doorway swing, or cabinet work zone, shift the overlap before trimming.
Check height at the seam: Overlap adds thickness. Low pile and flat woven runners tolerate overlap better than plush or backed rugs. If the seam feels raised, reduce overlap, move the seam, or use a thinner pad below that joint.
Many of us dream of buying one seamless runner that will fit our space exactly as-is. But we know better: Interior designers knows the art of sewing together pieces of carpet to fill out large spaces, like studio aisles, entryways and long hallways. They know this results in seams… And seams is what make (or break) a plan.
If not handled well, overlaps becomes unsightly ridges or even tripping hazards. Lack of coverage mean holes that trap dirt and dust. Knowing your pieces’ relationship before cutting into any fabric makes all the differance. It all comes down to how long and stable you want it to be.
How to Join Rug Runners Correctly
How much do you overlap on every piece? How much do you want to run across floor? If you have an eighteen-foot hallway and buy two ten-foot runners, you might think you are perfectly covered. Truth is, even if you get that 10 foot runner, you’ll lose a few inches to the seam itself.
Plug your runner into the calculator above, input the length of your path, and it will do that math for you. You won’t have to guess whether going that extra six inches is going to throw off the look of the room.
The end reveal (the stretch of empty flooring on either side of the runner) are more important than most folks realize. It doesn’t have to be big, just enough to frame the textile, and allow for any slight measurement inaccuracies that may occur when measuring out the hallway. You can leave as little as four inches, or as much as eight inches of flooring showing. The latter creates a nice framing effect around the textile; the former frames the runner too tightly against the wall trim, looking cheap, and making cleaning all-but-impossible.
Overlap width isn’t as important than seam placement. Aim for seams to be far from high-stress areas (chair pivots, door swings). You need to consider both how the seam affects the look of the room and physical dynamics of how people actualy walk over it. The problem is: they step on the edge of the joint, and then pivot hard on one foot. It doesn’t feel bad until you do it, and then you do it again. Then your friend does it. Next thing you know, you’ve got a seam in the center of your entryway and all your guests are pointing at it. That is because that’s exactly where their feet land when they walk in or out.
Then there is the added complexity of pattern matching. Motifs and stripes requires accurate cuts, while solid colors is forgiving of small differences. Often times, that means cutting a few inches extra just to ensure the pattern lines up exactly at the seam for a seamless appearance. So what was originally planned as a 3 inch match may turn into an 8 inch match in order to reach the next pattern repeat. That’s where the reference table on the page comes into play. It demonstrates how much more material you will use when running with patterns versus solids.
Thickness at the join is another quiet rug installation murderer. Overlapping two thick rugs create a bump that catches heels and tears backing over time. Flat woven runners that lie flatter to the ground handle overlapping better than plush pile ones. Consider cutting down one side if you need a thicker runner to blend into next one. You could also try using a thinner pad under the join to minimize the differance in thickness.
The runner, of course, is crucial but so is the pad selection. Even if you get the overlap exactly right, a loose rug will have lumps. Even with that precision, the runner’s pad must be set back from the edge a certain amount. Otherwise, the pad show on all sides instead of staying only in the center. Ideally the pad should be wide enough to hold the textile down but narrow enough to remain concealed beneath the fabric’s hem.
The only true test of your plan is by dry fitting. Lay down painter’s tape to show where you’ll want your seams, reveals and runners to be on the real floor. Now walk around in them like normal. Move a chair. Open doors. Make any changes to the tape now instead of wasting expensive textiles later because something doesn’t feel quite right with that seam or that reveal looks off kilter. Tedious? Yes. Costly mistake averted? Absolutely, you should of changed it then.
It’s not as much about taking measurements, as it is about controlling how your runners will flow from room to room. The goal isn’t just to cover the floor; it’s to create a seamless path that feels intentional. This means that where you place seams in relation to the overlap and reveal creates a seamless effect, making it look like one custom piece instead of a quilt made off many parts. It’s that intention that elevates a basic hallway into a good design.