Felt Wall Panel Calculator
Estimate felt acoustic panels, layout rows, coverage, adhesive, reveal gaps, and cutting waste for a wall or room accent.
✨Panel Presets
📏Wall And Panel Inputs
Felt Panel Estimate
Full Breakdown
🧱Panel Size Reference
📊Reference Tables
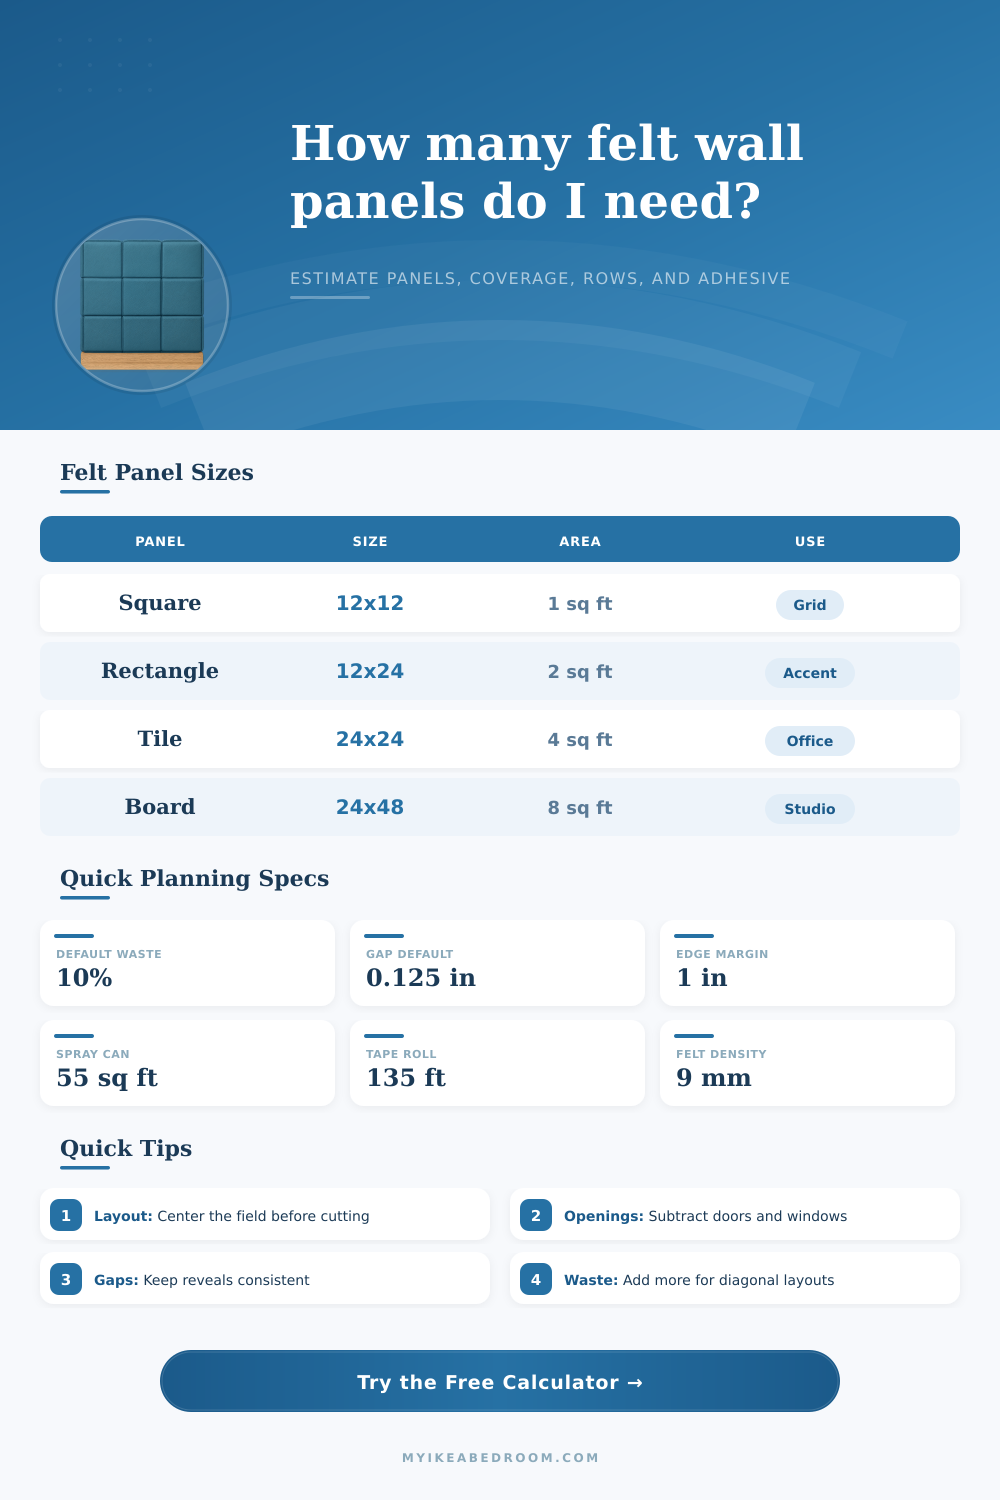
| Felt panel type | Nominal size | Face area | Common use |
|---|---|---|---|
| Square acoustic tile | 12 x 12 in | 1.00 sq ft | Small grids, color blocking |
| Hex peel-and-stick tile | 10 x 10 in | 0.60 sq ft usable | Patterned accents |
| Rectangle tile | 12 x 24 in | 2.00 sq ft | Desk backs and headboards |
| Large felt board | 24 x 48 in | 8.00 sq ft | Studios and media walls |
| Wall area | 12x12 tiles | 12x24 panels | 24x48 boards |
|---|---|---|---|
| 40 sq ft / 3.7 sq m | 44 with 10% waste | 22 with 10% waste | 6 with 10% waste |
| 80 sq ft / 7.4 sq m | 88 with 10% waste | 44 with 10% waste | 11 with 10% waste |
| 120 sq ft / 11.1 sq m | 132 with 10% waste | 66 with 10% waste | 17 with 10% waste |
| 160 sq ft / 14.9 sq m | 176 with 10% waste | 88 with 10% waste | 22 with 10% waste |
| Gap reveal | Visual effect | Area change | Layout note |
|---|---|---|---|
| 0 in / butt joint | Continuous felt field | Lowest wall reveal | Needs square wall lines |
| 1/16 in | Fine shadow line | Small reveal allowance | Good for boards |
| 1/8 in | Intentional panel grid | Moderate reveal allowance | Best all-purpose gap |
| 1/4 in | Bold modular grid | Higher reveal allowance | Useful for color mixes |
| Attachment method | Calculator basis | Best for | Planning caution |
|---|---|---|---|
| Spray adhesive | 55 sq ft per can | Full felt board backs | Ventilate and mask edges |
| Mounting tape | 135 linear ft per roll | Removable grid layouts | Use extra on corners |
| Removable tabs | 4 to 8 tabs per panel | Small tiles and rentals | Check wall finish first |
| No adhesive | Panels only | Mechanical fasteners | Confirm backing support |
⚖Layout Comparison
Straight Grid
Lowest waste, easiest rows, and the most predictable panel count for square or rectangle tiles.
Staggered Brick
Adds a softer rhythm but usually needs more edge cuts and a slightly higher waste setting.
Vertical Run
Works well with tall planks and slats when you want fewer horizontal breaks across the wall.
Diagonal Feature
Most expressive layout, but edge triangles and pattern alignment need the largest waste buffer.
💡Panel Planning Tips
When most folks begin a felt wall project they have a general notion of how much they need. Then suddenly they’re left with a half-filled box of panels, a partial bag of leftover adhesive, and the question of what happened. Because the material seems so easy. They are just some square pieces of soft wool (or polyester).
Yet getting them laid out correctly is more about thinking geometricly, not aesthetically. Essentially you’re constructing a modular grid and trying to make sure that it fits your specific rooms measurements. That include the necessary cuts around windows, doors, and outlets.
How to Plan Your Felt Wall Project
After you know how big your walls are and what size panel you want to use, the tool above does all that math for you. You no longer have to guess about conversions and coefficients. However, understanding how those input values relate to your actual physical space is what makes everything click.
While layout (i.e., staggered brick vs. A straight grid certainly depends on personal preference, but there’s a practical side as well. If you’re using a staggered pattern, you’ll be wasting much more material by making end-of-row cuts. Every panel perfectly fill up the rows and columns in a straight grid, which is why that option works so efficiently.
On the other hand, staggering create an organic, relaxed feel. However, you’re going to have to cut through part-panels at the end of nearly every row, which raise the waste percentage considerably.
And speaking of gaps, there’s the reveal gap, which refers to the small space left over between any two tiles. Many designers choose a reveal of one-eighth inch because it gives just enough of a shadow line while keeping it clean. It defines the squares without appearing cluttered. However, when you add up this little fraction of an inch on a big wall, you’ll be short pretty darn fast. That means that if you don’t plan for the gap, by the time you get three rows from the ceiling, you’re out of panels.
A small thing, yes, but it matters. To account for this the tool adjust the actual height and width of each panel. That way you’re ordering enough panels to cover the felt AND the negative space between the felt.
In addition to their acoustic properties, panel thickness matter. Panels as thick as twenty-four millimeters offer greater depth of sound absorption, but they’re also bulkier along the edge. That’s going to be an issue when you have tight reveals and imperfectly flat walls. A little extra room for the panel to conform will give a cleaner appearance, so if your surface isn’t perfect, perhaps a less thick nine-millimeter panel may lay flatter. Because it’s thinner, it will flex more readily into place.
You don’t want a bumpy wall; you want one that feels solid. Take the state of your drywall into account before ordering the thickest panel possible.
There’s also the issue of adhesive estimation. Intuition isn’t great here. Spray adhesive will cover the entire surface, which is good for heavy boards that need maximum hold. However, it gets everywhere and needs major ventilation. For smaller tiles, mounting tape or removable tabs are cleaner solutions, especially if you’re renting and not drilling holes in your walls.
Given the overall area, this calculator guesstimates how many rolls/cans to purchase. Always get a bit more. Running out mid-wall is a nightmare scenario. It stops your progress and results in tiles that does not bond evenly.
Don’t deduct all those little outlet boxes from your total space. A quick cut around the switch plate will be more efficient than trying to force a perfect patch of felt into an inch by inch hole. Think of the wall like a big blank canvas. Cover the broad fields first. Trim for details later. You will think less and feel less aggravation when cutting tiny pieces that might or might not match in the same batch of color.
In the end, a good acoustic wall looks planned, not like an afterthought. It provides a warm, textured feel to a space that could be quite sterile. It also absorbs sound. With a little planning and careful measuring, installation is straightforward.
You have to watch out for the common trap of underestimating your materials. And in the end, you’re left with a tidy, polished appearance that hides what is truly going on underneath that smooth surface. That’s right, follow the math, respect the grid, order accordingly. A bit more material here goes much further then expected as you cut for fit.