Hoop art planning tool
Embroidery Hoop Art Size Calculator
Estimate the safe design area inside a round or oval embroidery hoop, fabric cut size, design scale percentage, stitch count, margin balance, and a practical hoop fit score before transferring your pattern.
Load a common hoop project, then adjust the hoop diameter, margin, design size, fabric overhang, stitch density, mat option, shrink rate, and units.
4 in mini hoop
Best for: monograms, tiny florals, ornaments.
Keep design width under about 3 in for a calm border.
6 in floral hoop
Best for: small bouquets and simple names.
A half-inch margin usually leaves enough breathing room.
8 in quote hoop
Best for: lettering with small accent motifs.
Wide designs often need a little more side margin than top margin.
10 to 12 in wall hoop
Best for: stitched scenes and denser samplers.
Add overhang generously because large hoops need stronger tension.
Oval hoop
Best for: portraits, stems, vertical botanicals.
Check both width and height because the corners disappear quickly.
Linen fabric
Best for: heirloom texture and visible weave.
Pre-wash or include shrink because linen can change size noticeably.
Cotton fabric
Best for: crisp transfers and beginner hoop art.
Stable quilting cotton often works with 2 in overhang per side.
Aida cloth
Best for: counted work and grid-based motifs.
Use stitch density from the cloth count for a better estimate.
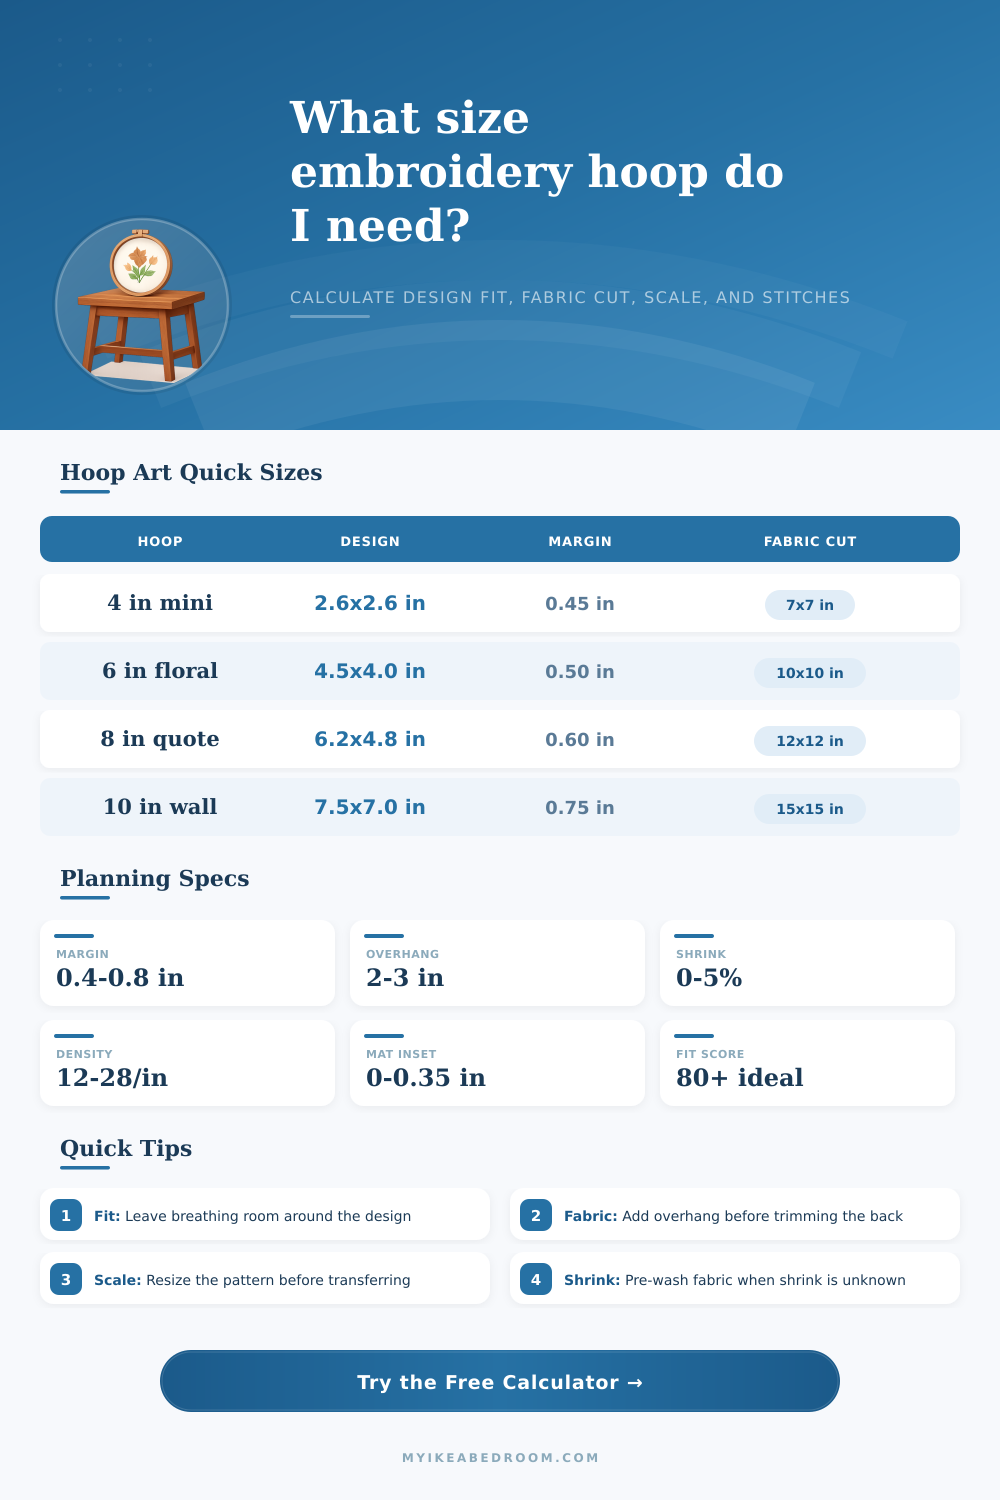
| Hoop size | Comfortable design box | Typical margin | Fabric cut starting point |
|---|---|---|---|
| 3 to 4 in mini hoop | 2 to 3 in wide | 0.35 to 0.50 in | Hoop diameter + 2 to 2.5 in per side |
| 5 to 6 in gift hoop | 3.5 to 4.75 in wide | 0.45 to 0.60 in | Hoop diameter + 2 to 3 in per side |
| 7 to 8 in quote hoop | 5.5 to 6.5 in wide | 0.55 to 0.75 in | Hoop diameter + 2.5 to 3 in per side |
| 10 to 12 in wall hoop | 7.5 to 9.5 in wide | 0.70 to 1.00 in | Hoop diameter + 3 to 4 in per side |
| Setting | Extra inset used | When to use it | Calculator effect |
|---|---|---|---|
| No mat or lip | 0 in / 0 cm | Hoop stays as the visible frame | Only your visible margin reduces the design area |
| Floating mat lip | 0.15 in / 0.4 cm | Fabric floats behind a narrow mat or trim ring | Safe width and height are slightly reduced |
| Deep frame mat | 0.35 in / 0.9 cm | Finished hoop art goes inside a deeper frame | Design scale may need to shrink for the mat reveal |
| High visual margin | 0.8 in+ / 2 cm+ | Minimal, airy, or nursery style hoop art | Fit score improves if the design still has room |
| Overhang per side | Best use | Finishing note | Risk if too small |
|---|---|---|---|
| 1 to 1.5 in / 2.5 to 4 cm | Very small ornaments or temporary hooping | Trim carefully after tightening | Hard to pull fabric evenly |
| 2 in / 5 cm | Most 4 to 8 in display hoops | Enough for gathering or felt backing | Usually low if fabric is stable |
| 2.5 to 3 in / 6 to 8 cm | Large hoops, loose weave linen, gifts | Helpful for strong tension and neat backs | Uses more fabric but is forgiving |
| 3.5 in+ / 9 cm+ | Shadowbox finishing or thick backing | Best when fabric wraps around padding | May create bulky folds behind small hoops |
| Style | Density input | Coverage input | Planning note |
|---|---|---|---|
| Outline art | 8 to 14 stitches per in | 10 to 25% | Good for names, quotes, and simple line drawings |
| Light floral | 14 to 22 stitches per in | 25 to 50% | Balanced estimate for leaves, stems, and small fills |
| Dense sampler | 22 to 34 stitches per in | 50 to 80% | Use for many satin stitches, fills, and motifs |
| Counted cross stitch | Fabric count per in | Pattern coverage percent | Use the cloth count and stitched chart area |
It is frustrating when you spend three hours painstakingly counting stitches on what seems like a perfect pattern on your computer screen. You cut out the fabric carefully, trying to create a nice clean edge. Then, you attempt to shove that rectangular swatch of goodness into a round hoop and notice that metal ring is just waiting there to slice off those precious corners. Geometry cares nothing about whether or not you adore your pattern and it’s an all too common frustration for many embroiderers at one time or another.
Before you ever thread a needle, it can come down to basic measurements that makes the difference between lovely art for the wall and a jumble of stray threads. The typical error is to begin by using the hoop size you have. Instead, you should begin with design itself and have the available space determine the frame. For example, if your motif is rectangular and rather wide, then trying to fit this into a tight circle forces you either to have an awkward empty patch somewhere or to have to clip threads right next to tension ring where the most important part is visible.
How to Measure Your Embroidery Hoop Correctly
With the calculator (above), you don’t guess at whether that additional half inch of margin will spoil the composition; the calculator does all the math, once you plug in exactly what your measurements are. You put in the hoop diameter plus the width and height of the design. It then returns a safe rectangle size. This shows how big a piece actualy fits inside the hoop, taking into account the breathing room required all the way round.
But again: that’s a no-no. Anywhere between a quarter-inch and a half-inch provides enough wiggle-room to prevent uneven tension (which bunches fabric) or stitching near metal inner ring. And then there’s the mat. Depending on what kind of frame you’re imagining, take into account the lip of whatever matting you’ll use. Even with a shallow frame mat, it may swallow much of your outer edge. This shrinks your working design space even more, leaving just enough so you can see the center motif. The tool will adjust for all of this, and tell you, right down to the scale size you need, how tight it fits. Below an 80 percent fit-score? Too tight; something will be distorted when tightened.
The other wrinkle (pardon the pun) is that fabric behaves. If you use natural fabrics like unbleached cotton or linen, they’ll shrink a bit when washed and dried. This pulls everything tight and makes total surface area smaller right where you want to be stitching things down. And so, if you don’t plan for that, what happens? Your stitches creep up against the hoop rim as you back it up on the last day, and you freak out because there’s no more room for your design. Planning for that little bit of shrinkage ahead of time keeps your design from moving too close to the hoop rim before you can back it up. Add a place to include shrinkage allowance in the calculator! Now, instead of treating these as fixed measurements, your final stitched dimensions reflect how the fibers naturaly move.
The other practical choice is selecting a suitable amount of overhang, which directly affects how well your piece will look when finished. You want plenty of leftover fabric to fold neatly into the back of the hoop and stay snugly in place as you stitch it up without being too bulky or falling out while sewing. A good rule of thumb is two inches on each side for most display hoops. That way you can still trim nice and clean once you have attached the backing. Smaller ornaments may be able to go less without issue, while larger pieces for walls is happy to have more to help hold their tightness all around their surface area. This simple measurement either means the world for a nicely presented backed item or one that resembles a bird’s nest of tangled threads.
Margin also factors into this calculation on a subtler level: While openwork shapes like these tend to hold their shape well and distort less different than dense patterns made up of heavy satin stitches, I’ve found that the latter tug at the fabric more strongly and need just a little more wiggle room to maintain their shape. Free-motion embroidery on even-weave cotton is trickier here, so pay special attention to the edges. If you’re stitching on a counted cloth such as Aida, its grid structure will help keep things in line. However, you’ll want to double-check the margin for accuracy.
The tool’s stitch estimate will give you an approximate number depending on the density you enter. This helps you get a sense of size compared with the time it will take. To help get you started, it also comes with a reference table of some common presets. These aren’t hard-and-fast rules; they’re just guidelines established from average material behavior and typical project sizes. Consider them a jumping off point to experiment on your own. After learning how mat depth, shrinkage, and margins all work together, feel free to tweak these accordingly with confidence.
Prepping for a project only costs me five minutes at the beginning and saves me hours of frustration later on. Knowing where your design needs to scale out to before cutting into that fabric is way better than finding out afterwards you’ve already sewed half the border! Don’t measure twice, calculate once. Let the math work for you instead of against you.
The result? The final piece looks perfect as it hangs in all its glory, with balanced tension, clean edges, and perfect centering.