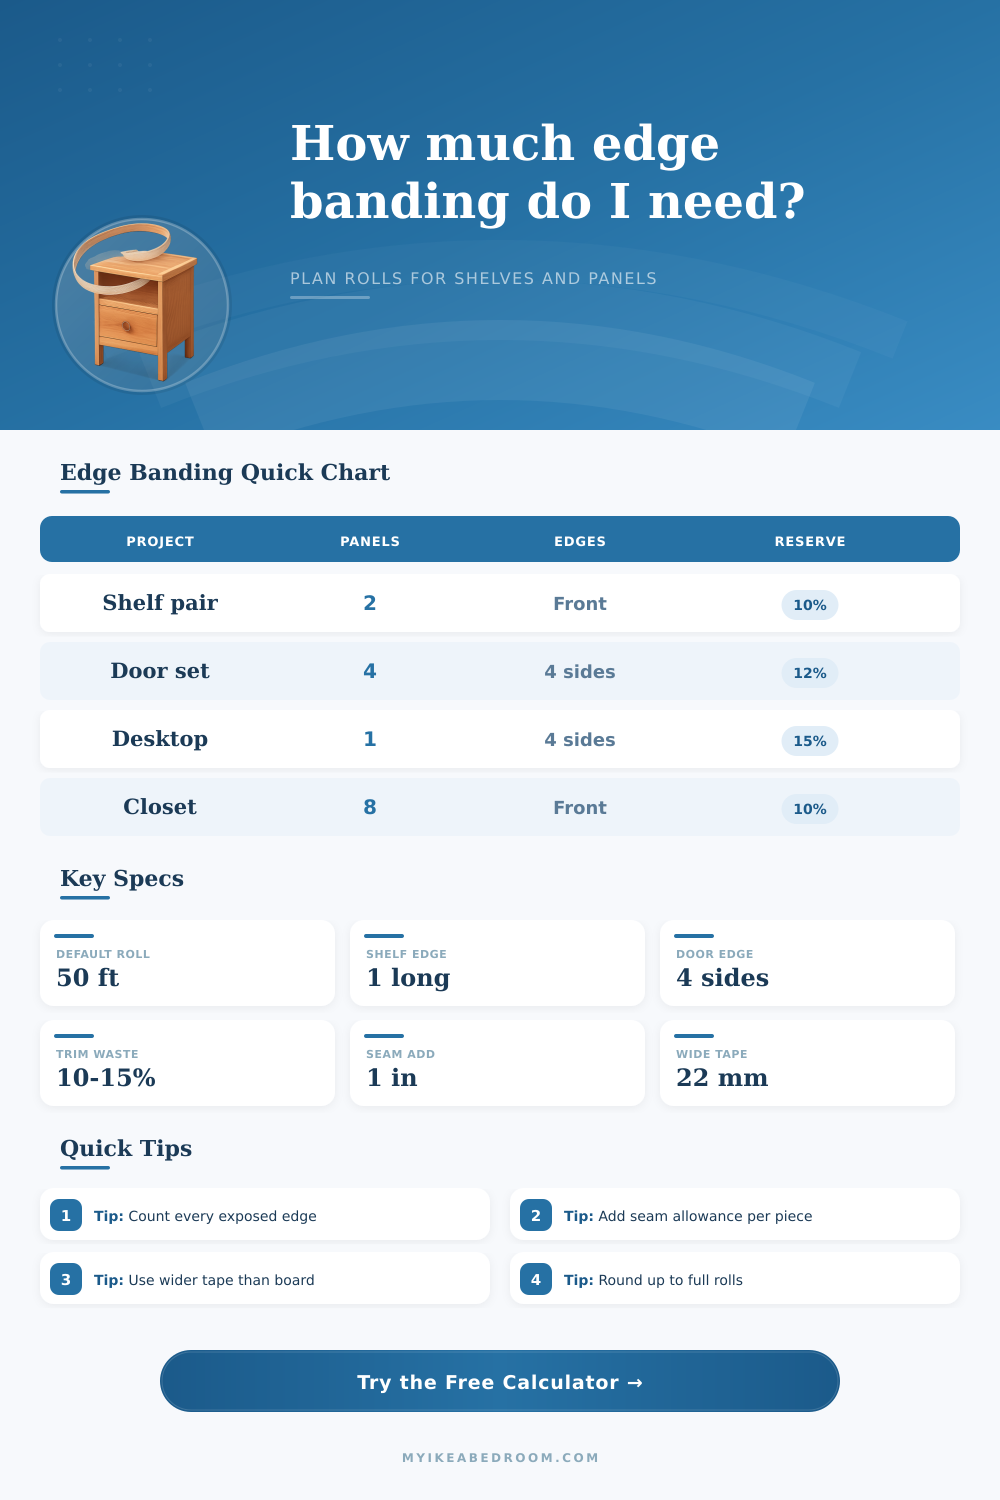
Edge Banding Length Calculator
Estimate the finished edge length, seam allowance, waste reserve, and roll count for shelves, cabinet doors, drawer fronts, desks, and custom furniture panels.
Melamine Iron-On
Best for utility shelves and laminate-faced boards where the visible edge needs a simple matching strip.
PVC / ABS
More impact resistant on doors, drawers, and kids room storage because the edge is thicker and tougher.
Wood Veneer
Useful when plywood, birch, oak, maple, or walnut edges must accept stain or clear finish.
Solid Lipping
Use for thick worktops or repairable edges; calculate it as linear stock, then cut and finish flush.
| Banding preset | Typical width | Thickness | Common roll | Best use |
|---|---|---|---|---|
| Iron-on melamine | 22 mm | 0.3 mm to 0.5 mm | 25 ft to 50 ft | White shelves, utility panels |
| Pre-glued PVC | 22 mm | 1 mm | 50 ft to 250 ft | Cabinet doors and drawers |
| ABS cabinet edge | 23 mm | 2 mm | 164 ft to 328 ft | Durable fronts and high-use edges |
| Real wood veneer | 7/8 in | Thin veneer | 25 ft to 50 ft | Stain-grade plywood and shelves |
| Wide plywood veneer | 1-1/2 in | Thin veneer | 25 ft | Thick plywood or doubled edges |
| Paintable veneer | 13/16 in | Thin veneer | 25 ft to 50 ft | Painted built-ins and repairs |
| Laser zero-joint ABS | 23 mm | 1 mm to 2 mm | 328 ft | Shop-applied modern casework |
| Solid wood lipping | 3/4 in to 1-1/2 in | 3 mm+ | Linear strips | Desktops, benches, repairable edges |
| Panel type | Usual long edges | Usual short edges | Allowance style | Watch point |
|---|---|---|---|---|
| Adjustable shelf | 1 front edge | 0 side edges | 1 in per piece | Back edge usually hidden |
| Open shelf | 1 or 2 long edges | 2 short edges | 1 in per edge | Side views are exposed |
| Cabinet door | 2 long edges | 2 short edges | 1 in per edge | All four edges visible |
| Drawer front | 2 long edges | 2 short edges | 1 in per edge | Small parts add many starts |
| Desktop slab | 2 long edges | 2 short edges | 2 in per edge | Wrapped corners need extra |
| Vertical divider | 1 front edge | 0 or 2 short edges | 1 in per piece | Top edge may show |
| Roll length | Usable length at 10% | 30 in shelf fronts | 24 x 30 in doors | Good planning use |
|---|---|---|---|---|
| 25 ft | 22.5 ft | 9 shelves | 2 doors | Small repair or sample batch |
| 50 ft | 45 ft | 18 shelves | 4 doors | Closet or bookcase refresh |
| 100 ft | 90 ft | 36 shelves | 9 doors | Full room built-in run |
| 164 ft | 147.6 ft | 59 shelves | 14 doors | Commercial ABS roll size |
| 250 ft | 225 ft | 90 shelves | 22 doors | Repeated cabinet shop parts |
| 328 ft | 295.2 ft | 118 shelves | 29 doors | Large zero-joint production roll |
| Project | Example parts | Typical visible edges | Estimated banding | Suggested reserve |
|---|---|---|---|---|
| Wardrobe shelf refresh | 6 panels, 30 x 15 in | Front long edges | 15 ft raw | 10% to 12% |
| Bookcase shelf pack | 10 panels, 28 x 11 in | Front long edges | 23.3 ft raw | 8% to 10% |
| Cabinet door set | 4 panels, 24 x 30 in | All four sides | 36 ft raw | 12% to 15% |
| Desk or table top | 1 panel, 60 x 30 in | All four sides | 15 ft raw | 15% |
| Drawer front batch | 6 panels, 24 x 8 in | All four sides | 32 ft raw | 12% to 15% |
| Pantry shelf run | 8 panels, 32 x 14 in | Front long edges | 21.3 ft raw | 10% |
It starts with a pile of plywood that looks great on top, but then you see the raw, layered sides underneath. Uh oh. That’s not finished looking at all! But edge banding will solve that problem: it wraps around those rough edges with something nice and smooth. A rough cut becomes a piece of furnitures.
But it’s easy to make one of the most common mistakes… Getting the wrong quantity. You’ll either order way too much (which means waiting for delivery)… Or you get a big roll but have been working on just forty feet of it, so now you’re left with an un-used big roll.
How to Use the Edge Banding Calculator
The calculator above do the math for you… Once you enter the dimensions of your panels. You no longer have to wonder what coefficient to use or what conversions is necessary.
We’re all used to thinking about our total length when it comes to edge banding. “My door is 2′ long and my shelf is 4′ long.” Then they add them together. Then they subtract an inch or two because there’s always some wastage on cutting. This doesn’t take into account what really happens with the material.
You don’t begin at precisely zero, then end at precisely thirty inches. There has to be some overlap so the iron/heat press can sticks it down. There has to be some overlap so the trimmer can get a clean cut without chipping away the good stuff. Each time you finish an edge, there will be waste at either end. Do this a dozen times (six small drawer front) and those little wastes adds up fast. Think of this as cost of precision, but a necessary one.
Repetition also drives the numbers. With that in mind, the tool will ask for dimensions and panel count. For example, a wardrobe shelf typically only require banding around the long front edge. The remaining back edges are hidden by the carcass or wall. However, with a cabinet door, all four sides is exposed, quadrupling the material needed per unit. The calculator separates these situations; eliminating the need to manually multiply all the sides. Simply inform it how many units you’re creating and which types of parts, then let it calculate the necessary linear footage for each type of edge.
Thickness and width depend heavily on material. Banding made from thin melamine is inexpensive and forgiving (but will chip with a hard bump). PVC or ABS edge tape will be thicker and last longer. For desks seeing lots of use or drawers being pulled violently open/closed, this make a difference. The reference table on the page contrasts typical profiles.
A wider band offers more trimming margin. You should of select banding of at least twenty-two millimeters wide if you’re using a three-quarter-inch thick board. That provides room for error as you attempt to make both faces flush.
Projects fail for lack of waste reserve: If your cuts are consistently straight and long, a five percent buffer may seem reasonable. Test strips can take time on a new setup, though, and adjustment to pressure and heat must be made before laying down the real thing. Waste a foot of nice tape on one bad start? Ouch.
The calculator will automatically add reserve to the last roll count. Since you can’t buy half-rolls, the calculator rounds up to full rolls so you aren’t left with a small amount of material you can’t use at the end of a project.
I also know that people don’t think about grain direction as much as they should. This is especially true when you’re using wood veneer. It’s important that the grain runs consistently through joints so it looks seamless. Doing this can take time and planning, and sometimes you have to sacrifice an extra piece of wood to get a matching run.
This is why there’s a grain matching reserve checkbox on the tool, it recognizes that beauty has a price tag in terms of linear feet. Failing to consider this will result in patchwork edges that detract from all your hard work.
Control is what matters most. Edge banding makes cut wood look refined and on purpose. Knowing how long you need it allows you to finish confidently rather than frantically running out midway through a build to get more. Take measurements, factor in the seams, and follow the math to figure out what you need. The result is cleaner looking furniture that lasts longer and feels more purposeful.