Drawer Divider Quantity Calculator
Plan a custom drawer grid from interior width, depth, height, target compartment size, strip thickness, kerf allowance, removable-frame choice, and item count.
Start with a common bedroom, kitchen, vanity, office, nursery, jewelry, tool, or craft drawer, then fine tune the grid to your exact interior measurements.
Divider breakdown
| Strip group | Count | Each length | Total length | Use |
|---|---|---|---|---|
| Calculate first | -- | -- | -- | Divider strip schedule appears here. |
| Preset | Interior size | Target cell | Layout | Typical items |
|---|---|---|---|---|
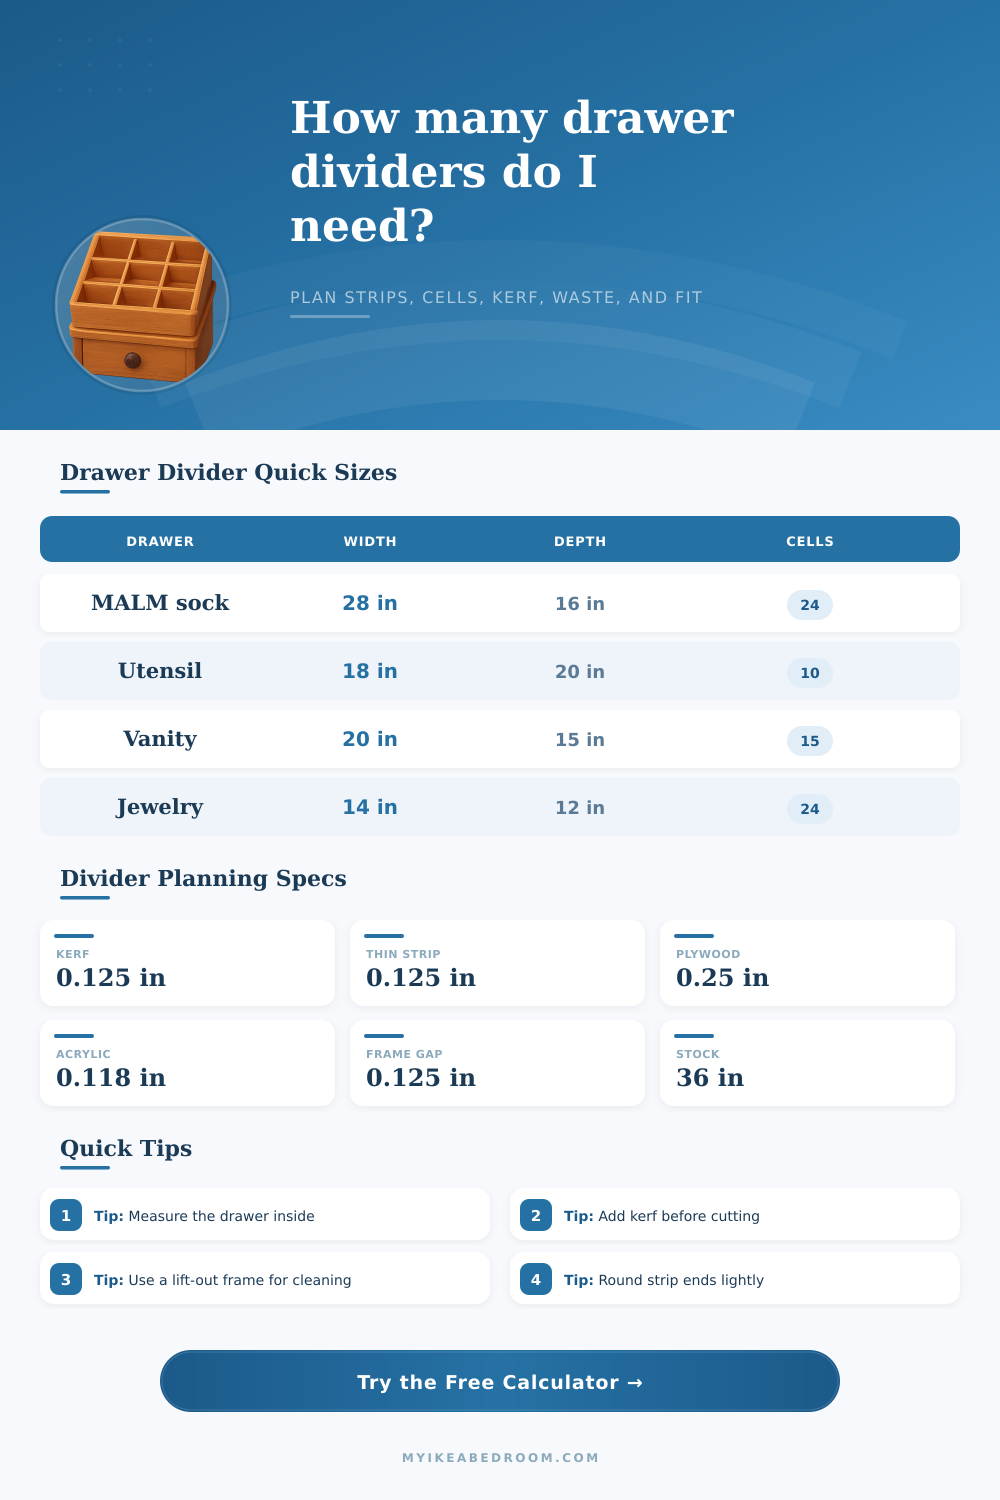
| MALM sock drawer | 28 x 16 x 5.5 in | 4.4 x 3.8 in | Balanced grid | 24 pairs or rolls |
| Kitchen utensil drawer | 18 x 20 x 3.5 in | 3.2 x 18 in | Front-to-back lanes | 6 utensil groups |
| Vanity cosmetics | 20 x 15 x 4 in | 3.6 x 3.4 in | Balanced grid | 18 bottles and compacts |
| Jewelry tray | 14 x 12 x 2 in | 2.1 x 2.2 in | Balanced grid | 30 small pieces |
| Orientation | Best for | Strip pattern | Compartment count logic | Watch point |
|---|---|---|---|---|
| Balanced grid | Socks, cosmetics, craft items | Width and depth dividers | Columns times rows | May create more cells than item count |
| Width-first | Rows of folded fabric | Grid with width priority | Uses target width first | Depth cell may drift larger |
| Depth-first | Bottles and short stacks | Grid with depth priority | Uses target depth first | Width cell may drift larger |
| Front-to-back lanes | Utensils, drivers, rulers | Only long dividers | Columns only | Items can slide within each lane |
| Side-to-side lanes | Belts, scarves, folded cloth | Only cross dividers | Rows only | Needs enough front-back depth |
| Material | Typical thickness | Common kerf | Good stock length | Notes |
|---|---|---|---|---|
| Hardboard strip | 1/8 in or 3 mm | 1/16-1/8 in | 24-48 in | Easy to cut and light for bedroom drawers. |
| Baltic birch plywood | 1/4 in or 6 mm | 1/8 in | 36-60 in | Stiffer for taller dividers and tool drawers. |
| Acrylic sheet strip | 3 mm or 1/8 in | 0.004-1/8 in | 24-48 in | Kerf depends on laser, saw, or scoring method. |
| Basswood strip | 1/8-1/4 in | 1/32-1/16 in | 24-36 in | Good for shallow jewelry and desk trays. |
Hardboard strips
Best fit: sock drawers, nursery drawers, and light accessories.
Cut note: add a visible kerf allowance if using a table saw.
Plywood dividers
Best fit: deeper drawers, tools, office supplies, and removable grids.
Cut note: seal or sand edges so fabric items do not snag.
Acrylic grid
Best fit: vanity cosmetics, jewelry trays, and wipe-clean inserts.
Cut note: use the kerf from your laser or saw test coupon.
Basswood rails
Best fit: shallow jewelry, craft, pen, and display drawers.
Cut note: check bowing on longer front-to-back strips.
Mock the cell size first: Lay painter tape or scrap strips inside the drawer before cutting every rail. Soft items like socks can tolerate smaller cells, while cosmetics and tools need grip room.
Measure the lowest obstruction: Drawer sides, slide screws, handle bolts, and curved fronts can reduce usable height or depth. Use the smallest clear measurement in the calculator.
Geometry fails. A disorganized drawer is an insult to your well-made pens and sock. You’ve got great stuff in there, but it has no place that appreciate its form. The upshot: Things tumble out on the counter when you turn the knob, or a mass of them hides in a heap at the rear of box.
Custom dividers solve this problem… Turning disorder to order, but first, how many do I need? And which ones will fit within the limits of the drawer itself? Most people typically have a vague notion of what size compartment they want and then hope for the best. They measure the width of their drawer, divide it by four (ignoring the fact that their saw blade is not zero-thickness), and move on.
How to Plan Your Drawer Dividers
But each of those cuts take away material. Your table saw kerf may be an eighth of an inch. With a laser cutter, its even less, but there it goes anyway. Without counting this loss, your grid will ultimately be ever so slightly wider then the actual width of your drawer. It’ll stick out on both sides and won’t quite fit in properly.
The one up top do all this math for you and accounts for amount of material lost to each cut. Tell it how much material you’re working with, whether plywood or acrylic. And it’ll update the remaining space accordingly. The layout orientation is surprisingly important too.
For example: A checkerboard layout (a.k.a. Balanced grid) with equal numbers of compartments in each direction work best if you have lots of small thing to organize; like folded socks, buttons, coins, etc. But since it cuts both horizontally and vertically, it waste more material while creating the most compartments possible.
On the other hand, if you’re organizing long things, like cooking utensils or tools, then front-to-back lanes would make more sense, as those only slice through width of the drawer (requiring fewer internal dividers). You can switch back-and-forth between them here in the calculator, which will show you how many strips you’ll need depending on what you want to store. You might find that switching to a lane layout saves you half the cuts and reduces waste significently.
The type of material you choose doesn’t only determine durability, it also informs how you’ll build your cut list. For example, hardboard is inexpensive and simple to cut (good for light-duty stuff and quickie projects). Plywood is stiff enough for deeper tool chests with tall divider. Acrylic looks nice in vanity drawer, but be gentle when you’re cutting, as it can crack easily.
And then there’s the matter of drawer space, which is eaten away by the thickness of each material. For instance, a one-quarter inch plywood divider will gobble up double the real estate of an eighth-inch thick piece of hardboard. Multiply that times several rows/columns and you begin to get a sense of the impact.
The page’s reference tables shows this balance by using typical stock lengths and kerf rates (the amount of waste left after cutting) for common building materials. The other thing people don’t account for when organizing DIY projects is waste. Making a bunch of cuts means you’re going to end up with scraps, especially since you’ll have leftovers after cutting your standard strips.
To figure out how much waste you’ll get from your project, this tool use the total length of all your individual cuts compared to the length of the boards you’re using. This lets you know when to purchase several short boards vs purchasing a single long one and also warns you if there is some inefficiency in your design. If you notice a lot of waste, then perhaps you should of consider reconfiguring some of your compartments so that you can use larger pieces of material.
Lastly, make your grid removable. This isn’t necessary if you’ll never need to change the layout or remove the insert later for cleaning. However, it’s very convenient to add a simple frame around the edge of your dividers so that you can lift the whole thing out easy at any time. This adds four additional strips to the cut list, but it is worth it. Without permanent barriers, you’ll be able to vacuum away lint and dust from inside the drawer below.
Choosing the removable option tells the tool to account for this frame in your final dimensions, which will still fit within the original measurements. A drawer can be beautiful. But even more so, a drawer can be precise. The math has to come before the art. Make things fit together, then let the looks fall in line.
It’s one thing to have organized socks; it’s another to know why the socks are now on top of the pile instead of at the bottom. And the beauty of the geometry? It makes a humble wood box into something that functions naturaly.