Draught Excluder Length Calculator
Size a bedroom draught excluder for door bottoms, window sills, wardrobe plinths, and sliding tracks with measured span, returns, seam allowance, tube diameter, shrinkage, and quantity included.
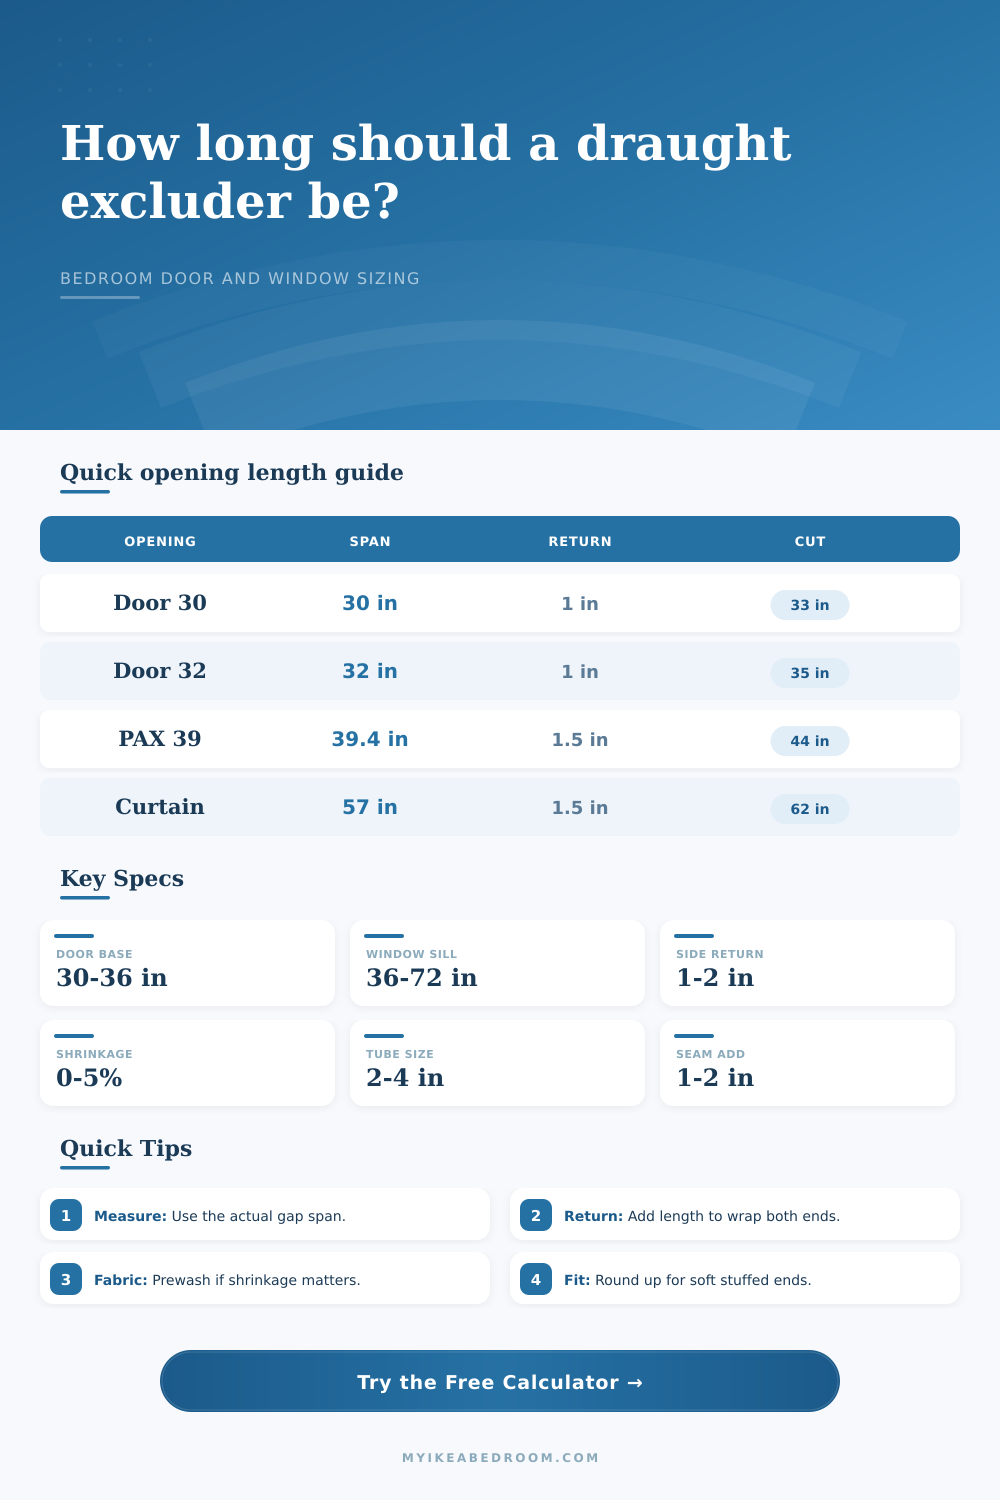
| Bedroom opening | Common span | Suggested return | Finished length target |
|---|---|---|---|
| Narrow closet or linen door | 24 in / 61 cm | 0.75 to 1 in each end | 25.5 to 26 in |
| Standard bedroom door | 30 in / 76 cm | 1 in each end | 32 in |
| Wider bedroom door | 32 in / 81 cm | 1 to 1.5 in each end | 34 to 35 in |
| Accessible bedroom door | 36 in / 91 cm | 1.5 in each end | 39 in |
| Sliding balcony track near bedroom | 72 in / 183 cm | 1.5 to 2 in each end | 75 to 76 in |
| IKEA bedroom item | Relevant measurement | Use for excluder planning | Practical allowance |
|---|---|---|---|
| Twin mattress footprint | 38 1/4 x 74 3/8 in | Draft strip along narrow wall side | Use about 39 to 40 in |
| Queen mattress footprint | 59 7/8 x 79 1/2 in | Draft strip behind bed head or side | Use about 62 to 63 in |
| King mattress footprint | 76 x 79 1/2 in | Wide headboard wall draught line | Use about 79 to 80 in |
| PAX wardrobe frame width | 39 3/8 in module | Base plinth or wardrobe draft gap | Use about 42 to 43 in |
| PAX narrow frame width | 19 5/8 in module | Small closet side or plinth gap | Use about 22 in |
| Fabric or panel reference | Panel measurement | Useful cut direction | Planning note |
|---|---|---|---|
| Common IKEA curtain width | 57 in / 145 cm | Across panel width | Enough for most door-bottom strips |
| Common IKEA curtain length | 98 in / 249 cm | Down panel length | Enough for sliding tracks under 8 ft |
| Long IKEA curtain length | 118 in / 300 cm | Down panel length | Allows long window or balcony runs |
| Light cotton shrinkage label | Up to 4% | Add before cutting | Prewash before final measuring |
| Two matching bedroom doors | 60 to 72 in total | Cut paired strips | Match pile and fabric direction |
| Finished tube diameter | Best gap range | Flat fabric strip width | Bedroom use case |
|---|---|---|---|
| 2 in / 5 cm | Up to 1/2 in | About 7.5 in with seams | Window sill or narrow closet door |
| 2.5 in / 6 cm | 1/2 to 3/4 in | About 9 in with seams | Typical carpeted bedroom door |
| 3 in / 8 cm | 3/4 to 1 in | About 10.5 in with seams | Standard door with visible light gap |
| 4 in / 10 cm | 1 to 1 1/2 in | About 13.5 in with seams | Sliding track or uneven threshold |
For a door bottom, measure the clear door width, not the casing. For a window sill, measure the cold edge the tube must physically cover, then add the side return so the ends do not leave two small draft gaps.
A tightly packed tube shortens slightly as the ends round out. If you want plump, cushion-like ends, keep the return allowance and shrinkage buffer in the cut length instead of trimming it away.
The draft is rarely a dramatic event; instead, it’s a slow thief that steals warmth from your bedroom floor while you sleep. You might not notice the air rushing into the room, but you will feel the result: a chill rising up from your feet.
Often it’s a poorly sized seal, if the draught excluder is too long then it bunches up, leaving gaps either end; if it’s too short then there are gaps either end. Too long, and it doesn’t press firmly on the threshold. It can be the difference between success or failure and the amount is often measured out in fractions of an inch. Measuring makes a diffrence. Guessing does not.
How to Make a Perfect Draft Stopper
The second mistake most folks make: they measure their door and purchase a strip the exact same size as the door itself. A typical 30 inch wide bedroom door should have more than just 30 inches of fabric covering it to seal effectivey. There is also those little flaps on the sides called returns. (They fold up the ends.) These keep the air from trying to sneak in around the ends. That’s why there is an extra amount added to your order via the Return Calculator. It does all the math for you, including return allowances, seam allowances, and any fabric shrinkage. All these variables is reduced down to one simple cut length, that’s where you save time and avoid frustration.
The silent saboteur in this case is fabric shrinkage. While cotton makes great soft excluders (like curtains!), they also can shrinks a bunch in the wash. So if you forget to include the shrinkage buffer, or you cut your strip out pre-wash, chances are you’ll have a strip that’s an inch too short post-first-wash. That may not seem like much, but at the base of a door it will result in a noticeable gap of light. With the tool, you can input the percent buffer (typically about four percent for cotton), and ensure you’ve got something that still fits after laundering. This little tweak eliminates the frustration of having a perfect fit that fall apart on the second wash.
Another factor in the equation is the diameter of the tube. For example, a two inch tube fits nicely into small spaces but doesn’t have the bulkiness to seal out big drafty openings. On the other hand, a four inch tube are a good size and will create a nice barrier on wider gaps like under a sliding glass door or an uneven threshold. Selecting your tube diameter impacts how much filler you’ll use (a bigger tube uses more) as well as how wide your fabric band needs to be. Generally speaking thicker tubes takes more filling and also want to be wrapped with wider fabric to feel comfortabley. This is why the reference charts are helpful because they can guide you in selecting the right gap size to tube size so that you don’t overload a narrow gap (or under fill a wider one). Balancing comfort and coverage is key.
One last detail is that the return side is essential for a full seal. Warm air escapes through the gaps at each end of the excluder otherwise. If you add an inch or two to fold up the side, it will stay snug against threshold. It is a minor detail that really matters. And while the fabric might shift a bit over time, this is what distinguishes a “looks good” from a “works good” strip.
But then there’s also where it goes. Maybe you want to use it on a bedroom entrance door, and that requires something different than maybe a closet door. Perhaps you have more space here (the gap between the door and frame is usually narrower with a closet door), requiring a thinner profile. Or maybe you have a bedroom door facing into the hall, which need a stronger seal. These are some of the scenarios the tool has prepared for. It can be a quicker way to get started if you choose one of those presets because it takes into account common size ranges. But customizing the inputs means you’ll get an exact fit for whatever your case may be.
So in the end, it’s all about comfort. If you make a draft stopper that fits properly, it becomes part of the background, doing its job well and not drawing attention to itself. The trick is preventing the cold from entering without screaming “draft stopper!”. A draft stopper made right stays put. It’s something you’ll do once, but it will last because you measured correctly and allowed for shrinking and seams. You should of done extra work upfront is rewarded by saving money on heating bills and keeping your feet warm. This is one little job whose payoff in terms of daily comfort is huge. You know what happens when the draft no longer blows: you don’t even notice. And that’s how you know your fit is just right.