Drain Pipe Slope Calculator
Calculate pipe fall from run and slope, compare common drainage slopes by pipe diameter, convert grade to percent and degrees, and estimate upstream and downstream invert elevations.
🚰Drain run presets
⚙Calculator inputs
Your drain slope result
Calculation breakdown
📐Formula used
fall = run * slope
fall inches = run feet * slope inches per foot
downstream invert feet = upstream invert feet - fall inches / 12
percent grade = slope inches per foot / 12 * 100
🔧Quick slope specs
📊Common drainage slope table
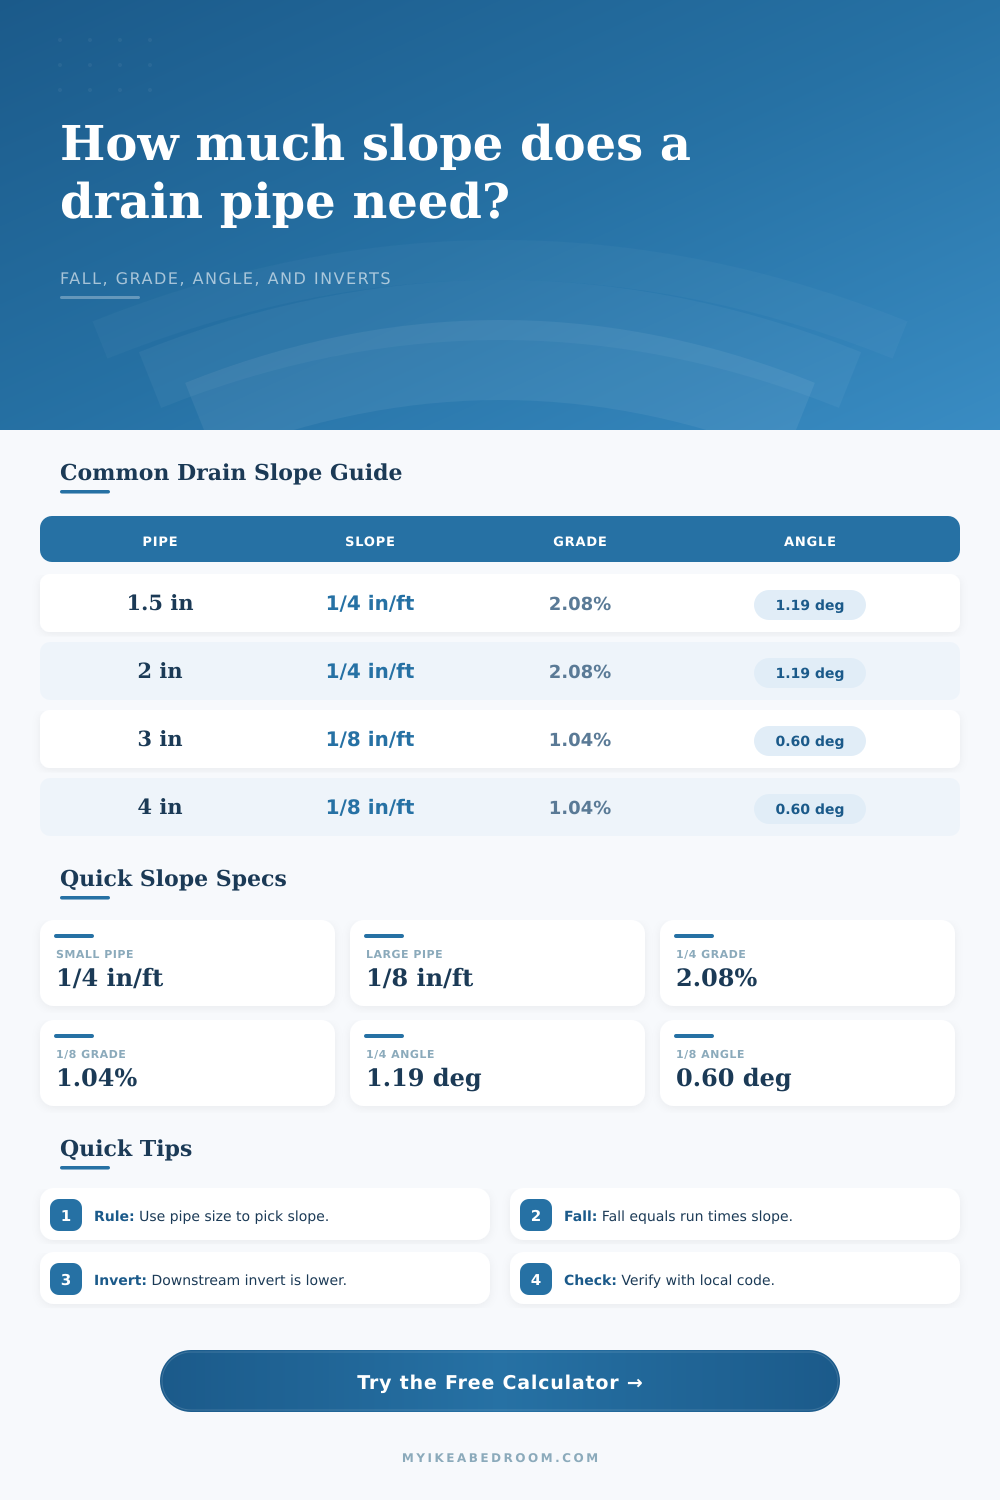
| Pipe diameter | Common slope | Percent grade | Degree angle |
|---|---|---|---|
| 1.25 inch lavatory branch | 1/4 inch per foot | 2.08% | 1.19 degrees |
| 1.5 inch sink or tub branch | 1/4 inch per foot | 2.08% | 1.19 degrees |
| 2 inch shower or laundry branch | 1/4 inch per foot | 2.08% | 1.19 degrees |
| 2.5 inch drain branch | 1/4 inch per foot | 2.08% | 1.19 degrees |
| 3 inch toilet branch | 1/8 inch per foot | 1.04% | 0.60 degrees |
| 4 inch building drain | 1/8 inch per foot | 1.04% | 0.60 degrees |
| 6 inch building drain | 1/8 inch per foot | 1.04% | 0.60 degrees |
📏Fall by run length
| Horizontal run | Fall at 1/4 inch per foot | Fall at 1/8 inch per foot | Metric drop comparison |
|---|---|---|---|
| 4 ft (1.22 m) | 1.0 in | 0.5 in | 25 mm / 13 mm |
| 8 ft (2.44 m) | 2.0 in | 1.0 in | 51 mm / 25 mm |
| 12 ft (3.66 m) | 3.0 in | 1.5 in | 76 mm / 38 mm |
| 20 ft (6.10 m) | 5.0 in | 2.5 in | 127 mm / 64 mm |
| 40 ft (12.19 m) | 10.0 in | 5.0 in | 254 mm / 127 mm |
📘Percent and degree conversions
| Slope expression | Inches per foot | Percent grade | Degree angle |
|---|---|---|---|
| 1/16 inch per foot | 0.0625 in/ft | 0.52% | 0.30 degrees |
| 1/8 inch per foot | 0.1250 in/ft | 1.04% | 0.60 degrees |
| 3/16 inch per foot | 0.1875 in/ft | 1.56% | 0.89 degrees |
| 1/4 inch per foot | 0.2500 in/ft | 2.08% | 1.19 degrees |
| 1/2 inch per foot | 0.5000 in/ft | 4.17% | 2.39 degrees |
🏠Preset scenario table
| Drain preset | Pipe and run | Slope used | Calculated fall |
|---|---|---|---|
| Bathroom sink branch | 1.5 in, 6 ft | 1/4 in/ft | 1.5 in |
| Kitchen sink branch | 2 in, 12 ft | 1/4 in/ft | 3.0 in |
| Laundry standpipe | 2 in, 10 ft | 1/4 in/ft | 2.5 in |
| Shower branch | 2 in, 9 ft | 1/4 in/ft | 2.25 in |
| Toilet branch | 3 in, 8 ft | 1/8 in/ft | 1.0 in |
| Basement building drain | 4 in, 35 ft | 1/8 in/ft | 4.38 in |
💡Planning tips
There’s only one pump: gravity. It doesn’t follow your budget, or even your schedule.
Too much slope and water races away leaving solids behind; too little and waste sits in your drain lines (blocking them). Achieving this sweet spot is the key plumbing skill of any DIYer or plumber who’s remodeling a bathroom.
Why Pipe Slope Matters
This tool solve the math part, letting you concentrate on how you physically arrange the drain pipes.
Pipe size matters. This is important, so let’s get it out of the way at the start: Pipe diameter determine how much slope is needed. In general, smaller pipes requires greater slope to efficiently move water as well as anything else in the pipe.
For example, the typical one and a half inch sink branch should of have a quarter inch of fall per foot. That equates to about a two percent grade. Building drains (four inches or larger) can generally accommodates an eighth inch per foot. This is because the large volume of water also help push solid waste along.
These are the standard choices used by the calculator, which will select them automatically depending off the diameter you enter. If your area has specific requirements from your local code, you may wish to override those, but for most residential applications these defaults are a good starting place.
The other thing folks miss: how do you measure the run? Horizontal distance from start to finish. Not as the crow flies (straight across that floor/wall).
So if it’s a snake-y piece of pipe going through a cabinet or around a beam, then all of that becomes part of total run. Then there’s an option to add in a % allowance for offsets and fittings. Why smart? Those little tees and elbows requires real estate too. And if you don’t account for them, then your final connection point is higher than expected. This means you will either have to raise the height of the fixture or cut into the slab, which is a hassle nobody needs.
The bottom part inside the pipe, which the water physically comes in contact with, is called invert elevation. You must match the invert levels when designing a tie-in to an existing main line. What happens if your calculated downstream invert is lower than the main line? This is a problem.
That’s what this tool does: it compares your result to a target invert you give it. That way you know instantly whether what you are planning can work. Maybe you’ll see that you need to make your slope steeper or you need a shorter run to reach that connection point. Much easier to tweak numbers on a screen than to cut new PVC in a crawl space.
There is also a practical limit to how steep you can make a drain slope. Most codes specify some maximum slope, typically three or four percent for small pipes. Why? Because if the water runs down too fast, it gets separated from the solids. The solids dry up and stick to pipe wall. Over time this creates a film that ultimately will plug your line.
Counterintuitive, right? More slope=good, right? But no, faster isn’t necessarily better in drainage.
Notice how slight those angles get with the conversions in the reference table. One-quarter inch per foot is just shy of 1.2 degrees. It is barely noticeable to the naked eye. In fact, your level may not pick it up very well at all over short spans. That’s why it’s important to be careful when laying things out and check frequently as you go.
The other thing that affects a good sloping pipe is ventilation. Even the best sloped pipe won’t work properly without it. In order for there to be pressure balance, air must come into the pipe on the backside of the water flow. Otherwise, the water will glug around and allow sewage gases to get trapped. It’s another system all its own, but interacts with the drainage pipe slope.
When you run out a long horizontal branch, consider how the vent will physically hook up. The calculator doesn’t address vent size, but it provides the exact amount of fall to show you which way to go.
That’s why it pays to do your homework. Save yourself frustration (and materials) by thinking ahead.
Measure the horizontal run. Choose the proper pipe diameter. Calculate the necessary fall. Check the invert elevations. Each one of these steps has a number, and that’s where the calculator comes into play. It transforms vague guidelines into exact measurements.
You’ll see the overall drop in both millimeters and inches. You’ll know the final elevation. That precision lets you make precise cut plans and buy exactly what’s needed. It also allows you to describe the design to an inspector or contractor. By having those calculations spelled out, there’s no room for confusion.
Good planning is half the work; gravity does the rest.