Lighting Load Planner
Dimmer Load Calculator
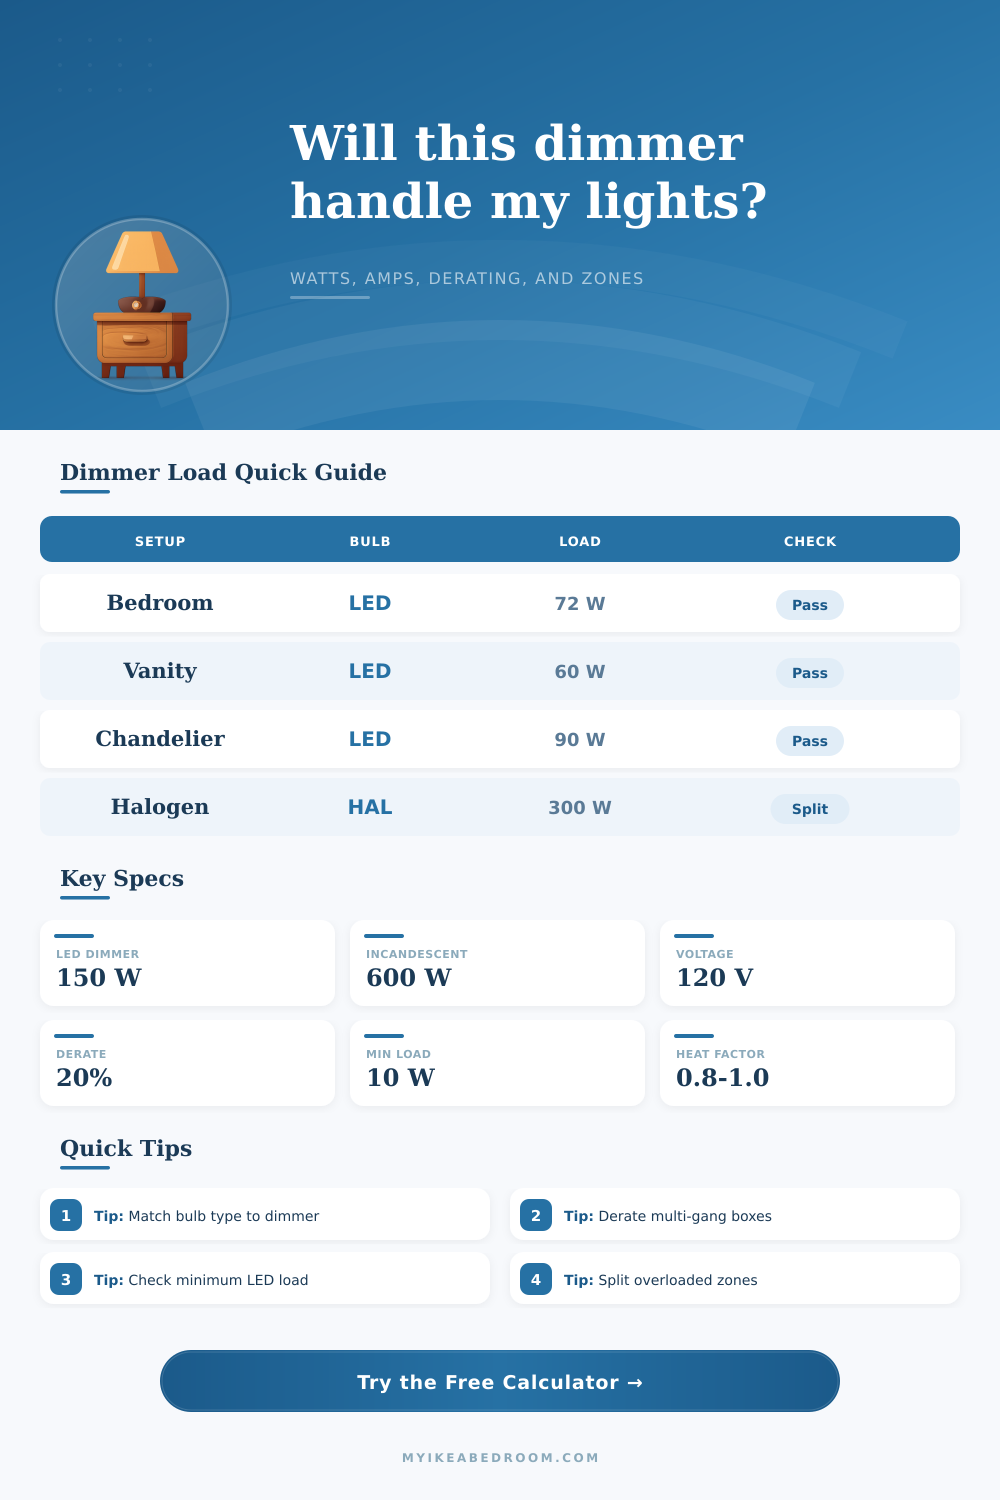
Check total lamp watts, derated dimmer capacity, remaining headroom, minimum-load compatibility, amperage, and whether the lighting plan should be split into more zones.
Load Breakdown
| Bulb or Driver Type | Typical Actual Watts | Common Minimum Load Concern | Dimmer Match Note |
|---|---|---|---|
| Dimmable LED lamp | 5 to 12 W per bulb | Low total load can flicker | Use LED-rated forward-phase dimmer when listed compatible. |
| Integrated LED fixture | 8 to 25 W per fixture | Driver may set its own minimum | Check fixture dimming protocol and dimmer compatibility list. |
| LED strip driver | 2 to 8 W per foot | Driver loading and voltage drop | Size by driver watts, not just tape length. |
| Incandescent or halogen | 25 to 75 W per bulb | Usually no low-load problem | Heat and total watts are the main checks. |
| Gang Box Condition | Heat Factor | 150 W LED Capacity After 20% Derate | 600 W Incandescent Capacity After 20% Derate |
|---|---|---|---|
| Single device with normal ventilation | 1.00 | 120 W | 480 W |
| Two controls in one box | 0.90 | 108 W | 432 W |
| Three controls in one box | 0.85 | 102 W | 408 W |
| Four-gang or tight enclosure | 0.80 | 96 W | 384 W |
| Room Scenario | Fixture Count | Watts Each | Total Load |
|---|---|---|---|
| Bedroom recessed LED dimmer | 8 lamps | 9 W | 72 W |
| Vanity sconces around mirror | 4 lamps | 7.5 W | 30 W |
| Closet LED strip driver | 1 driver | 36 W | 36 W |
| Chandelier candle bulbs | 12 lamps | 5.5 W | 66 W |
| Halogen accent group | 6 lamps | 50 W | 300 W |
| Formula | How It Is Calculated | Why It Matters | Good Result |
|---|---|---|---|
| Total load | Fixture count × bulb watts | Shows the connected load on the dimmer. | Below adjusted capacity. |
| Derated capacity | Rating × safety derate × heat factor | Leaves margin for heat and real operation. | Higher than total load. |
| Amps | Total watts ÷ volts | Compares the lighting load to circuit limits. | Low for lighting circuits. |
| Zone split | Load divided by usable capacity | Suggests when multiple dimmers are cleaner. | One zone if it passes. |
People think of a dimmer switch as an on-off button with a knob that lets you turn the lights up or down. This explains why some folks purchase a glitzy dimmer, install it and find themselves spending the next few nights staring at a flickering lamp while attempting to dial back the light to “oh-so-low”… say fifty percent. It’s bad math. Usually not. But is it bad wiring? No, not often. It’s about a mismatch between number printed on the bulb box and what the dimmer actualy sees.
Get beyond the brightness and get real with electricity. Once you has the actual wattage and number of fixture, you can plug it into calculator on top and it does the math for you. No more guesswork; no more “Will this trip my capacity?” questions.
Why Your Dimmer Switch Is Flickering
And here’s where you should of know: Moddern LED bulbs are designed to be deceptive. Sixty watts? Oh yeah, that’s what the box screams at you because that’s how much light your brain thinks corresponds to a bulb. Except now they only use about nine watts. Eight of ’em strung in series? You think that’s forty-eight watts you’re pulling? Try nearer to seventy-two.
Still doesn’t sound like much, right? Yeah. That’s why they blow out old-school dimmers. Old-style switches requires a minimum amount of load, usually somewhere between ten and fifteen watts, to make the capacitors inside them happy. Below that, and you get strobing. Above that, and you gets a smoothly-dimming switch. Sounds like nothing, until it trips you up and wrecks the mood.
The third danger is that lighting plan run warm. You may envision those plastic switch boxes on your walls as empty holes; but they’re thermal traps. Pack multiple dimmers in a single gang box, and they’ll bake each other to death. The calculator takes that into account (with a heat factor) and scales down their safe capacity accordingally. For example, what starts out as a four-gang switch might really only support 80% of its rated wattage since there’s nowhere for the heat to go.
If you don’t measure it properly, you’ll push through this and won’t realize there’s a problem until things go wrong. But if you don’t? Your lights will seem to work just fine for six months, until that switch is so hot to the touch or worse melts the plastic around the faceplate. That’s where people make mistakes. They look at grand total of watts and stop thinking.
When you hit these kinds of limits, the cleanest solution is usually just to split up your zones. Rather than cramming a dozen recessed lights onto a single circuit that’s pushing it to the minimum load or heat limit, you just divide them into two groups. You might need a few feet more wire and an additional switch, but it buys you reliability. That’s particularly important if some of those fixtures is incandescent or halogen, which add their own heat. You don’t want to put that heat on an already-tight wall box; it’s just asking for trouble.
Here’s the key: What exactly are they measuring? Bulbs don’t tell a dumb old switch, “I’m an LED,” so you must figure it out yourself; then pair that load with the appropriate dimmer tech. Most LEDs is forward-phased, but electronic low-voltage fixtures require control all of their own. Combine ’em and there will be wailing and gnashing of teeth (and early demise). It is more a compatibility problem different than an electrical one.
Buy a switch that meets minimum load for the bulbs you selected, not the brightest switch available. Also, respect the heat limits of the wall box: Don’t buy some super-bright switch that won’t fit.
The right lighting plan doesn’t merely turns on; it hums quietly until its time, shuts off when it should, lasts longer than the paint on the walls and so on. That is exactly the point.