⚡ Ceiling Fan Capacitor Value Calculator
Find the correct capacitor µF rating for your ceiling fan motor — instantly
| Fan Blade Span | Speed Config | Run Cap (µF) | Start Cap (µF) | Min Voltage Rating |
|---|---|---|---|---|
| 30" – 36" (76–91 cm) | 2-Speed | 1.5 – 2.0 µF | 2.0 – 3.0 µF | 250V AC |
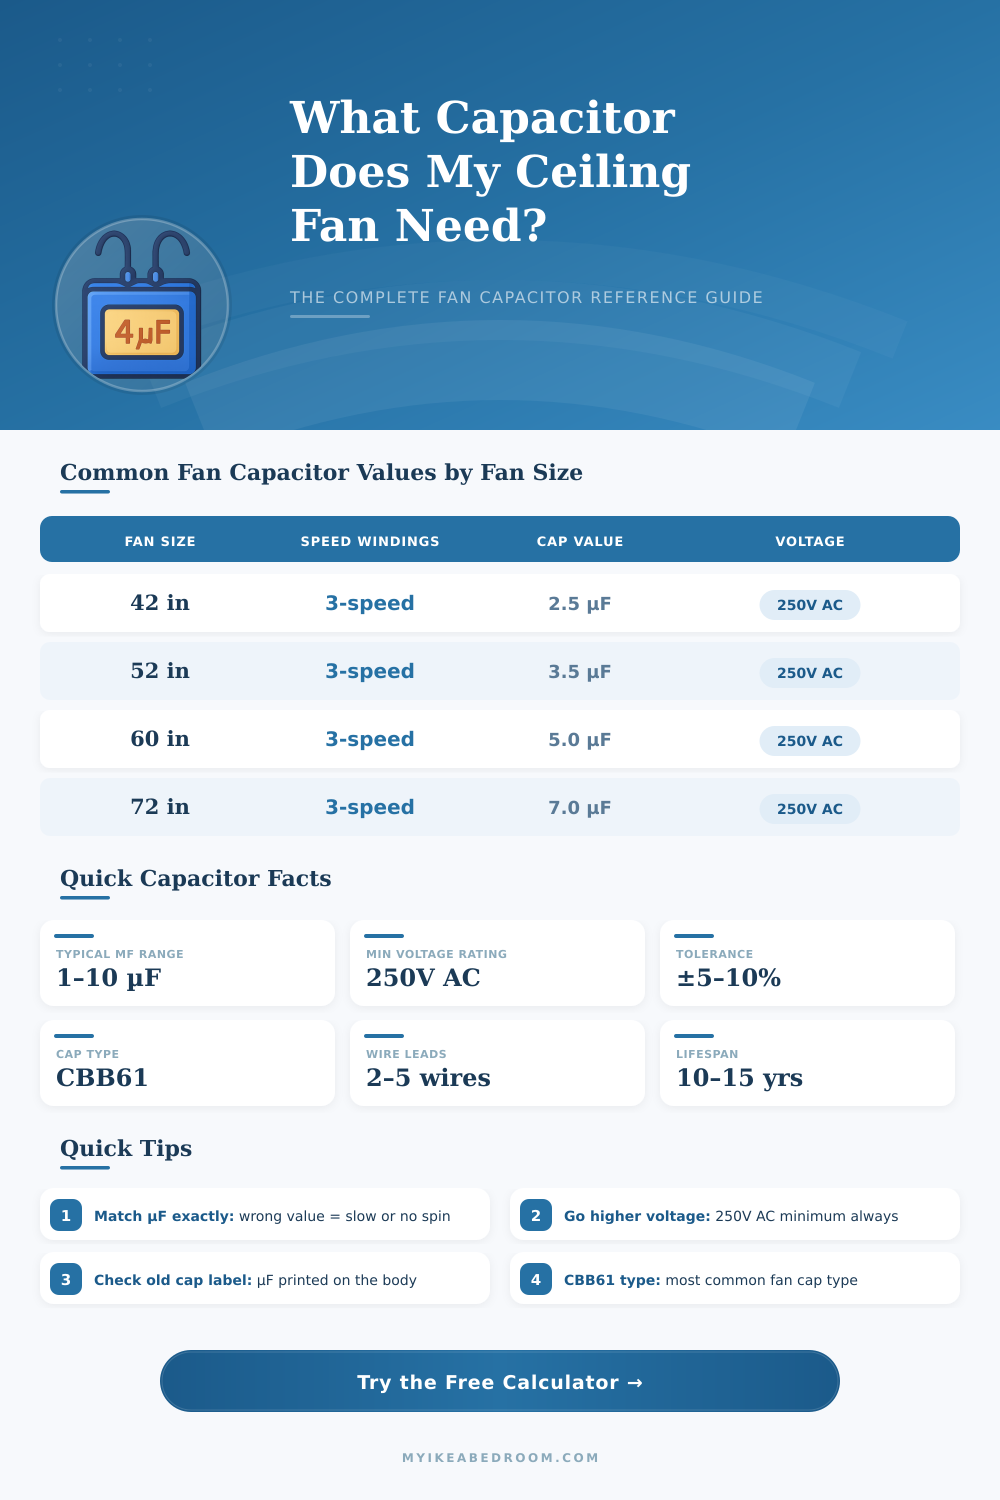
| 36" – 42" (91–107 cm) | 3-Speed | 2.5 – 3.0 µF | 3.0 – 4.0 µF | 250V AC |
| 44" – 52" (112–132 cm) | 3-Speed | 3.0 – 4.0 µF | 4.0 – 6.0 µF | 250V AC |
| 54" – 60" (137–152 cm) | 3-Speed | 4.5 – 5.0 µF | 6.0 – 8.0 µF | 400V AC |
| 62" – 72" (157–183 cm) | 3-Speed | 6.0 – 7.0 µF | 8.0 – 10.0 µF | 400V AC |
| 72"+ (183 cm+) | 3–5 Speed | 7.0 – 10.0 µF | 10.0 – 15.0 µF | 450V AC |
| Speed Count | Capacitor Wires | Typical µF per Winding | Cap Type | Notes |
|---|---|---|---|---|
| 2-Speed | 2 wires | 2.0 – 3.0 µF | CBB61 | Single capacitor section |
| 3-Speed | 3–4 wires | 2.5 – 5.0 µF | CBB61 | Dual section common |
| 4-Speed | 4–5 wires | 2.0 – 6.0 µF | CBB61 | Multi-section cap |
| 5-Speed | 5–6 wires | 1.5 – 8.0 µF | CBB61 | Multi-section cap |
| Supply Voltage | Min Cap Rating | Recommended Rating | Overkill (Safe) |
|---|---|---|---|
| 120V AC | 200V AC | 250V AC | 400V AC |
| 230V AC | 300V AC | 400V AC | 450V AC |
| 240V AC | 300V AC | 400V AC | 450V AC |
| 277V AC | 350V AC | 450V AC | 600V AC |
| Scenario | Fan Size | Speeds | Run Cap | Cap Voltage |
|---|---|---|---|---|
| Small bedroom | 36" (91 cm) | 3-speed | 2.5 µF | 250V AC |
| Standard bedroom | 42" (107 cm) | 3-speed | 3.0 µF | 250V AC |
| Living room | 52" (132 cm) | 3-speed | 3.5 µF | 250V AC |
| Large living room | 60" (152 cm) | 3-speed | 5.0 µF | 400V AC |
| Open plan / barn | 72" (183 cm) | 3-speed | 7.0 µF | 400V AC |
| Industrial / workshop | 84" (213 cm) | 5-speed | 10.0 µF | 450V AC |
A ceiling fan capacitor is a component that is located within the motor housing of a ceiling fan. Furthermore, the capacitor provide the electrical phase shift that is necessary to allow the single-phase motor of the ceiling fan to spin. If the ceiling fan is experiencing issues such as not spinning or wobble at high speeds, then the capacitor may be broken.
In this situation, you must replace the capacitor with a replacement capacitor that match the specifications of the motor. If the wrong type of capacitor are installed into the motor, it can lead to various issues with the motors function. For instance, if the motor dont function correctly with the capacitor that was installed, or if the motor overheats when use that capacitor, it is likely that someone installed the capacitor with the wrong specifications.
Ceiling Fan Capacitor: What It Does and How to Replace It
The specifications for a capacitor include the microfarad (µF) rating, the voltage rating, and the type of capacitor. The microfarad rating indicate the strength of the capacitance of the capacitor. If the capacitor that is installed has a too low microfarad rating, the motor will not have enough torque to spin at the proper rate.
If the capacitor has a too high microfarad rating, the motor will draw too much current from the capacitor, which can lead to the motor burn out. The voltage rating for the capacitor should be equal than or higher than the voltage supplied to the motor. For instance, a capacitor that has a 250 volt rating is safe for a motor that is supplied with 120 volt.
The size of the ceiling fan will dictate the microfarad rating that the capacitor should have. For instance, a small ceiling fan may require a capacitor that has a microfarad rating of 2 µF or 3 µF. However, a ceiling fan that are larger in size may require a higher microfarad rating, such as 7 µF or more. This is due to the fact that the larger fans requires more electromagnetic force to move the air.
Additionally, many ceiling fans is available in various blade speeds. Many of these multi-speed fans use a multi-section capacitor that has multiple wire to control the speeds of the fan. When replacing the capacitor, the best type of capacitor to look for is a CBB61 film type capacitor.
These types of capacitor are created to work within a ceiling fan, and they are resistant to the electrical stresses that the motors create. Additionally, the capacitor will have a tolerance, such as ±5% or ±15%. This indicate the amount that the capacitance of the capacitor may vary from the stated microfarad rating.
The replacement capacitor should remain within an acceptable range to avoid placing strain upon the motor. In order to safely perform the replacement of the capacitor, it is necessary to perform a few step. First, you should turn off the fan at the circuit breaker.
The capacitor can hold an electrical charge even when the fan is off, so it can deliver an electric shock to the person that replace the capacitor. In addition to turning the fan off, it is also necessary to discharge the capacitor by use an insulated screwdriver to short the lead of the capacitor. If the capacitor is swollen or contain oil within the device, it is indicating that the capacitor is damaged and must be immediatly replaced.
To install the capacitor, it is first necessary to take a photograph of the capacitor that is currently installed. It is necessary to note which color wire is connected to which terminal of the capacitor. Once you install the new capacitor, you should reassemble the housing of the fan.
Afterwards, the fan should be tested at its lowest speed. If the capacitor is correctly installed, the ceiling fan will spin smooth at each of its available speeds. If the capacitor is incorrectly installed, the fan may make a humming noise, overheat, or not spin at all.